# Administration

# Emails

<div class="sticky-spacer" id="bkmrk-"><div class="sticky-wrapper is-sticky" id="bkmrk--1"><div id="bkmrk--2"></div></div></div><div id="bkmrk--3"><div id="bkmrk--4"></div></div>## Mail Accounts Overview

Configuring email for **KiyoCRM** provides a wide range of features, including sending personal emails to contacts, automatic creation of cases, sending notifications for events using Workflows and sending email marketing Campaigns.

This document explains the different types of mail accounts and how to set them up. For information on reading and sending email in **KiyoCRM** using the Emails module, see the Email Module guide.

Several different types of account can be configured within **KiyoCRM** for different purposes. These are:

**Outgoing Mail**

The outgoing mail server is used to send automatic email notifications (such as record assignment notifications) and emails sent as workflows actions.

The outgoing mail configuration will need to be set up by an Administrator.

See <span style="color: rgb(53, 152, 219);">Outgoing Mail Configuration</span> for instructions on setting up the default outgoing mail configuration.

Other outbound accounts can be configured in addition to the default account for specific purposes, such as sending Campaigns. These can be set up from the admin panel, under outbound accounts. If no other outbound accounts are configured, the default outgoing mail server account will be used.

**Personal Accounts**

A personal account is used to view and send email from a personal email account within the Emails module. This account can be an internal or an external email account. Emails from personal accounts are not stored in **KiyoCRM** unless manually imported.

Personal accounts can be configured by the user from their user profile. Administrators can configure personal accounts for other users.

See <span style="color: rgb(53, 152, 219);">Managing User Accounts</span> for instructions on setting up a personal account.

**Group Accounts**

Group accounts are used when you need several users to be able to view and send email from one mail account, for example a support or sales mailbox. Group accounts can be set up to automatically import emails and create <span style="color: rgb(53, 152, 219);">Cases</span> from incoming email.

Group accounts must be set up by an Administrator. Access to a group account must be granted by an Administrator.

Set up a group account from the <span style="color: rgb(53, 152, 219);">Inbound Email </span>page.

**Bounce Handling Accounts**

A Bounce Handling account is used with <span style="color: rgb(53, 152, 219);">Campaigns </span>to handle bounced mail notifications when emails are undelivered. You will need to set up a Bounce Handling account in order to send a Campaign.

Bounce Handling accounts must be set up by an Administrator. Once set up, users can select the bounce handling account when setting up a campaign.

Set up a Bounce Handling account from the <span style="color: rgb(53, 152, 219);">Inbound Email</span> page.

### Email Settings

#### Outgoing Mail Configuration

The outgoing mail configuration settings are used to send system notification emails such as password reset emails, record assignment notifications and workflow email notifications.

[![image.png](https://docs.kiyocrm.com/uploads/images/gallery/2025-05/scaled-1680-/lfMimage.png)](https://docs.kiyocrm.com/uploads/images/gallery/2025-05/lfMimage.png)

[![image.png](https://docs.kiyocrm.com/uploads/images/gallery/2025-05/scaled-1680-/7DKimage.png)](https://docs.kiyocrm.com/uploads/images/gallery/2025-05/7DKimage.png)

[![image.png](https://docs.kiyocrm.com/uploads/images/gallery/2025-05/scaled-1680-/NzAimage.png)](https://docs.kiyocrm.com/uploads/images/gallery/2025-05/NzAimage.png)

Select the mail provider by clicking the appropriate button and then enter the required configuration information for your system. Verify that any default port/protocol settings are valid for your setup.

<div id="bkmrk-allow-users-to-use-t"><div class="sect1"><div class="sectionbody"><div class="sect2"><div class="paragraph">  
</div><table class="tableblock frame-none grid-none stretch"><colgroup><col></col><col></col></colgroup><tbody><tr><td class="tableblock halign-left valign-top">**Allow users to use this account for outgoing mail**

</td><td class="tableblock halign-left valign-top">When this option selected, all users will be able to send emails using this outgoing mail account, which is the same as that used to send system notifications and alerts. If the option is not selected, users can still use the outgoing mail server after providing their own account information.

</td></tr><tr><td class="tableblock halign-left valign-top">**Users may send as themselves**

</td><td class="tableblock halign-left valign-top">When this option selected, all users will be able to send emails using the same outgoing mail account used to send system notifications and alerts. If the option is not selected, users can still use the outgoing mail server after providing their own account information.

</td></tr></tbody></table>

<div class="paragraph">  
</div></div></div></div></div>Click **Send Test Email** to check your settings. You will be asked to enter an email address for the test message to be sent to.

[![image.png](https://docs.kiyocrm.com/uploads/images/gallery/2025-05/scaled-1680-/dkkimage.png)](https://docs.kiyocrm.com/uploads/images/gallery/2025-05/dkkimage.png)

A verification message will be displayed if the email was sent successfully. Check that you have received this test message.

Once the settings have been verified, click **Save** to that these settings are retained before leaving the settings page.

#### Troubleshooting

If the test message was not sent successfully, check the log file for any further error messages which may assist with resolving the issue.

Verify that all port/protocol settings are correct and that the username/password entered is correct and has the correct permissions to send mail.

### Email Options

[![image.png](https://docs.kiyocrm.com/uploads/images/gallery/2025-05/scaled-1680-/ruqimage.png)](https://docs.kiyocrm.com/uploads/images/gallery/2025-05/ruqimage.png)

<div id="bkmrk-assignment-notificat"><div class="sect1"><div class="sectionbody"><div class="sect2"><div class="paragraph">  
</div><table class="tableblock frame-none grid-none stretch"><colgroup><col></col><col></col></colgroup><tbody><tr><td class="tableblock halign-left valign-top">**Assignment Notifications**

</td><td class="tableblock halign-left valign-top">When selected, users will be emailed when a record is assigned to them.

</td></tr><tr><td class="tableblock halign-left valign-top">**Send notification from the email address of the assigning user**

</td><td class="tableblock halign-left valign-top">When enabled, the assigning user’s name and email address will be included in the From field of the email. This feature might not work with SMTP servers that do not allow sending from a different email account than the server account.

</td></tr></tbody></table>

<div class="sect3">  
</div></div></div></div></div>#### OptInSettings

**KiyoCRM 7.10** introduces a new **Confirmed opt In** feature which provides two opt in settings for email addresses: **Opt In** and **Confirmed opt In**.

See the Confirmed Opt in documentation for further information on these settings.

### Email Security Settings

[![image.png](https://docs.kiyocrm.com/uploads/images/gallery/2025-05/scaled-1680-/Vkpimage.png)](https://docs.kiyocrm.com/uploads/images/gallery/2025-05/Vkpimage.png)

<div id="bkmrk-email-security-setti-1"><div class="sect1"><div class="sectionbody"><div class="sect2"><div class="sect3"><div class="paragraph">  
</div><table class="tableblock frame-none grid-none stretch"><colgroup><col></col><col></col></colgroup><tbody><tr><td class="tableblock halign-left valign-top">**Email Security Settings**

</td><td class="tableblock halign-left valign-top">Tags selected here will be stripped from inbound email and will not be displayed in the **Emails** module.

</td></tr></tbody></table>

<div class="paragraph">  
</div></div></div></div></div></div>Click **Save** retain your settings.

### Inbound Email

Set up group mail accounts for monitoring inbound email and bounce handling accounts for campaigns by visiting your profile. You can also manage personal inbound mail account information for users from this panel.

[![image.png](https://docs.kiyocrm.com/uploads/images/gallery/2025-05/scaled-1680-/oKIimage.png)](https://docs.kiyocrm.com/uploads/images/gallery/2025-05/oKIimage.png)

#### Personal Email Account

A personal email account is an internal or external email account used to view and send personal emails from the Emails Module.

#### Group Email Account

A group email account allows more than one user to access a particular mail account. This can be useful for sales or support email accounts for example. In addition, group accounts are also used for sending email campaigns. See the **Campaigns** documentation for more information.

**KiyoCRM** can also be configured to automatically import emails and to automatically create cases from email.

#### Inbound Email Settings

The mail protocol supported by **KiyoCRM** is IMAP.

#### Basic Auth

<span class="image">[![Group Mail Settings](https://docs.suitecrm.com/images/en/admin/EmailServerConfiguration.png)](https://docs.suitecrm.com/images/en/admin/EmailServerConfiguration.png)</span>

When setting up with `Basic Auth` all you will need is the username(email) and password of the account you are adding as well as the mail server address.

**Monitored Folders** are the folders which are checked for new (unread) mail. **Inbox** and **Trash** folder names must be specified here. Click **Select** to connect to the mail server and select the relevant folder(s) from the popup dialog.

#### OAuth Configuration

[![image.png](https://docs.kiyocrm.com/uploads/images/gallery/2025-05/scaled-1680-/qMSimage.png)](https://docs.kiyocrm.com/uploads/images/gallery/2025-05/qMSimage.png)

When setting up with OAuth, you will need the username(email), password and mail server address for the account.

The other required field is `External OAuth Connection`, you can see how to configure this How to Configure <span style="color: rgb(53, 152, 219);">Inbound Email with OAuth.</span>

#### Email Handling Options

[![image.png](https://docs.kiyocrm.com/uploads/images/gallery/2025-05/scaled-1680-/tRNimage.png)](https://docs.kiyocrm.com/uploads/images/gallery/2025-05/tRNimage.png)

#### Import Emails Automatically

Check this box to import emails automatically, which means that records will be created in **KiyoCRM** for all incoming emails. These associated emails can then be viewed via the History subpanel of the relevant record. This setting is selected by default in **KiyoCRM**.

##### Create Case from Email

Check this box to set up **KiyoCRM** to create a <span style="color: rgb(53, 152, 219);">Case</span> record from an incoming email.

[![image.png](https://docs.kiyocrm.com/uploads/images/gallery/2025-05/scaled-1680-/Jmkimage.png)](https://docs.kiyocrm.com/uploads/images/gallery/2025-05/Jmkimage.png)

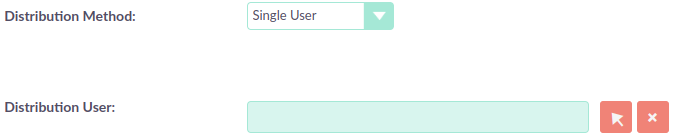
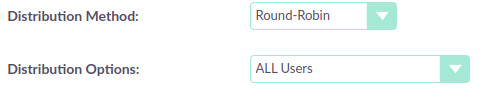
Select a **Distribution Method** to specify how cases created from incoming email are assigned to users.

<div id="bkmrk-system-default-this-"><div class="sect1"><div class="sectionbody"><div class="sect2"><div class="sect3"><div class="paragraph">  
</div><table class="tableblock frame-all grid-all stretch" style="width: 100%;"><colgroup><col style="width: 11.7939%;"></col><col style="width: 88.1823%;"></col></colgroup><tbody><tr><td class="tableblock halign-left valign-top">**System default**

</td><td class="tableblock halign-left valign-top">This will use the default settings, configurable via the admin panel.

</td></tr><tr><td class="tableblock halign-left valign-top">**Single User**

</td><td class="tableblock halign-left valign-top">Enter a username or click the select arrow to search for a user. Every automatically created case will be assigned to the specified user.<span class="image">[![Single User](https://docs.suitecrm.com/images/en/admin/EmailDistrubutionSU.png)](https://docs.suitecrm.com/images/en/admin/EmailDistrubutionSU.png)</span>

</td></tr><tr><td class="tableblock halign-left valign-top">**Round Robin**

</td><td class="tableblock halign-left valign-top">Select All Users or an existing security group or role. Cases will be assigned to the next member of the specified group or role.<span class="image">[![Round Robin](https://docs.suitecrm.com/images/en/admin/EmailDistributionRR.png)](https://docs.suitecrm.com/images/en/admin/EmailDistributionRR.png)</span>

</td></tr><tr><td class="tableblock halign-left valign-top">**Least Busy**

</td><td class="tableblock halign-left valign-top">Select All Users or an existing security group or role. Cases will be assigned to the member of the specified group or role with the least case assignments.

</td></tr><tr><td class="tableblock halign-left valign-top">**Random**

</td><td class="tableblock halign-left valign-top">Select All Users or an existing security group or role. Cases will be assigned randomly to members of the specified group or role.

</td></tr></tbody></table>

<div class="paragraph">  
</div></div></div></div></div></div>**Auto-Reply configuration**

If **KiyoCRM** has been configured to auto-create cases, you can select or create an email template to use as an automated response to notify the sender that a case has been created. If no template is specified here, this automated response will not be sent.<span class="image">[![New Case Auto-Reply template](https://docs.suitecrm.com/images/en/admin/EmailAutoReplyConfiguration.png)](https://docs.suitecrm.com/images/en/admin/EmailAutoReplyConfiguration.png)</span>

<div id="bkmrk-no-auto_reply-to-thi"><div class="sect1"><div class="sectionbody"><div class="sect2"><div class="sect3"><div class="paragraph">  
</div><table class="tableblock frame-none grid-none stretch"><colgroup><col></col><col></col></colgroup><tbody><tr><td class="tableblock halign-left valign-top">**No Auto\_Reply to this Domain**

</td><td class="tableblock halign-left valign-top">No auto-responses will be sent to the specified domain. Use this for example to exclude your company domain, so your users do not receive auto-reply messages.

</td></tr><tr><td class="tableblock halign-left valign-top">**Number of Auto-responses**

</td><td class="tableblock halign-left valign-top">This setting specifies the maximum number of replies to send to a particular email address in a 24hr period.

</td></tr></tbody></table>

</div><div class="sect3">  
</div></div></div></div></div>#### Outbound Configuration

<span class="image">[![Group Mail Reply To settings](https://docs.suitecrm.com/images/en/admin/InboundOutboundConfiguration.png)](https://docs.suitecrm.com/images/en/admin/InboundOutboundConfiguration.png)</span>

<div id="bkmrk-from-address%3A-used-a"><div class="sect1"><div class="sectionbody"><div class="sect2"><div class="sect3"><div class="paragraph">  
</div><table class="tableblock frame-none grid-none stretch"><colgroup><col></col><col></col></colgroup><tbody><tr><td class="tableblock halign-left valign-top">**From Address:**

</td><td class="tableblock halign-left valign-top">Used as the from address where supported, otherwise the [system outbound](https://docs.suitecrm.com/admin/administration-panel/emails/email/#_outgoing_mail_configuration) account will be used.

</td></tr><tr><td class="tableblock halign-left valign-top">**Allow users to send emails using the From name and Address as the reply to address:**

</td><td class="tableblock halign-left valign-top">When checked, the **From Name** and **From Address** for this account will appear as a **From** option when composing an email for all users that have access to this group account.

</td></tr></tbody></table>

<div class="paragraph">  
</div></div></div></div></div></div>Once configured, all inbound accounts are listed under **Inbound Accounts** on the **Admin** panel, from where they can be edited or removed.

#### Bounce Handling Account

A Bounce Handling Account is used to manage bounce notifications for an email [campaign](https://docs.suitecrm.com/user/core-modules/campaigns/). Bounced email addresses are recorded in the campaign status.

Once created, the bounce handling account can be selected by users when setting up a campaign.

Select **New Bounce Handling Account** from the Sidebar.

[![image.png](https://docs.kiyocrm.com/uploads/images/gallery/2025-05/scaled-1680-/SIIimage.png)](https://docs.kiyocrm.com/uploads/images/gallery/2025-05/SIIimage.png)

Enter the configuration details for the bounce account you are configuring. You will need the username and password for the account, plus the mail server address. Your system administrator will be able to supply these settings.

The mail protocol supported by **KiyoCRM** is IMAP.

[![image.png](https://docs.kiyocrm.com/uploads/images/gallery/2025-05/scaled-1680-/2zjimage.png)](https://docs.kiyocrm.com/uploads/images/gallery/2025-05/2zjimage.png)

**Monitored Folders** are the folders which are checked for new (unread) mail. **Inbox** and **Trash** folder names must be specified here.

Click **Select** to connect to the mail server and select the relevant folder(s) from the popup dialog.

### Outbound Email

Set up system outbound mail accounts for monitoring outbound email. You can also manage personal outbound mail account information for users from this panel.

### System Email Account

System email allows users inside your business to send emails to recipients outside of the associated domains for your business. This can be useful because it means users can email customers and give them support.

When you install KiyoCRM, an account for system outbound email will be automatically created but you can create your own account with different configurations.

Select **New System Outbound Email Account** from the sidebar

[![image.png](https://docs.kiyocrm.com/uploads/images/gallery/2025-05/scaled-1680-/ERKimage.png)](https://docs.kiyocrm.com/uploads/images/gallery/2025-05/ERKimage.png)

You will need the username for the account you are adding, plus the mail server address, the port number of the account. You can also check if you want to use SMTP authentication. If you do, you will need the password of the account you are adding. The mail protocols supported by KiyoCRM is SMTP and SSL.

[![image.png](https://docs.kiyocrm.com/uploads/images/gallery/2025-05/scaled-1680-/liNimage.png)](https://docs.kiyocrm.com/uploads/images/gallery/2025-05/liNimage.png)

Once this account has been created, click **Send Test Email** and a popup will appear to enter the address of the email address that a test notification will be sent to.

[![image.png](https://docs.kiyocrm.com/uploads/images/gallery/2025-05/scaled-1680-/Z0mimage.png)](https://docs.kiyocrm.com/uploads/images/gallery/2025-05/Z0mimage.png)

### Personal Outbound Email Account

Personal accounts will allow users to send emails to clients outside of associated domains of your business. When you install KiyoCRM, it is recommended an outbound account is made and this can be configured with different configurations

You will need the username for the account you are adding, plus the mail server address, the port number of the account. You can also check if you want to use SMTP authentication. If you do, you will need the password of the account you are adding. The mail protocols supported by KiyoCRM is SMTP and SSL.

[![image.png](https://docs.kiyocrm.com/uploads/images/gallery/2025-05/scaled-1680-/liNimage.png)](https://docs.kiyocrm.com/uploads/images/gallery/2025-05/liNimage.png)

Once this account has been created, click and a popup will appear to enter the address of the email address that a test notification will be sent to.

[![image.png](https://docs.kiyocrm.com/uploads/images/gallery/2025-05/scaled-1680-/tZ1image.png)](https://docs.kiyocrm.com/uploads/images/gallery/2025-05/tZ1image.png)

### Campaign Email Settings

 Configure the following additional settings for <span style="color: rgb(53, 152, 219);">Campaigns</span> here:

<div id="bkmrk-the-batch-size-for-s"><div class="sect1"><div class="sectionbody"><div class="paragraph">  
</div><div class="ulist">- The batch size for sending campaign emails
- Where campaign tracking files are located
- Whether or not copies of campaign messages are kept

</div><div class="paragraph">  
</div></div></div></div>[![image.png](https://docs.kiyocrm.com/uploads/images/gallery/2025-05/scaled-1680-/0w1image.png)](https://docs.kiyocrm.com/uploads/images/gallery/2025-05/0w1image.png)

### Email Queue

Scheduled campaign emails are queued here until the scheduled job runs to send them out. By default, this is the **Run Nightly Mass Email Campaigns** scheduled job.

See the **Scheduler** section for further information on scheduled jobs.

Click **Send Queued Emails** to send them immediately without waiting for the scheduler to do so.

# 1. How to configure a Microsoft OAuth Provider

<section id="bkmrk-1.-intro-this-guide-"><div class="padding highlightable sticky-parent"><div><div id="bkmrk-"></div></div></div>#### 1. Intro

This guide will explain how to configure a client on Microsoft Azure and then use the information from Microsoft Azure to configure an OAuth Provider in KiyoCRM.

#### 2. Register KiyoCRM App in Microsoft Store

The following steps assume that you are configuring a provider for a company account that will be shared among many users.

#### 2.1 Go to App Registrations

Go to [https://portal.azure.com/](https://portal.azure.com/) and login

On the home page you should see a screen like the following

<span class="image">[![azure-homepage.png](https://docs.suitecrm.com/images/en/admin/email/microsoft/azure-homepage.png)](https://docs.suitecrm.com/images/en/admin/email/microsoft/azure-homepage.png)</span>

Check if there is a link to **App Registrations** on the home page, should look something like the following

<span class="image">[![azure-services.png](https://docs.suitecrm.com/images/en/admin/email/microsoft/azure-services.png)](https://docs.suitecrm.com/images/en/admin/email/microsoft/azure-services.png)</span>

Otherwise, go to **More services** and then search for the **App Registrations** link

<span class="image">[![more-services.png](https://docs.suitecrm.com/images/en/admin/email/microsoft/more-services.png)](https://docs.suitecrm.com/images/en/admin/email/microsoft/more-services.png)</span>

<span class="image">[![azure-services-app-registration-entry.png](https://docs.suitecrm.com/images/en/admin/email/microsoft/azure-services-app-registration-entry.png)](https://docs.suitecrm.com/images/en/admin/email/microsoft/azure-services-app-registration-entry.png)</span>

The Azure **App Registrations** page looks like the following

<span class="image">[![azure-app-registrations.png](https://docs.suitecrm.com/images/en/admin/email/microsoft/azure-app-registrations.png)](https://docs.suitecrm.com/images/en/admin/email/microsoft/azure-app-registrations.png)</span>

#### 2.2 Create a New App Registration

On the **App Registrations** page click on the "New Registration" link

<span class="image">[![azure-new-app-registration-link.png](https://docs.suitecrm.com/images/en/admin/email/microsoft/azure-new-app-registration-link.png)](https://docs.suitecrm.com/images/en/admin/email/microsoft/azure-new-app-registration-link.png)</span>

You should then see the App registration creation page

On the registration page complete the following:

<div class="padding highlightable sticky-parent"><div><div class="sect1"><div class="sectionbody"><div class="sect2"><div class="paragraph">  
</div><div class="olist arabic">1. Add a name for the registration like "KiyoCRM"
2. Select one of the "Supported account types" depending on your needs
    
    <div class="olist loweralpha">
    1. **Note** In this example we are going to use "Single tenant", that does not mean it is the one to be used for every scenario.
    2. You should select the option that is appropriate for your use case
    
    </div>
3. Set a "Redirect URI". This should be similar to: `<a class="bare highlight" href="https://%3Cyour-suitecrm-instance-host%3E/index.php?entryPoint=setExternalOAuthToken">https://<your-kiyocrm-instance-host>/index.php?entryPoint=setExternalOAuthToken</a>`
    
    <div class="olist loweralpha">
    1. **Note** Azure only allows https connections to host that aren’t the localhost. (the azure interface will alert you to it)
        
        <div class="olist lowerroman">
        1. A host like `<a class="bare highlight" href="http://my-suitecrm.com/index.php?entryPoint=setExternalOAuthToken">http://my-kiyocrm.com/index.php?entryPoint=setExternalOAuthToken</a>` is not valid
        2. A host like `<a class="bare highlight" href="https://my-suitecrm.com/index.php?entryPoint=setExternalOAuthToken">https://my-kiyocrm.com/index.php?entryPoint=setExternalOAuthToken</a>` is valid
        3. A host like `<a class="bare highlight" href="http://localhost/index.php?entryPoint=setExternalOAuthToken">http://localhost/index.php?entryPoint=setExternalOAuthToken</a>` is valid
        
        </div>
    
    </div>

</div><div class="paragraph">  
</div></div></div></div></div></div>[![Screenshot 1.png](https://docs.kiyocrm.com/uploads/images/gallery/2025-05/scaled-1680-/screenshot-1.png)](https://docs.kiyocrm.com/uploads/images/gallery/2025-05/screenshot-1.png)


After filling in the information proceed with the registration

After the registration you should be re-directed to the "detail view" of the registration.

There you will find **Application (client) ID** that is the **Client Id** that will need to be configured later on KiyoCRM.

<span class="image">[![azure-client-id.png](https://docs.suitecrm.com/images/en/admin/email/microsoft/azure-client-id.png)](https://docs.suitecrm.com/images/en/admin/email/microsoft/azure-client-id.png)</span>

### 2.3. Create a client secret 

The next step to take is to generate a "client secret" that will be used by KiyoCRM to communicate with Microsoft.

On your App Registration main page click "Add a certificate or secret".

<span class="image">[![azure-add-secret.png](https://docs.suitecrm.com/images/en/admin/email/microsoft/azure-add-secret.png)](https://docs.suitecrm.com/images/en/admin/email/microsoft/azure-add-secret.png)</span>

This should take you to the "Certificates &amp; secrets" page

Here you can generate a new secret by clicking "New Client Secret"

<span class="image">[![azure-new-client-secret.png](https://docs.suitecrm.com/images/en/admin/email/microsoft/azure-new-client-secret.png)](https://docs.suitecrm.com/images/en/admin/email/microsoft/azure-new-client-secret.png)</span>

A sidebar should open where you can place the name of the secret you want to give to you secret and its duration. After setting the name and the duration click "Add".


[![Screenshot 2.png](https://docs.kiyocrm.com/uploads/images/gallery/2025-05/scaled-1680-/KgPscreenshot-2.png)](https://docs.kiyocrm.com/uploads/images/gallery/2025-05/KgPscreenshot-2.png)

  
This should generate a new line on the "Certificates &amp; secrets" page table

[![Screenshot 2025-05-22 154034.png](https://docs.kiyocrm.com/uploads/images/gallery/2025-05/scaled-1680-/screenshot-2025-05-22-154034.png)](https://docs.kiyocrm.com/uploads/images/gallery/2025-05/screenshot-2025-05-22-154034.png)

You should copy the "Value" by (clicking the icon next to it) for your new secret and store it in some safe place. You won’t be able to access this value again from the Microsoft Azure interface. The secret will be required on the KiyoCRM documentation.

<span class="image">[![azure-secret-value.png](https://docs.suitecrm.com/images/en/admin/email/microsoft/azure-secret-value.png)](https://docs.suitecrm.com/images/en/admin/email/microsoft/azure-secret-value.png)</span>

We recommend noting the expiry date for your Client Secret and replacing the secret on a regular basis. Once the secret expires, your email connections will fail with an error message in the logs similar to `OAuthAuthorizationService::hasConnectionTokenExpired | Access token has expired` If you see this error, generate a new secret in Azure and update it within KiyoCRM to ensure continued access.

Now go back to your App Registration main page, by clicking "Overview" on the sidebar.

### 2.4. Define the authorized scopes 

Our next step is to configure the scopes that KiyoCRM will be able to access.

Back on your App Registration main page

Click on "View API" permissions

<span class="image">[![azure-view-api-permissions-link.png](https://docs.suitecrm.com/images/en/admin/email/microsoft/azure-view-api-permissions-link.png)](https://docs.suitecrm.com/images/en/admin/email/microsoft/azure-view-api-permissions-link.png)</span>

This should take you to the "Api Permissions" page

Now lets add the scopes that we allow. Click "Add a permission"

<span class="image">[![azure-add-permission-link.png](https://docs.suitecrm.com/images/en/admin/email/microsoft/azure-add-permission-link.png)](https://docs.suitecrm.com/images/en/admin/email/microsoft/azure-add-permission-link.png)</span>

This should open a sidebar

<span class="image">[![azure-add-permission-sidebar-clean.png](https://docs.suitecrm.com/images/en/admin/email/microsoft/azure-add-permission-sidebar-clean.png)](https://docs.suitecrm.com/images/en/admin/email/microsoft/azure-add-permission-sidebar-clean.png)</span>

The permissions we want are under the Microsoft Graph. So click on "Microsoft Graph".

<span class="image">[![azure-microsoft-graph-permissions-link.png](https://docs.suitecrm.com/images/en/admin/email/microsoft/azure-microsoft-graph-permissions-link.png)](https://docs.suitecrm.com/images/en/admin/email/microsoft/azure-microsoft-graph-permissions-link.png)</span>

After clicking you should be prompted with which kind of permission you want to use.

<span class="image">[![azure-microsoft-graph-permission-types.png](https://docs.suitecrm.com/images/en/admin/email/microsoft/azure-microsoft-graph-permission-types.png)](https://docs.suitecrm.com/images/en/admin/email/microsoft/azure-microsoft-graph-permission-types.png)</span>

Go ahead and click "Delegate permissions"

<span class="image">[![azure-delegated-permissions-link.png](https://docs.suitecrm.com/images/en/admin/email/microsoft/azure-delegated-permissions-link.png)](https://docs.suitecrm.com/images/en/admin/email/microsoft/azure-delegated-permissions-link.png)</span>

You should now see a new "Select permissions" section.

In the search bar type `offline_access`, that should show the offline\_access permission. Select it add then click "Add permissions"

<span class="image">[![azure-add-offline-access-permission.png](https://docs.suitecrm.com/images/en/admin/email/microsoft/azure-add-offline-access-permission.png)](https://docs.suitecrm.com/images/en/admin/email/microsoft/azure-add-offline-access-permission.png)</span>

Repeat the process for the following permissions: . `IMAP.AccessAsUser.All` . `User.Read`

<span class="image">[![azure-add-imap-permission.png](https://docs.suitecrm.com/images/en/admin/email/microsoft/azure-add-imap-permission.png)](https://docs.suitecrm.com/images/en/admin/email/microsoft/azure-add-imap-permission.png)</span><span class="image">[![azure-add-user-read-permission.png](https://docs.suitecrm.com/images/en/admin/email/microsoft/azure-add-user-read-permission.png)](https://docs.suitecrm.com/images/en/admin/email/microsoft/azure-add-user-read-permission.png)</span>

After you add all the above permissions, your permissions table should look something like the following:

<span class="image">[![azure-api-permissions-page-with-values.png](https://docs.suitecrm.com/images/en/admin/email/microsoft/azure-api-permissions-page-with-values.png)](https://docs.suitecrm.com/images/en/admin/email/microsoft/azure-api-permissions-page-with-values.png)</span>

Now go back to your App Registration main page, by clicking "Overview" on the sidebar.

### 2.5. Define the Return URI 

Our next step is to set the configurations on the "Authentication" like the Return URI and others.

Back on your App Registration main page

Click the "Redirect URIs" link

<span class="image">[![azure-redirect-uri-link.png](https://docs.suitecrm.com/images/en/admin/email/microsoft/azure-redirect-uri-link.png)](https://docs.suitecrm.com/images/en/admin/email/microsoft/azure-redirect-uri-link.png)</span>

This should have taken you to the "Authentication" page.

Here you should see the Return URI that you previously configured

<span class="image">[![azure-redirect-uri-list.png](https://docs.suitecrm.com/images/en/admin/email/microsoft/azure-redirect-uri-list.png)](https://docs.suitecrm.com/images/en/admin/email/microsoft/azure-redirect-uri-list.png)</span>

After that enable the "Access tokens (used for implicit flows)" option on the Implicit grant and hybrid flows section

<span class="image">[![azure-enable-access-token.png](https://docs.suitecrm.com/images/en/admin/email/microsoft/azure-enable-access-token.png)](https://docs.suitecrm.com/images/en/admin/email/microsoft/azure-enable-access-token.png)</span>

Now go back to your App Registration main page, by clicking "Overview" on the sidebar.

### 2.6. Retrieve the endpoint information 

The last step you need to take is to retrieve the following endpoints:

<div class="padding highlightable sticky-parent"><div><div class="sect1"><div class="sectionbody"><div class="sect2"><div class="paragraph">  
</div><div class="olist arabic">1. OAuth 2.0 authorization endpoint
2. OAuth 2.0 authorization endpoint (v2)

</div><div class="paragraph">  
</div></div></div></div></div></div>Back on your App Registration main page

Click in the "Endpoints" link.

<span class="image">[![azure-endpoints-link.png](https://docs.suitecrm.com/images/en/admin/email/microsoft/azure-endpoints-link.png)](https://docs.suitecrm.com/images/en/admin/email/microsoft/azure-endpoints-link.png)</span>

This should open a sidebar like the following

<span class="image">[![azure-endpoints-sidebar.png](https://docs.suitecrm.com/images/en/admin/email/microsoft/azure-endpoints-sidebar.png)](https://docs.suitecrm.com/images/en/admin/email/microsoft/azure-endpoints-sidebar.png)</span>

From the sidebar copy and take note of the following endpoints, that will be required to configure KiyoCRM

<span class="image">[![azure-required-endpoints.png](https://docs.suitecrm.com/images/en/admin/email/microsoft/azure-required-endpoints.png)](https://docs.suitecrm.com/images/en/admin/email/microsoft/azure-required-endpoints.png)</span>

## 3. Configure the Microsoft Provider in KiyoCRM 

In the following steps we are going to configure a provider that can be used by multiple users within KiyoCRM. This scenario only makes sense when you have registered an app in azure for accounts that share the same domain, usually accounts that are not @outlook accounts or similar.

Since we are going to configure a Group OAuth provider, the following steps are needed to be done by an admin user

Login into KiyoCRM as an admin user and go to the admin panel

[![image.png](https://docs.kiyocrm.com/uploads/images/gallery/2025-05/scaled-1680-/QX0image.png)](https://docs.kiyocrm.com/uploads/images/gallery/2025-05/QX0image.png)

On the admin panel search for "External OAuth Providers"

[![image.png](https://docs.kiyocrm.com/uploads/images/gallery/2025-05/scaled-1680-/lzRimage.png)](https://docs.kiyocrm.com/uploads/images/gallery/2025-05/lzRimage.png)

Click on the "External OAuth Providers", that should take you to the module list view

<span class="image">[![suitecrm-external-oauth-provider-module.png](https://docs.suitecrm.com/images/en/admin/email/microsoft/suitecrm-external-oauth-provider-module.png)](https://docs.suitecrm.com/images/en/admin/email/microsoft/suitecrm-external-oauth-provider-module.png)</span>

As an admin you can create two types of records:

<div class="padding highlightable sticky-parent"><div><div class="sect1"><div class="sectionbody"><div class="paragraph">  
</div><div class="olist arabic">1. Personal
    
    <div class="olist loweralpha">
    1. These are only accessible by the user that created them
    2. Personal records are meant to be used when configuring access to personal accounts in exiting providers, without a custom domain. I.e. when for instance configuring access to your `@gmail` or `@outlook` accounts. These can have a shared group configuration as for each used the "Client Id", "Client Secret" and other fields are going to be unique per account.
    
    </div>
2. Group
    
    <div class="olist loweralpha">
    1. Records that will be used by many users
    2. Group records are meant to be use by everyone that have accounts that share the same domain, lie `@example-inc.onmicrosoft.com`. The "Client ID", "Client Secret" and the other fields are going to be the same for all accounts that use this domain.
    
    </div>

</div><div class="paragraph">  
</div></div></div></div></div>As mentioned before in this guide we are going to configure a provider that will be used by multiple users, so we are going to create a group record.

Click on the "New Group OAuth Provider" which should take you to the create view.

Add a meaningful name to your provider, it can be just "Microsoft", the name of your domain, or something that helps you identify and differentiate the provider from other possible providers.

Then select the "Microsoft" on "Connector" field

<span class="image">[![suitecrm-connector-selection.png](https://docs.suitecrm.com/images/en/admin/email/microsoft/suitecrm-connector-selection.png)](https://docs.suitecrm.com/images/en/admin/email/microsoft/suitecrm-connector-selection.png)</span>

The Microsoft connector type works in the same way as the "Generic" connector type. The difference is that it has several built in defaults. This spares you some configuration steps and makes the process of configuring an External OAuth provider easier.

Add the "Scopes" that you want to access, the same ones you’ve configured on Azure’s API Permissions page.

<div class="padding highlightable sticky-parent"><div><div class="sect1"><div class="sectionbody"><div class="paragraph">  
</div><div class="olist arabic">1. `offline_access`
2. `<a class="bare highlight" href="https://outlook.office.com/IMAP.AccessAsUser.All">https://outlook.office.com/IMAP.AccessAsUser.All</a>`
3. `User.Read`

</div><div class="paragraph">  
</div></div></div></div></div><span class="image">[![suite_crm_oauth_provider_scopes.png](https://docs.suitecrm.com/images/en/admin/email/microsoft/suite_crm_oauth_provider_scopes.png)](https://docs.suitecrm.com/images/en/admin/email/microsoft/suite_crm_oauth_provider_scopes.png)</span>

Set the "Client Id" that was generated in Azure

<span class="image">[![suitecrm-oauth-provider-client-id.png](https://docs.suitecrm.com/images/en/admin/email/microsoft/suitecrm-oauth-provider-client-id.png)](https://docs.suitecrm.com/images/en/admin/email/microsoft/suitecrm-oauth-provider-client-id.png)</span>

Set the "Client Secret" that was generated in Azure

<span class="image">[![suitecrm-oauth-provider-client-secret.png](https://docs.suitecrm.com/images/en/admin/email/microsoft/suitecrm-oauth-provider-client-secret.png)](https://docs.suitecrm.com/images/en/admin/email/microsoft/suitecrm-oauth-provider-client-secret.png)</span>

Set the "Authorize URL" that you’ve copied from the Azure endpoints ( OAuth 2.0 authorization endpoint (v2) )

<span class="image">[![azure-authorize-url.png](https://docs.suitecrm.com/images/en/admin/email/microsoft/azure-authorize-url.png)](https://docs.suitecrm.com/images/en/admin/email/microsoft/azure-authorize-url.png)</span><span class="image">[![suitecrm-oauth-provider-authorize-url.png](https://docs.suitecrm.com/images/en/admin/email/microsoft/suitecrm-oauth-provider-authorize-url.png)](https://docs.suitecrm.com/images/en/admin/email/microsoft/suitecrm-oauth-provider-authorize-url.png)</span>

Set the "Access Token URL" that you’ve copied from the Azure endpoints ( OAuth 2.0 token endpoint (v2) )

<span class="image">[![azure-access-token-url.png](https://docs.suitecrm.com/images/en/admin/email/microsoft/azure-access-token-url.png)](https://docs.suitecrm.com/images/en/admin/email/microsoft/azure-access-token-url.png)</span><span class="image">[![suitecrm-oauth-provider-access-token-url.png](https://docs.suitecrm.com/images/en/admin/email/microsoft/suitecrm-oauth-provider-access-token-url.png)](https://docs.suitecrm.com/images/en/admin/email/microsoft/suitecrm-oauth-provider-access-token-url.png)</span>

Your record should now look something like the following:

<span class="image">[![suitecrm-oauth-provider-filled-example.png](https://docs.suitecrm.com/images/en/admin/email/microsoft/suitecrm-oauth-provider-filled-example.png)](https://docs.suitecrm.com/images/en/admin/email/microsoft/suitecrm-oauth-provider-filled-example.png)</span>

Since many of the other fields have defaults and the Microsoft connector adds other defaults, these are all the field that you should need to configure.

You can now save the record

## 4. Configure User Inbound emails 

Now users should be able to use the OAuth Provider you have created for authenticating with Microsoft.

Check the [How to configure Inbound Email with OAuth guide](https://docs.kiyocrm.com/books/kiyocrm-documentation-user-guide-api-setup-configurationkiyocrm/page/3-how-to-configure-inbound-email-with-oauth) for the steps users need to take to configure their inbound emails using an OAuth connection.

<div id="bkmrk--1"></div></section><div id="bkmrk--2"></div>

# 2. Compose Email 'From' Dropdown Behavior Compose Email 'From' Dropdown Behavior

<section id="bkmrk-1.-intro-on-kiyocrm-"><div class="padding highlightable sticky-parent"><div class="sticky-spacer"><div class="sticky-wrapper is-sticky" id="bkmrk-"><div id="bkmrk--1"></div></div></div></div><div class="padding highlightable sticky-parent"><div><div id="bkmrk--2"></div></div></div>### 1. Intro

On KiyoCRM 7.13.1 and 8.2.3 versions, the “From” dropdown list, depicted on the following image, has been updated.

[![image.png](https://docs.kiyocrm.com/uploads/images/gallery/2025-05/scaled-1680-/e4Dimage.png)](https://docs.kiyocrm.com/uploads/images/gallery/2025-05/e4Dimage.png)

As well as the new styling, the field behaves differently.

By default, it now shows the list of all Outbound Email Accounts the user has access to, which includes the personal accounts and group accounts.

In addition to the above it will also show the System Email if the `Users may send as this account’s identity` option is enabled in the `Administration > Email Settings` page.

### 2. Legacy Email behavior config option

#### 2.1 Option description

A new `legacy_email_behaviour` config option has been added, which allows you to keep some of the legacy Compose “From” behavior.

It will get the list of 'from email addresses' that was generated in previous versions of KiyoCRM and add it to the new list that is generated based on the Outbound Email Accounts.

As you might know, the previous behaviour was to generate the list from addresses based on the Inbound Email Accounts.

#### 2.2 Note on Upgraded Versions

Newly installed instances will have the `legacy_email_behaviour` option disabled by default.

Instances that have been upgraded from a previous KiyoCRM version will have the newly added `legacy_email_behaviour` `config.php` option enabled in order to keep legacy behaviour.

### 3. Email Signatures

The Outbound Email Account configuration has been updated to allow configuring an email signature per outbound email account, as depicted in the image below. This signature can be defined both for Personal and Group Outbound Email Accounts.

The group signatures will be accessible by any user that has access to the Outbound Email Account record.

Please note that signatures do not support embedded images, only images that are available in a public url.

[![image.png](https://docs.kiyocrm.com/uploads/images/gallery/2025-05/scaled-1680-/Ig6image.png)](https://docs.kiyocrm.com/uploads/images/gallery/2025-05/Ig6image.png)

<div id="bkmrk--3"></div></section><div id="bkmrk--4"><div>  
</div></div>

# 3. How to configure Inbound Email with OAuth

<section id="bkmrk-1.-intro-this-guide-"><div class="padding highlightable sticky-parent"><div class="sticky-spacer"><div class="sticky-wrapper is-sticky" id="bkmrk-"><div id="bkmrk--1"></div></div></div></div><div class="padding highlightable sticky-parent"><div><div id="bkmrk--2"></div></div></div>### 1. Intro

This guide will explain how to configure an inbound email connection using a previously configured OAuth Provider.

As example we will use a Microsoft account, however the steps should be similar for other providers

In this guide we will be configuring a personal account using a group OAuth Provider. Group OAuth providers are meant to be used by many users in the system.

As an admin you can create three types of records:

<div class="padding highlightable sticky-parent"><div><div class="sect1"><div class="sectionbody"><div class="paragraph">  
</div><div class="olist arabic">1. Personal
    
    <div class="olist loweralpha">
    1. These are only accessible by the user that created them
    2. Personal records are meant to be used when configuring access to personal accounts, like '<john.doe@example-inc.onmicrosoft.com>'.
    3. These accounts configuration is only accessible by the account owner and system administrators
    
    </div>
2. Group
    
    <div class="olist loweralpha">
    1. Records that will be used by many users
    2. Group records are meant to be use by accounts in a domain that are meant to be used by several users, e.g. all members of the support team would have access to `support@example-inc.onmicrosoft.com`.
    
    </div>
3. Bounce
    
    <div class="olist loweralpha">
    1. Records meant to be used just for reading Campaigns bounce emails
    
    </div>

</div><div class="paragraph"><div class="notices note"><div class="paragraph">  
</div></div></div></div></div></div></div>If you haven’t yet configured the OAuth Provider or don’t know how to, please have a look at [How to configure a Microsoft OAuth Provider Guide](https://docs.kiyocrm.com/books/kiyocrm-documentation-user-guide-api-setup-configurationkiyocrm/page/1-how-to-configure-a-microsoft-oauth-provider)

## 2. Create an OAuth connection

Login into you KiyoCRM instance

Go to Admin page and Select "External OAuth Connectors" under email.</section><section id="bkmrk-this-module-is-the-o">  
<span class="image">[![suitecrm-external-oauth-connection-list-view.png](https://docs.suitecrm.com/images/en/admin/email/microsoft/suitecrm-external-oauth-connection-list-view.png)](https://docs.suitecrm.com/images/en/admin/email/microsoft/suitecrm-external-oauth-connection-list-view.png)</span>

This module is the one that will keep the reference of all the existing OAuth Connections. It stores the tokens generated after the authentication.

Let's create a new Personal OAuth Connection. click on "Personal OAuth Connection"

<span class="image">[![suitecrm-new-personal-oauth-connection-link.png](https://docs.suitecrm.com/images/en/admin/email/microsoft/suitecrm-new-personal-oauth-connection-link.png)](https://docs.suitecrm.com/images/en/admin/email/microsoft/suitecrm-new-personal-oauth-connection-link.png)</span>

This should take you to the creation view.

<span class="image">[![suitecrm-oauth-connection-create-blank.png](https://docs.suitecrm.com/images/en/admin/email/microsoft/suitecrm-oauth-connection-create-blank.png)](https://docs.suitecrm.com/images/en/admin/email/microsoft/suitecrm-oauth-connection-create-blank.png)</span>

Add a meaningful name to your connection, it can be the username of your account, or something that helps you identify and differentiate the connection from other existing connections.

<span class="image">[![suitecrm-oauth-connection-name-field.png](https://docs.suitecrm.com/images/en/admin/email/microsoft/suitecrm-oauth-connection-name-field.png)](https://docs.suitecrm.com/images/en/admin/email/microsoft/suitecrm-oauth-connection-name-field.png)</span>

Now select on the "Provider" field, select the Microsoft OAuth Provider that you previously created.

<span class="image">[![suitecrm-oauth-connection-provider-field.png](https://docs.suitecrm.com/images/en/admin/email/microsoft/suitecrm-oauth-connection-provider-field.png)](https://docs.suitecrm.com/images/en/admin/email/microsoft/suitecrm-oauth-connection-provider-field.png)</span>

After selecting the provider, it is time to authenticate, click on the "Authenticate" button.

<span class="image">[![suitecrm-oauth-connection-authenticate.png](https://docs.suitecrm.com/images/en/admin/email/microsoft/suitecrm-oauth-connection-authenticate.png)](https://docs.suitecrm.com/images/en/admin/email/microsoft/suitecrm-oauth-connection-authenticate.png)</span>

When clicking the button, a popup window should display with the Microsoft page for Authentication.

<span class="image">[![microsoft-authenticate-popup.png](https://docs.suitecrm.com/images/en/admin/email/microsoft/microsoft-authenticate-popup.png)](https://docs.suitecrm.com/images/en/admin/email/microsoft/microsoft-authenticate-popup.png)</span>

After going through all the authentication popup steps, the popup should close and the fields on the External OAuth Connection record should be populated.

Do not store or share any of the tokens. These work almost as passwords. They are sensitive information.

<span class="image">[![suitecrm-oauth-connection-configured.png](https://docs.suitecrm.com/images/en/admin/email/microsoft/suitecrm-oauth-connection-configured.png)](https://docs.suitecrm.com/images/en/admin/email/microsoft/suitecrm-oauth-connection-configured.png)</span>

Go ahead and **save** your record.

<span class="image">[![suitecrm-save-button.png](https://docs.suitecrm.com/images/en/admin/email/microsoft/suitecrm-save-button.png)](https://docs.suitecrm.com/images/en/admin/email/microsoft/suitecrm-save-button.png)</span>

### 3. Configure an Inbound Email Account

Now it is time to create an Inbound Email Account. Click on the "Inbound Email Accounts" in Admin page

<span class="image">[![suitecrm-inbound-email-accounts-menu-link.png](https://docs.suitecrm.com/images/en/admin/email/microsoft/suitecrm-inbound-email-accounts-menu-link.png)](https://docs.suitecrm.com/images/en/admin/email/microsoft/suitecrm-inbound-email-accounts-menu-link.png)</span>

This should take you to the Inbound Emails module list view.

<span class="image">[![suitecrm-inbound-email-accounts-listview.png](https://docs.suitecrm.com/images/en/admin/email/microsoft/suitecrm-inbound-email-accounts-listview.png)](https://docs.suitecrm.com/images/en/admin/email/microsoft/suitecrm-inbound-email-accounts-listview.png)</span>

Lets create a new Personal Inbound Email Account. click on "New Personal Inbound Email Account"

<span class="image">[![suitecrm-new-inbound-email-account-link.png](https://docs.suitecrm.com/images/en/admin/email/microsoft/suitecrm-new-inbound-email-account-link.png)](https://docs.suitecrm.com/images/en/admin/email/microsoft/suitecrm-new-inbound-email-account-link.png)</span>

This should take you to the create view

[![image.png](https://docs.kiyocrm.com/uploads/images/gallery/2025-05/scaled-1680-/KMcimage.png)](https://docs.kiyocrm.com/uploads/images/gallery/2025-05/KMcimage.png)

[![image.png](https://docs.kiyocrm.com/uploads/images/gallery/2025-05/scaled-1680-/hhjimage.png)](https://docs.kiyocrm.com/uploads/images/gallery/2025-05/hhjimage.png)

Add a meaningful name to your inbound, it can be the username of your account, or something that helps you identify and differentiate this inbound email account from other existing accounts.

[![image.png](https://docs.kiyocrm.com/uploads/images/gallery/2025-05/scaled-1680-/8hPimage.png)](https://docs.kiyocrm.com/uploads/images/gallery/2025-05/8hPimage.png)

Select the "OAuth" type on the Auth Type field.

[![image.png](https://docs.kiyocrm.com/uploads/images/gallery/2025-05/scaled-1680-/jsyimage.png)](https://docs.kiyocrm.com/uploads/images/gallery/2025-05/jsyimage.png)

By selecting the OAuth type, the "External OAuth Connection" field should now display. Click on the arrow to select the OAuth Connection you created before.

Group Inbound Emails should be linked to Group External OAuth Connection records. If they are linked Personal External OAuth Connection records errors may occur

<span class="image">[![suitecrm-inbound-email-external-oauth-connection-field.png](https://docs.suitecrm.com/images/en/admin/email/microsoft/suitecrm-inbound-email-external-oauth-connection-field.png)](https://docs.suitecrm.com/images/en/admin/email/microsoft/suitecrm-inbound-email-external-oauth-connection-field.png)</span>

Click on the arrow button should open a popup where you can select the OAuth Connection we’ve created before.

<span class="image">[![suitecrm-oauth-connection-select-popup.png](https://docs.suitecrm.com/images/en/admin/email/microsoft/suitecrm-oauth-connection-select-popup.png)](https://docs.suitecrm.com/images/en/admin/email/microsoft/suitecrm-oauth-connection-select-popup.png)</span>

Enter the username for your account. It should be the same you’ve used to create the OAuth Connection.

<span class="image">[![suitecrm-inbound-email-username-field.png](https://docs.suitecrm.com/images/en/admin/email/microsoft/suitecrm-inbound-email-username-field.png)](https://docs.suitecrm.com/images/en/admin/email/microsoft/suitecrm-inbound-email-username-field.png)</span>

Enter server address for your account. E.g. for Microsoft it would be `outlook.office365.com`.

Here we are using a Microsoft account as example. Though you should set the address of the server you are using

<span class="image">[![suitecrm-inbound-email-server-field.png](https://docs.suitecrm.com/images/en/admin/email/microsoft/suitecrm-inbound-email-server-field.png)](https://docs.suitecrm.com/images/en/admin/email/microsoft/suitecrm-inbound-email-server-field.png)</span>

Depending on your server configurations enable the ssl and set the port. E.g. for Microsoft you should enable the "Use SSL" checkbox which is going to change the port to "993" which is the default.

Here we are using a Microsoft account as example. Though you should set the port of the server you are using

<span class="image">[![suitecrm-inbound-email-port-field.png](https://docs.suitecrm.com/images/en/admin/email/microsoft/suitecrm-inbound-email-port-field.png)](https://docs.suitecrm.com/images/en/admin/email/microsoft/suitecrm-inbound-email-port-field.png)</span>

The `Email Body Filtering Search Type` allows the user to choose to search using 1 word or a multiword search.

<span class="image">[![suitecrm-inbound-email-filter-type.png](https://docs.suitecrm.com/images/en/admin/email/microsoft/suitecrm-inbound-email-filter-type.png)](https://docs.suitecrm.com/images/en/admin/email/microsoft/suitecrm-inbound-email-filter-type.png)</span>

Now set the values for the folders. Click the "Select" button next to each folder to open the popup that will show you the available values.

Do not try to fill these fields before setting the following fields: `External OAuth Connection`, `Username`, `Mail Server Address`, `Mail Server Port`, `Use SSL`. Otherwise, you will just see an empty dropdown on the popup.

[![image.png](https://docs.kiyocrm.com/uploads/images/gallery/2025-05/scaled-1680-/DgMimage.png)](https://docs.kiyocrm.com/uploads/images/gallery/2025-05/DgMimage.png)

**For Microsoft**: the following is an example of how the fields should look after being configured:

[![image.png](https://docs.kiyocrm.com/uploads/images/gallery/2025-05/scaled-1680-/Exyimage.png)](https://docs.kiyocrm.com/uploads/images/gallery/2025-05/Exyimage.png)

Next, set the value for the other fields. The following is an example of a fully configure account, except for the "Outbound Email Account" field which is not in the scope of this guide to explain how to configure

[![image.png](https://docs.kiyocrm.com/uploads/images/gallery/2025-05/scaled-1680-/4qEimage.png)](https://docs.kiyocrm.com/uploads/images/gallery/2025-05/4qEimage.png)

Go ahead and **save** your record.

### 4. Configure the Inbound Email to display on the Emails module

For the configured account to show on the email's module, you need must go to your profile and select it as one of the accounts to show.

On the navbar global menu click on "Profile"

[![image.png](https://docs.kiyocrm.com/uploads/images/gallery/2025-05/scaled-1680-/8Hpimage.png)](https://docs.kiyocrm.com/uploads/images/gallery/2025-05/8Hpimage.png)

This should take you to the profile page.

[![image.png](https://docs.kiyocrm.com/uploads/images/gallery/2025-05/scaled-1680-/K62image.png)](https://docs.kiyocrm.com/uploads/images/gallery/2025-05/K62image.png)

Scroll to the end of the page a click on the "Settings" button

[![image.png](https://docs.kiyocrm.com/uploads/images/gallery/2025-05/scaled-1680-/ScKimage.png)](https://docs.kiyocrm.com/uploads/images/gallery/2025-05/ScKimage.png)

This should open a modal with a "Folder Management" section at the end. On this section select the accounts that should display on your Emails module.

It is possible to select multiple accounts.

[![image.png](https://docs.kiyocrm.com/uploads/images/gallery/2025-05/scaled-1680-/xoeimage.png)](https://docs.kiyocrm.com/uploads/images/gallery/2025-05/xoeimage.png)

Click "Done"

Go ahead and **save** your profile.

[![image.png](https://docs.kiyocrm.com/uploads/images/gallery/2025-05/scaled-1680-/K4eimage.png)](https://docs.kiyocrm.com/uploads/images/gallery/2025-05/K4eimage.png)

That should be your Inbound Email account configured.

### 5. Access the Configured account on emails module

On the menu click on the "Emails" module link

[![image.png](https://docs.kiyocrm.com/uploads/images/gallery/2025-05/scaled-1680-/yrfimage.png)](https://docs.kiyocrm.com/uploads/images/gallery/2025-05/yrfimage.png)

On the menu click on the "Emails" module link.

[![image.png](https://docs.kiyocrm.com/uploads/images/gallery/2025-05/scaled-1680-/8B8image.png)](https://docs.kiyocrm.com/uploads/images/gallery/2025-05/8B8image.png)

  
Depending on the number of Inbound Emails you have configured, the inbound you have just configured may not be the one to display by default.

To change to the Inbound Email account you have just configured click on the current inbox button, located on the top right.

<span class="image">[![suitecrm-emails-current-inbox-button.png](https://docs.suitecrm.com/images/en/admin/email/microsoft/suitecrm-emails-current-inbox-button.png)](https://docs.suitecrm.com/images/en/admin/email/microsoft/suitecrm-emails-current-inbox-button.png)</span>

A modal should show with the Inbound Email accounts you have configured on the Folder Management within your profile

<span class="image">[![suitecrm-current-inbox-selection.png](https://docs.suitecrm.com/images/en/admin/email/microsoft/suitecrm-current-inbox-selection.png)](https://docs.suitecrm.com/images/en/admin/email/microsoft/suitecrm-current-inbox-selection.png)</span>

Within the modal, click on the Inbound Email Account you have just configured. That should reload the page and show the Inbound Email that you configured

<span class="image">[![suitecrm-configured-email-list-example.png](https://docs.suitecrm.com/images/en/admin/email/microsoft/suitecrm-configured-email-list-example.png)](https://docs.suitecrm.com/images/en/admin/email/microsoft/suitecrm-configured-email-list-example.png)</span>

<div id="bkmrk--3"></div></section>

# 4. External OAuth Provider Overview

<section id="bkmrk-1.-intro-this-guide-"><div class="padding highlightable sticky-parent"><div class="sticky-spacer"><div class="sticky-wrapper is-sticky" id="bkmrk-"><div id="bkmrk--1"></div></div></div></div><div class="padding highlightable sticky-parent"><div><div id="bkmrk--2"></div></div></div>### 1. Intro

This guide tries to provide a more in-depth description of the configurations in the External OAuth Provider module

### 2. Types Of records

As an admin you can create two types of records:

<div class="padding highlightable sticky-parent"><div><div class="sect1"><div class="sectionbody"><div class="paragraph">  
</div><div class="olist arabic">1. Personal
    
    <div class="olist loweralpha">
    1. These are only accessible by the user that created them
    2. Personal records are meant to be used when configuring access to personal accounts in exiting providers, without a custom domain. I.e. when for intance configuring access to your `@gmail` or `@outlook` accounts. These can have a shared group configuration as for each used the "Client Id", "Client Secret" and other fields are going to be unique per account.
    
    </div>
2. Group
    
    <div class="olist loweralpha">
    1. Records that will be used by many users
    2. Group records are meant to be use by everyone that have accounts that share the same domain, lie `@example-inc.onmicrosoft.com`. The "Client ID", "Client Secret" and the other fields are going to be the same for all accounts that use this domain.
    
    </div>

</div><div class="paragraph">  
</div></div></div></div></div>Please check the [Configuring Security Groups for Inbound Email](https://docs.kiyocrm.com/books/kiyocrm-documentation-user-guide-api-setup-configurationkiyocrm/page/3-how-to-configure-inbound-email-with-oauth) on more information in the differences between the two and how to use them properly.

### 3. OAuth2 Client lib

KiyoCRM is using the [OAuth 2.0 Client from The PHP League](https://oauth2-client.thephpleague.com/). It uses the Generic Provider for all the providers.

### 4. Base Config\_

On the base configuration, depicted below, you can find all the fields that are essential for the OAuth Provider to work. This may vary depending on the provider that you will be using, but most of these field are common for most providers.

<span class="image">[![suitecrm-oauth-provider-base-config.png](https://docs.suitecrm.com/images/en/admin/email/microsoft/suitecrm-oauth-provider-base-config.png)](https://docs.suitecrm.com/images/en/admin/email/microsoft/suitecrm-oauth-provider-base-config.png)</span>

### 5. Extra Configurations

These are extra configurations that you may need to add depending on the provider. All the below are merged with any existing defaults.

<div class="padding highlightable sticky-parent"><div><div class="sect1"><div class="sectionbody"><div class="paragraph">  
</div><div class="olist arabic">1. Extra Provider Params: are parameters to inject to the provider when initializing. These may be used on all requests
2. Get Token Request grant type: the type of grant to use in the request to retrieve the token
3. Get Token Request options: Extra options that can be sent on the request to retrieve the token
4. Refresh Token Request Grant Type: the type of grant to use in the request to refresh the token
5. Refresh Token Request Options: Extra options that can be sent on the request to refresh the token

</div><div class="paragraph">  
</div></div></div></div></div><span class="image">[![suitecrm-oauth-providers-extra-config.png](https://docs.suitecrm.com/images/en/admin/email/microsoft/suitecrm-oauth-providers-extra-config.png)](https://docs.suitecrm.com/images/en/admin/email/microsoft/suitecrm-oauth-providers-extra-config.png)</span>

### 6. Mapping Configurations

These define how to map the fields received on the token, to the fields where they are store in KiyoCRM. All the except for token type have defaults.

In this configuration it is possible to retrieve values nested within an array. For that you can define the path to the field using the key names and using `.` to join them. E.g. Microsoft connector uses the following mapping to get the token type `values.token_type`

<span class="image">[![suitecrm-oauth-provider-mapping-config.png](https://docs.suitecrm.com/images/en/admin/email/microsoft/suitecrm-oauth-provider-mapping-config.png)](https://docs.suitecrm.com/images/en/admin/email/microsoft/suitecrm-oauth-provider-mapping-config.png)</span>

### 7. Connectors

Connectors are the part of the code that is responsible for managing the requests to the provider to do the authentication

The Microsoft connector type works in the same way as the "Generic" connector type. The difference is that it has several built in defaults. This spares you some configuration steps and makes the process of configuring an External OAuth provider easier.

### 8. Internal Configuration Format

In order to understand how/when the fields from the External OAuth Providers module are used, it may help to understand the internal structure.

The following code snippet is an example of the configurations without the shortcuts from the frontend.

<div class="padding highlightable sticky-parent"><div><div class="sect1"><div class="sectionbody"><div class="paragraph">  
</div><div class="listingblock"><div class="content">  
</div></div></div></div></div></div>```php
[
    'type' => 'Generic',
    'client_id' => '...',
    'client_secret' => '....',
    'redirect_uri' => '....',
    'authorize_url_options' => [
        'scope' => '...',
    ],
    'extra_provider_params' => [
        'scopes' => '...',
        'urlAuthorize' => '...',
        'urlAccessToken' => '...',
    ],
    'get_token_request_grant' => 'authorization_code', // optional
    'get_token_request_options' => [], // optional
    'refresh_token_request_grant' => 'refresh_token', // optional
    'refresh_token_request_options' => [], // optional
    'token_mapping' => [ // optional
        'access_token' => '...',
        'expires_in' => '...',
        'refresh_token' => '...',
        'token_type' => ''
    ]
]
```

<div class="padding highlightable sticky-parent"><div><div class="sect1"><div class="sectionbody"><div class="listingblock"><div class="content">  
</div></div><div class="paragraph">  
</div></div></div></div></div>From the above example you can see that:

<div class="padding highlightable sticky-parent"><div id="bkmrk-scope%C2%A0is-injected-in"><div class="sect1"><div class="sectionbody"><div class="paragraph">  
</div><div class="olist arabic">1. `scope` is injected into both the `authorize_url_options` and the `extra_provider_params`
2. `urlAuthorize` is injected into `extra_provider_params`
3. `urlAccessToken` is injected into `extra_provider_params`

</div></div></div><footer class=" footline"></footer></div></div><div id="bkmrk--3"></div></section>

# 5. Configuring Security Groups for Inbound Email

<div class="sticky-spacer" id="bkmrk-"><div class="sticky-wrapper is-sticky" id="bkmrk--1"><div id="bkmrk--2"></div></div></div>### 1. Intro

This guide will explain how to configure the visibility defaults that are applied to Inbound Email and related records, as well as the way you can configure Security Groups.

### 2. Personal Records Default Visibility

`Inbound Emails`, `External OAuth Connection` and `External OAuth Provider` allow to create personal records.

These types of records are only visible to the owner of the record and to admin users.

### 3. Group Records Default Visibility

#### 3.1 Inbound Emails and External OAuth Connection

Like on personal records, administrator users are able to see all group records.

Non-admin users, by default, cannot see any group record. They will only be able to see the records if:

<div id="bkmrk-they-have-a-role-wit"><div class="sect1"><div class="sectionbody"><div class="sect2"><div class="paragraph">  
</div><div class="olist arabic">1. They have a Role with ACLs defined for the module, i.e. Inbound Emails or External OAuth Connection
2. They belong to the Security Group that the Group record is also assigned to.

</div><div class="paragraph">  
</div></div></div></div></div>This behavior differs from the default KiyoCRM behavior for Security Groups, in the sense that by default KiyoCRM records are visible to everyone, and the admin needs to add Security Groups to restrain record visibility. These two modules work the other way around, because their records are hidden by default.

#### 3.2 External OAuth Provider

Unlike `Inbound Emails` and `External OAuth Connection`, `External OAuth Provider` group records are visible by default. To restrict visibility you need to define Security Groups and Roles.

`External OAuth Provider` is using an "open" visibility because the group provider configurations are meant to be used by all users that have an account for the same domain. E.g. when configuring a Microsoft Provider for `@exampleinc.onmicrosoft.com` any user that has an account on this domain can use the same provider.

In the `Inbound Emails` and `External OAuth Connection` the same does not happen. These are email account specific configurations, like for `sales@exampleinc.onmicrosoft.com`. Where we just want to give access to reading emails from this account to users that should have access to it.

### 4. Security Group Role Configuration

From a Role perspective, the Security Groups records are visible and changeable by default.

On `Inbound Emails`, `External OAuth Connection` record detail view, there is a subpanel for the Security Groups. Where a user can change the groups the record belongs to.

Since `Inbound Emails`, `External OAuth Connection` are hidden by default and they depend on the Security Group they belong to. It may be a good idea to restrain the visibility on Security Group so that the subpanel only shows for admin users.

# Users

<div class="sticky-spacer" id="bkmrk-"><div class="sticky-wrapper is-sticky" id="bkmrk--1"><div id="bkmrk--2"></div></div></div>### Overview

This guide documents the settings on the Users section of the Administration panel.

A **user** represents someone who can log in to your **KiyoCRM** system. In addition to the basic information (name, title, address, phone number etc) contained in the **Employees** module, a user has a username and password to enable them to log in to the system, and an email address. When a new User is created in KiyoCRM, a matching Employee record is created. Similarly, when a new Employee record is created, a new User record is also created. This new user record will need to be edited (if required) to add a username/password and email address before it can be used to log in to **KiyoCRM**.

The **Users** section of the **Administration Panel** holds settings for **KiyoCRM** user accounts and security access settings.

You must have Administrator access to add new user accounts and edit access settings. Regular users have access to their own user account details and can edit address details, set preferences, set up personal email and change their password.

Open the Administration panel by selecting **Admin** from the dropdown at the top right-hand of the **KiyoCRM** screen.

[![image.png](https://docs.kiyocrm.com/uploads/images/gallery/2025-05/scaled-1680-/F3gimage.png)](https://docs.kiyocrm.com/uploads/images/gallery/2025-05/F3gimage.png)

### User Management

Select User Management to view, edit and add new user accounts.

[![image.png](https://docs.kiyocrm.com/uploads/images/gallery/2025-05/scaled-1680-/5LEimage.png)](https://docs.kiyocrm.com/uploads/images/gallery/2025-05/5LEimage.png)

[![image.png](https://docs.kiyocrm.com/uploads/images/gallery/2025-05/scaled-1680-/zK6image.png)](https://docs.kiyocrm.com/uploads/images/gallery/2025-05/zK6image.png)

### Add New User

Select **Create New User** from the sidebar to add a new user account.

[![image.png](https://docs.kiyocrm.com/uploads/images/gallery/2025-05/scaled-1680-/j0Oimage.png)](https://docs.kiyocrm.com/uploads/images/gallery/2025-05/j0Oimage.png)

### User Profile Tab

[![image.png](https://docs.kiyocrm.com/uploads/images/gallery/2025-05/scaled-1680-/j3Mimage.png)](https://docs.kiyocrm.com/uploads/images/gallery/2025-05/j3Mimage.png)

On the default **User Profile** tab, enter the new username, user’s first and last names and the account status (Active or Inactive).

Only **Active** accounts can be used to log in to **KiyoCRM**. In addition, **Inactive** account usernames are not included in dropdown username lists (e.g. assigned to or modified by lists) used for record searching.

Select the User Type from the drop down. A System Administrator User can access the Administration panel and all records in **KiyoCRM**. A regular user has access to modules and records based on the role(s) assigned to them. See [Roles and Security Groups](https://docs.suitecrm.com/admin/administration-panel/roles-and-security-groups) for further information.

An optional photograph can be attached to the user record. Browse for the required file using the **Choose File** button. The photo will be displayed on the detail view of the user record once the record has been saved.

#### Two Factor Authentication

Two Factor Authentication is available in **KiyoCRM** version 7.10 onwards

Two Factor Authentication can be enabled on a per-user basis. Once enabled, a user will be required to enter a code received via email each time they log on to **KiyoCRM**.

Check the Two Factor Authentication box to enable.

[![image.png](https://docs.kiyocrm.com/uploads/images/gallery/2025-05/scaled-1680-/nkJimage.png)](https://docs.kiyocrm.com/uploads/images/gallery/2025-05/nkJimage.png)

Click **Save** to retain the settings.

When the user logs on, after entering their username and password, they will be asked to enter the code which will have been sent to them via email.

<span class="image">[![TwoFactorAuthCodeSent](https://docs.suitecrm.com/images/en/admin/TwoFactorAuthCodeSent.png "Two Factor Authentication code required")](https://docs.suitecrm.com/images/en/admin/TwoFactorAuthCodeSent.png)</span>

Once they have entered the correct code and clicked Verify, they will be logged into **KiyoCRM**.

The template for the Two Factor Authentication code email which is sent to users can be set in **Password Management**

#### Employee Information

Optional further information about the user can be added in the Employee Information panel. Changes made here will be reflected in the corresponding Employee record.

#### Email Settings

An email address is also required for a user account. This address is used to send system generated emails such as workflow notifications and record assignments. Further accounts can be added using the '+'button. Where there is more than one account, select the account to be used as the primary account.

For further information regarding user email settings, see <span style="color: rgb(53, 152, 219);">user profile email settings.</span>

#### Password Tab

Set the password for a new user here or reset the password for an existing user.

The Password tab will not be visible on the user record if you have the **System-Generated Passwords Feature** enabled. To enable/disable system-generated passwords, please see the **Password Management** section of this document.

[![image.png](https://docs.kiyocrm.com/uploads/images/gallery/2025-05/scaled-1680-/WjAimage.png)](https://docs.kiyocrm.com/uploads/images/gallery/2025-05/WjAimage.png)

Enter the new password details and click **Save**

##### Advanced Tab

User settings (including notification and reminder settings and import settings), Locale settings (date/time, currency etc) and Calendar options for iCal integration can be set here. These are all user configurable.

#### Layout Options

The Layout Options tab appears in **KiyoCRM** version 7.10 onwards

The Layout Options tab allows you to set color choices for the **KiyoP** theme. These settings can be configured by the user. Please see the <span style="color: rgb(53, 152, 219);">User Themes documentation</span> for more information on these settings.

### Password Management

From the **Admin** panel, select **Password Management** to open the settings page.

#### System-Generated Passwords

If this feature is enabled, passwords for new user accounts will be generated automatically and emailed to the address on the user’s account.

This requires both an outbound email server to be configured and a valid email address on the user’s record

#### Password Security Settings

These are optional password security settings for user passwords. Once set, user passwords must meet the selected criteria.

[![image.png](https://docs.kiyocrm.com/uploads/images/gallery/2025-05/scaled-1680-/aVrimage.png)](https://docs.kiyocrm.com/uploads/images/gallery/2025-05/aVrimage.png)

Check the boxes to select the required password features.

Note that special characters are #$%^&amp;\*()+=-\[\]';,./{}|:&lt;&gt;?~

Click **Save** to retain the settings.

### User 

When this feature is enabled, users will be able to reset their passwords from a link on the **KiyoCRM** login page.

This requires both an outbound email server to be configured and a valid email address on the user’s record

[![image.png](https://docs.kiyocrm.com/uploads/images/gallery/2025-05/scaled-1680-/4uyimage.png)](https://docs.kiyocrm.com/uploads/images/gallery/2025-05/4uyimage.png)

### Email Templates

The templates for password-related system-generated emails can be edited here. Please see the [Email Templates](https://docs.kiyocrm.com/books/kiyocrm-documentation-user-guide-api-setup-configurationkiyocrm/page/email-templates) documentation for further information regarding creating and editing email templates.

[![image.png](https://docs.kiyocrm.com/uploads/images/gallery/2025-05/scaled-1680-/S48image.png)](https://docs.kiyocrm.com/uploads/images/gallery/2025-05/S48image.png)

#### LDAP Support

If LDAP Authentication is enabled, none of the **KiyoCRM** Password Management settings will apply. Passwords will be managed by LDAP settings.

#### SAML Authentication

If SAML Authentication is enabled, none of the **KiyoCRM** Password Management settings will apply. Passwords will be managed by SAML settings.

# Roles and Security Groups

<section id="bkmrk-roles-and-security-g">Roles and Security Group settings are managed from the **Users** section of the **Administration Panel**.

The settings allow you to restrict access to sensitive data in **KiyoCRM** to specific teams (groups). There are many options to allow you to configure it to your exact needs, and a number of automatic assignment options to ensure that your users can always access the data that they need.

**Security Groups** allow you to define groups of users with particular access rights defined by the roles attached to the group. Groups can also be used to assign records to teams of users.

**Roles** are used to define access rights to modules and determine what a user can do with a record once they have access to it.

There are 3 key steps to setting up Groups so that you work correctly.

<div class="padding highlightable sticky-parent"><div><div><div class="sectionbody"><div class="paragraph">  
</div><div class="olist arabic">1. Create a **group** for each team of users and add the appropriate users to the group.
2. Create a **role** and select the appropriate access levels. Assign that role to each group.
3. Add the groups to records in your KiyoCRM instance. You can use the Mass Assign on the List View to do this. Going forward the groups will automatically inherit based on your Security Suite Settings. You can also use logic hooks, workflow, or do a direct database insert into the security groups records table if doing a one-time initial setup.

</div><div class="paragraph"><div class="notices info"><div class="paragraph">  
</div></div></div></div></div></div></div>Further advanced security group settings and functionality are available with the purchase of the Security Suite add-on

### Role Management

Create a role to define access to modules and the functions users will be able to perform on records within these modules. The role can then be assigned to security groups or to individual users where appropriate.

#### Create Role

Select Role Management and then Create Role from the Role Management sidebar.

[![image.png](https://docs.kiyocrm.com/uploads/images/gallery/2025-05/scaled-1680-/yZAimage.png)](https://docs.kiyocrm.com/uploads/images/gallery/2025-05/yZAimage.png)

Enter a name and a description for the role you are creating and click **Save**.

[![image.png](https://docs.kiyocrm.com/uploads/images/gallery/2025-05/scaled-1680-/tveimage.png)](https://docs.kiyocrm.com/uploads/images/gallery/2025-05/tveimage.png)

Once the role has been created, the role matrix will be displayed, showing all the configurable access options for each module.

[![image.png](https://docs.kiyocrm.com/uploads/images/gallery/2025-05/scaled-1680-/Lchimage.png)](https://docs.kiyocrm.com/uploads/images/gallery/2025-05/Lchimage.png)

Click on a cell to change the access setting. Note that you can change the setting for an entire column by clicking on the column heading.

[![image.png](https://docs.kiyocrm.com/uploads/images/gallery/2025-05/scaled-1680-/maiimage.png)](https://docs.kiyocrm.com/uploads/images/gallery/2025-05/maiimage.png)

Use the **Access** column to determine whether users can access each module:

<div class="padding highlightable sticky-parent"><div><div class="sect1"><div class="sectionbody"><div class="sect2"><div class="paragraph">  
</div><table class="tableblock frame-none grid-none stretch"><colgroup><col></col><col></col></colgroup><tbody><tr><td class="tableblock halign-left valign-top">**Enabled**

</td><td class="tableblock halign-left valign-top">Users have access to this module

</td></tr><tr><td class="tableblock halign-left valign-top">**Disabled**

</td><td class="tableblock halign-left valign-top">Users will not be able to view records for this module.

</td></tr></tbody></table>

<div class="paragraph">  
</div></div></div></div></div></div>Use the **Delete**, **Edit**, **Export** , **Import**, **List**, **Mass Update** and **View** columns to determine available record functions for users:

<div class="padding highlightable sticky-parent"><div><div class="sect1"><div class="sectionbody"><div class="sect2"><div class="paragraph">  
</div><table class="tableblock frame-none grid-none stretch"><colgroup><col></col><col></col></colgroup><tbody><tr><td class="tableblock halign-left valign-top">**Group**

</td><td class="tableblock halign-left valign-top">Gives users access to all records assigned to members of the same group.

</td></tr><tr><td class="tableblock halign-left valign-top">**Owner**

</td><td class="tableblock halign-left valign-top">Gives users access only to their own records.

</td></tr><tr><td class="tableblock halign-left valign-top">**None**

</td><td class="tableblock halign-left valign-top">Users will not have access to this function for this module.

</td></tr></tbody></table>

<div class="paragraph">  
</div></div></div></div></div></div>Click **Save** Once saved, access rights are color coded for ease of reading.

If your users should only typically see their own records, then the role you would assign to their group would be configured to have **Owner** rights. A manager who is a part of the same group, but who should be able to see all records in the group should have a role directly assigned to their user record that gives **Group** access.

#### Add User or Group

Assign the role to a group or an individual user as appropriate, using the subpanels below the matrix.

### List Roles

Select List Roles from the sidebar to view all roles and their descriptions.

[![image.png](https://docs.kiyocrm.com/uploads/images/gallery/2025-05/scaled-1680-/B0nimage.png)](https://docs.kiyocrm.com/uploads/images/gallery/2025-05/B0nimage.png)

Click on the role name to view and edit the access settings.

Click on the pencil icon to edit the role name and/or description.

#### List Roles by User

Select a username from the list to display the access matrix for the user as defined by all roles applied to the user.

[![image.png](https://docs.kiyocrm.com/uploads/images/gallery/2025-05/scaled-1680-/5yMimage.png)](https://docs.kiyocrm.com/uploads/images/gallery/2025-05/5yMimage.png)

### Security Suite Management

Select **Security Suite Management** from the Admin panel to view any existing groups or create a new group.

#### Create Group 

Create a group to define groups of users with particular access rights which are defined by the roles attached to the group. Groups can also be used to assign records in the CRM.

Select **Security Suite Management**, and then **Create a Security Group** from the sidebar.

[![image.png](https://docs.kiyocrm.com/uploads/images/gallery/2025-05/scaled-1680-/Ykximage.png)](https://docs.kiyocrm.com/uploads/images/gallery/2025-05/Ykximage.png)

[![image.png](https://docs.kiyocrm.com/uploads/images/gallery/2025-05/scaled-1680-/Bxgimage.png)](https://docs.kiyocrm.com/uploads/images/gallery/2025-05/Bxgimage.png)

Enter a name and an optional description for the group.

**Not Inheritable** If this field is checked then the group will not automatically be attached to any record. This can be useful for cases such as creating groups to assign roles to.

Click Save.

The Detail view for the newly created group will appear.

#### Add Users and Roles

Add users and roles to the group as required, using the subpanels.

[![image.png](https://docs.kiyocrm.com/uploads/images/gallery/2025-05/scaled-1680-/KIOimage.png)](https://docs.kiyocrm.com/uploads/images/gallery/2025-05/KIOimage.png)

[![image.png](https://docs.kiyocrm.com/uploads/images/gallery/2025-05/scaled-1680-/NZIimage.png)](https://docs.kiyocrm.com/uploads/images/gallery/2025-05/NZIimage.png)

[![image.png](https://docs.kiyocrm.com/uploads/images/gallery/2025-05/scaled-1680-/kzaimage.png)](https://docs.kiyocrm.com/uploads/images/gallery/2025-05/kzaimage.png)

Here, Chris and Sarah are members of the group and the **Owner Only** role has been applied, so the **Owner Only** role settings will apply to both Chris and Sarah.

#### View Security Groups

Select **Security Groups** from the sidebar to view all security groups.

Click the group name to edit the users and roles attached to the group, and the pencil icon to edit the group name and/or description.

[![image.png](https://docs.kiyocrm.com/uploads/images/gallery/2025-05/scaled-1680-/44iimage.png)](https://docs.kiyocrm.com/uploads/images/gallery/2025-05/44iimage.png)

### Security Suite Settings

KiyoCRM System Administrators can configure many advanced options for Security Suite. This allows you to control various access rights, inheriting of records, filters and more.

[![image.png](https://docs.kiyocrm.com/uploads/images/gallery/2025-05/scaled-1680-/kODimage.png)](https://docs.kiyocrm.com/uploads/images/gallery/2025-05/kODimage.png)

#### Additive Rights

User gets greatest rights of all roles assigned to the user or the user’s group(s)

#### Strict Rights

If a user is a member of several groups only the respective rights from the group assigned to the current record are used.

#### New User Group Popup

If this is checked, a Security Groups popup will open when a new user is created, allowing you to add the user to a security group(s)

#### User Role Precedence

If any role is assigned directly to a user that role should take precedence over any group roles.

#### Filter User List

With this selected, non-admin users can only assign records to users who are in the same group(s)

#### Use Creator Group Select

Adds a panel to a record creation screen if a user is a member of more than one inheritable group that allows a user to select one or more groups (that the user belongs to) that should be associated with the newly created record. If a user is in just one group the normal inheritance rules will instead be applied.

The new record will still inherit from the Assigned To user or Parent record if these options are set. This setting only overrides the Created By setting.

#### Inherit from Created By User

The record will inherit all the groups assigned to the user who created it.

#### Inherit from Assigned To User

The record will inherit all the groups of the user assigned to the record.

Other groups assigned to the record will NOT be removed.

#### Inherit from Parent Record

E.g. If a case is created for a contact the case will inherit the groups associated with the contact.

#### Inbound email account

Locks down inbound email accounts in the email client to only list those that belong to the same group as the current user.

#### Default Groups for New Records

Set groups that should always be attached when a specific module record is created, e.g. you can set a group to be assigned to all newly created Account records.

</section>

# System

<section id="bkmrk-system-settings%C2%A0-use"><div class="padding highlightable sticky-parent"><div class="sticky-spacer"><div class="sticky-wrapper is-sticky" id="bkmrk-"><div id="bkmrk--1"></div></div></div></div><div class="padding highlightable sticky-parent"><div><div id="bkmrk--2"></div></div></div>### System Settings 

[![image.png](https://docs.kiyocrm.com/uploads/images/gallery/2025-05/scaled-1680-/2uhimage.png)](https://docs.kiyocrm.com/uploads/images/gallery/2025-05/2uhimage.png)

[![image.png](https://docs.kiyocrm.com/uploads/images/gallery/2025-05/scaled-1680-/VmLimage.png)](https://docs.kiyocrm.com/uploads/images/gallery/2025-05/VmLimage.png)

### User Interface 

These user interface settings apply system-wide, although some (for example **Show Full Names**) can be overridden by individual users in their user profile.

<div class="padding highlightable sticky-parent"><div><div class="sect1"><div class="sectionbody"><div class="sect2"><div class="paragraph">  
</div><table class="tableblock frame-none grid-none stretch"><colgroup><col></col><col></col></colgroup><tbody><tr><td class="tableblock halign-left valign-top">**Listview items per page**

</td><td class="tableblock halign-left valign-top">The number of records to display per page in the list view of each module.

</td></tr><tr><td class="tableblock halign-left valign-top">**System Name**

</td><td class="tableblock halign-left valign-top">This name will be displayed on the browser tab.

</td></tr><tr><td class="tableblock halign-left valign-top">**Current Logo**

</td><td class="tableblock halign-left valign-top">This shows the logo currently displayed on the login screen

</td></tr><tr><td class="tableblock halign-left valign-top">**Select Logo**

</td><td class="tableblock halign-left valign-top">Click **Choose file** select logo file. Images can be .png or .jpg format.

</td></tr><tr><td class="tableblock halign-left valign-top">**Lead Conversion Options**

</td><td class="tableblock halign-left valign-top"> </td></tr><tr><td class="tableblock halign-left valign-top">**Enable inline editing**

</td><td class="tableblock halign-left valign-top">Enables records to be edited from list or detail view by double clicking on the item to be edited.

</td></tr><tr><td class="tableblock halign-left valign-top">**Show Full Names**

</td><td class="tableblock halign-left valign-top">Displays full names for users, rather than usernames in Assigned To fields.

</td></tr><tr><td class="tableblock halign-left valign-top"> </td><td class="tableblock halign-left valign-top"> </td></tr></tbody></table>

<div class="sect3">  
</div></div></div></div></div></div>#### Configure AJAX User Interface 

Click the **Configure Ajax User Interface** link to display the configuration options.

[![image.png](https://docs.kiyocrm.com/uploads/images/gallery/2025-05/scaled-1680-/t8Cimage.png)](https://docs.kiyocrm.com/uploads/images/gallery/2025-05/t8Cimage.png)

Drag and drop modules between the columns to enable/disable AJAX.

[![image.png](https://docs.kiyocrm.com/uploads/images/gallery/2025-05/scaled-1680-/MVximage.png)](https://docs.kiyocrm.com/uploads/images/gallery/2025-05/MVximage.png)

#### Proxy Settings 

Select the **Use Proxy server?** checkbox to configure proxy server address and authentication settings.

#### Google Authentication 

This is where you upload the JSON credential file for Google Calendar Sync.  
See the Google Credentials and Syncing Section.

### Advanced Settings 

<div class="padding highlightable sticky-parent"><div><div class="sect1"><div class="sectionbody"><div class="sect2"><table class="tableblock frame-none grid-none stretch"><colgroup><col></col><col></col></colgroup><tbody><tr><td class="tableblock halign-left valign-top">**Developer Mode**

</td><td class="tableblock halign-left valign-top">Turns off caching so that code changes to files will be seen immediately. See the [Developer Guide](https://docs.suitecrm.com/developer) for more information.

</td></tr><tr><td class="tableblock halign-left valign-top">**vCal Updates Time Period**

</td><td class="tableblock halign-left valign-top">Set the number of months in advance to show free/busy information for invitees when scheduling calls and meetings.

</td></tr></tbody></table>

</div><div class="sect2">  
</div></div></div></div></div>#### Logger Settings 

Specify log filename, extension and size as well as the log level here. See the chapter on logging for more information.

Click the View Log link to view the log file.

### Import Wizard 

[![image.png](https://docs.kiyocrm.com/uploads/images/gallery/2025-05/scaled-1680-/DrXimage.png)](https://docs.kiyocrm.com/uploads/images/gallery/2025-05/DrXimage.png)

The Import Wizard is also available from the sidebar of all import-enabled KiyoCRM modules. Select the module to import data into and click **Next** to launch the wizard.

### Locale 

Set system-wide settings for locale here, including date and time formats, system currency and export settings. Currencies can be added to KiyoCRM via the Currencies panel.

[![image.png](https://docs.kiyocrm.com/uploads/images/gallery/2025-05/scaled-1680-/GUPimage.png)](https://docs.kiyocrm.com/uploads/images/gallery/2025-05/GUPimage.png)

<div class="padding highlightable sticky-parent"><div><div class="sect1"><div class="sectionbody"><div class="paragraph">  
</div><div class="paragraph"><div class="notices note"><div class="literalblock"><div class="content">  
</div></div></div></div></div></div></div></div>```
Note that date and time settings can be overridden by the user in their user profile
```

<div class="padding highlightable sticky-parent"><div><div class="sect1"><div class="sectionbody"><div class="paragraph"><div class="notices note"><div class="literalblock"><div class="content">  
</div></div></div></div></div></div><div class="sect1">  
</div></div></div>### Upgrade Wizard 

The Upgrade Wizard provides a quick and simple way to upgrade your KiyoCRM application. Download the required upgrade package and check your system compatibility before running the wizard.

See Using the Upgrade Wizard for full instructions on upgrading.

### Currencies 

Use this section to add a currency to **KiyoCRM**. The default currency can be set in the [Locale](https://docs.kiyocrm.com/books/kiyocrm-documentation-user-guide-api-setup-configurationkiyocrm/page/system#bkmrk-locale%C2%A0) section.

Entering the ISO 4217 code for the currency will autofill the Currency Name and Currency Symbol fields.

You must also specify a currency conversion rate before saving the new currency settings.

[![image.png](https://docs.kiyocrm.com/uploads/images/gallery/2025-05/scaled-1680-/TiTimage.png)](https://docs.kiyocrm.com/uploads/images/gallery/2025-05/TiTimage.png)

## Backups 

The **KiyoCRM** application files can be backed up using this tool. Please note that you should also perform regular backups of your database - see the vendor’s documentation for details on how to do this.

## Languages 

Download language packs for Store [here](https://crowdin.com/project/suitecrmtranslations).

### Repair 

Selecting Repair from the System Settings panel displays a wide range of repair options for KiyoCRM which will run automatically when the link is clicked. **KiyoCRM** may direct you to run particular Repair commands, for example following an upgrade using the [Upgrade Wizard](https://docs.kiyocrm.com/books/kiyocrm-documentation-user-guide-api-setup-configurationkiyocrm/page/system#bkmrk-upgrade-wizard%C2%A0).

Quick Repair and Rebuild is the most often used command here and will be required after installing a new module via Module Loader for example, or to display changes to code during development when [Developer Mode](https://docs.kiyocrm.com/books/kiyocrm-documentation-user-guide-api-setup-configurationkiyocrm/page/system#bkmrk-advanced-settings%C2%A0) is not set.

When running a Quick Repair and Rebuild, be sure to scroll to the bottom of the page to view any new SQL code which may need to be executed to ensure that your database tables are correctly synced with any changes that have been made.

The following functions are available to you in the section:

<div class="padding highlightable sticky-parent"><div><div class="sect1"><div class="sectionbody"><div class="paragraph">  
</div><div class="dlist"><dl><dt class="hdlist1">Quick Repair and Rebuild</dt><dd>Repairs and rebuilds DB, Extensions, Vardefs, KiyoCRM Dashlets etc.

</dd><dt class="hdlist1">Expand Column Width</dt><dd>Expands certain char, varchar and text columns in database (MSSQL ONLY)

</dd><dt class="hdlist1">Rebuild .htaccess File</dt><dd>Rebuilds .htaccess to limit access to certain files directly

</dd><dt class="hdlist1">Rebuild Config File</dt><dd>Rebuilds config.php by updating version and adding defaults when not explicitly declared

</dd><dt class="hdlist1">Rebuild Relationships</dt><dd>Rebuilds relationship metadata and drops the cache file

</dd><dt class="hdlist1">Rebuild Schedulers</dt><dd>Rebuilds out-of-the-box Scheduler Jobs

</dd><dt class="hdlist1">Rebuild KiyoCRM Dashlets</dt><dd>Rebuilds the KiyoCRM Dashlets cache file

</dd><dt class="hdlist1">Rebuild Javascript Languages</dt><dd>Rebuilds javascript versions of language files

</dd><dt class="hdlist1">Rebuild JS Compressed Files</dt><dd>Copies original Full JS Source files and replaces existing compressed JS files

</dd><dt class="hdlist1">Rebuild JS Grouping Files</dt><dd>Re-concatenates and overwrites existing group files with latest versions of group files

</dd><dt class="hdlist1">Rebuild Minified JS Files</dt><dd>Copies original Full JS Source Files and minifies them, then replaces existing compressed files

</dd><dt class="hdlist1">Repair JS Files</dt><dd>Compresses Existing JS files - includes any changes made, but does not overwrite original JS Source files

</dd><dt class="hdlist1">Repair Non-Lowercase Fields</dt><dd>Repair mixed-case custom table(s) and metadata file(s) to fix issues where code expects lowercase field names

</dd><dt class="hdlist1">Repair Roles</dt><dd>Repairs Roles by adding all new modules that support Access Controls, and by adding any new Access Controls to existing modules

</dd><dt class="hdlist1">Repair Inbound Email Accounts</dt><dd>Repairs Inbound Email accounts and encrypts account passwords

</dd><dt class="hdlist1">Sync Inbound Email Accounts</dt><dd>Sync Inbound Email Accounts and Emails

</dd><dt class="hdlist1">Remove XSS</dt><dd>Removes XSS Vulnerabilities from the database

</dd><dt class="hdlist1">Repair Activities</dt><dd>Repairs Activities (Calls, Meetings) end dates

</dd><dt class="hdlist1">Enable/Disable Seed Users</dt><dd>Quickly enable or disable seed users populated during demo installation.

</dd><dt class="hdlist1">Remove missed files from upload directory</dt><dd>Please note that removal can take a lot of time

</dd></dl></div></div></div><div class="sect1">  
</div></div></div>## Global Search 

The Global Search functionality is used to search for records using the search bar on the main navigation menu. Add or remove modules from the Global Search here.

See the User Interface guide to the global search for more information.

[![image.png](https://docs.kiyocrm.com/uploads/images/gallery/2025-05/scaled-1680-/N7kimage.png)](https://docs.kiyocrm.com/uploads/images/gallery/2025-05/N7kimage.png)

## Diagnostic Tool 

The diagnostic tool allows you to gather system configuration information which can be downloaded via a .zip file for analysis.

[![image.png](https://docs.kiyocrm.com/uploads/images/gallery/2025-05/scaled-1680-/VOaimage.png)](https://docs.kiyocrm.com/uploads/images/gallery/2025-05/VOaimage.png)

<div class="padding highlightable sticky-parent"><div><div class="sect1"><div class="sectionbody"><div class="paragraph">  
</div><table class="tableblock frame-none grid-none stretch" style="width: 100%;"><colgroup><col style="width: 18.9426%;"></col><col style="width: 81.0335%;"></col></colgroup><tbody><tr><td class="tableblock halign-left valign-top">**KiyoCRM config.php**

</td><td class="tableblock halign-left valign-top">Includes a copy of the config.php file from the KiyoCRM root directory. This contains many of the system settings options such as date formats, currency information, password configuration alongside configuration details such as database settings and KiyoCRM version

</td></tr><tr><td class="tableblock halign-left valign-top">**KiyoCRM Custom directory**

</td><td class="tableblock halign-left valign-top">Includes a copy of the custom directory, which contains any field or layout customizations made, either through Studio or via code.

</td></tr><tr><td class="tableblock halign-left valign-top">**phpinfo()**

</td><td class="tableblock halign-left valign-top">Includes the output of the phpinfo() function, containing information about the php configuration on the server

</td></tr><tr><td class="tableblock halign-left valign-top">**MySQL - Configuration Table Dumps**

</td><td class="tableblock halign-left valign-top">Includes a folder MySQL/Table Dumps in the diagnostic zip file with an html file for each configuration table in KiyoCRM. Each file contains field definitions (field names, data types etc), indexes (name, type and fields in the index) and data from the relevant table.

</td></tr><tr><td class="tableblock halign-left valign-top">**MySQL - All Tables Schema**

</td><td class="tableblock halign-left valign-top">Includes the file MySQL/TableSchema/TableSchema.html with two sections for each table in KiyoCRM- field definitions (table name, data types etc) and indexes (name, type and fields in the index)

</td></tr><tr><td class="tableblock halign-left valign-top">**MySQL - General information**

</td><td class="tableblock halign-left valign-top">Includes a file MySQL/MySQL-General-info.html containing database information such as version number and character sets

</td></tr></tbody></table>

<div class="paragraph">  
</div></div></div></div></div>Select the information you require and click **Execute Diagnostic.**

 [![image.png](https://docs.kiyocrm.com/uploads/images/gallery/2025-05/scaled-1680-/jjJimage.png)](https://docs.kiyocrm.com/uploads/images/gallery/2025-05/jjJimage.png)

Once complete, click the link to download the zipped diagnostic file.

## Connectors 

This section to be completed.

## Themes 

From 7.9 onwards, only the Kiyo theme is available. For earlier versions, you can set the default theme, and which other themes are available for users to select here.

[![image.png](https://docs.kiyocrm.com/uploads/images/gallery/2025-05/scaled-1680-/I99image.png)](https://docs.kiyocrm.com/uploads/images/gallery/2025-05/I99image.png)

From 7.10 onwards, there is a choice of theme colors for Kiyo which can be set from the User profile.

## Scheduler 

KiyoCRM uses a number of Scheduler jobs running at scheduled times, supporting functionality such as search indexing, workflows, email notifications, database maintenance and sending campaign emails.

[![image.png](https://docs.kiyocrm.com/uploads/images/gallery/2025-05/scaled-1680-/h4cimage.png)](https://docs.kiyocrm.com/uploads/images/gallery/2025-05/h4cimage.png)

### Setting up the Scheduler 

Scheduler jobs need to be manually enabled. This is done by running a script called cron.php every minute. This, in turn, manages all KiyoCRM jobs according to their proper schedules.

In Windows this is setup using Task Scheduler, and in Linux and iOS, it is setup in crontab. Detailed instructions for your system will be displayed during installation and can also be found on the Schedulers page, under the list of scheduled jobs.

See Scheduler Jobs in KiyoCRM in Linux - the Definitive Guide for an in-depth guide to setting up and managing scheduled jobs in Linux.

### Configuring Scheduled Jobs 

Click on a scheduled job to view settings

[![image.png](https://docs.kiyocrm.com/uploads/images/gallery/2025-05/scaled-1680-/gomimage.png)](https://docs.kiyocrm.com/uploads/images/gallery/2025-05/gomimage.png)

In edit mode, you can set the job status (only Active jobs will run) and configure the interval at which the job runs as well as the start time. Unchecking the 'Advanced Options' box will show a more user-friendly way to set the job interval if you are not familiar with the crontab notation. Re-checking Advanced Options will let you set the initial start time.

[![image.png](https://docs.kiyocrm.com/uploads/images/gallery/2025-05/scaled-1680-/96Eimage.png)](https://docs.kiyocrm.com/uploads/images/gallery/2025-05/96Eimage.png)

## Activity Streams 

By default, the Activity Stream dashlet displays recent updates for the Opportunities, Contacts, Leads and Cases modules.

The Activity Stream admin panel allows you to configure what is displayed on the activity feed and which features are available to users.

[![image.png](https://docs.kiyocrm.com/uploads/images/gallery/2025-05/scaled-1680-/35Rimage.png)](https://docs.kiyocrm.com/uploads/images/gallery/2025-05/35Rimage.png)

<div class="padding highlightable sticky-parent"><div><div class="sect1"><div class="sectionbody"><div class="paragraph">  
</div><table class="tableblock frame-none grid-none stretch"><colgroup><col></col><col></col></colgroup><tbody><tr><td class="tableblock halign-left valign-top">**Enable MyActivity Stream Dashlet:**

</td><td class="tableblock halign-left valign-top">Enables/disables the Activity Stream dashlet for all users

</td></tr><tr><td class="tableblock halign-left valign-top">**Activate Feeds For:**

</td><td class="tableblock halign-left valign-top">Select the modules to display activity for

</td></tr><tr><td class="tableblock halign-left valign-top">**Activate User Feed:**

</td><td class="tableblock halign-left valign-top">Allows users to enter messages in the status update field for broadcast to all users

</td></tr></tbody></table>

<div class="paragraph">  
</div></div></div></div></div>Please see the user interface guide for further information on how to use the Activity Stream.

</section>

# Developer Tools

<div class="padding highlightable sticky-parent" id="bkmrk-"><div class="sticky-spacer"><div class="sticky-wrapper is-sticky" id="bkmrk--1"><div id="bkmrk--2"></div></div></div></div>## Studio 

The Studio tools allow you to customize the information shown in the modules and how it is displayed.

See the dedicated [Studio guide](https://docs.suitecrm.com/admin/administration-panel/studio) for more information on how to use the Studio tools.

## Rename Modules 

Use this panel to rename a **KiyoCRM** module. For example, you may wish to rename Companies as Businesses.

[![image.png](https://docs.kiyocrm.com/uploads/images/gallery/2025-05/scaled-1680-/PDJimage.png)](https://docs.kiyocrm.com/uploads/images/gallery/2025-05/PDJimage.png)

Click on the module you wish to rename. Enter the new singular and plural labels for the module and click **SAVE**.

[![image.png](https://docs.kiyocrm.com/uploads/images/gallery/2025-05/scaled-1680-/MDaimage.png)](https://docs.kiyocrm.com/uploads/images/gallery/2025-05/MDaimage.png)

The new module label will now appear on menus and headings throughout KiyoCRM.

## Module Builder 

Use the Module Builder to create custom modules in KiyoCRM. The process of creating a custom module is as follows:

<div class="padding highlightable sticky-parent" id="bkmrk-create-a-package-to-"><div><div class="sect1"><div class="sectionbody"><div class="paragraph">  
</div><div class="olist arabic">1. Create a package to house the new module(s).
2. Create a module using one of the following templates that KiyoCRM provides for you:
    
    <table class="tableblock frame-none grid-none stretch" style="width: 100%;"><colgroup><col style="width: 10.8323%;"></col><col style="width: 89.1419%;"></col></colgroup><tbody><tr><td class="tableblock halign-left valign-top">**Basic**
    
    </td><td class="tableblock halign-left valign-top">This template provides basic fields such as ID, Date Entered, and Created By. Use this template to create a module from scratch.
    
    </td></tr><tr><td class="tableblock halign-left valign-top">**Company**
    
    </td><td class="tableblock halign-left valign-top">This template provides organization-specific fields such as Company Name, Industry, and Billing Address. Use this template to create a module that is similar to the Companies module.
    
    </td></tr><tr><td class="tableblock halign-left valign-top">**File**
    
    </td><td class="tableblock halign-left valign-top">This template provides document-specific fields such as File Name and Document Type. Use this template to create a module that is similar to the Documents module.
    
    </td></tr><tr><td class="tableblock halign-left valign-top">**Issue**
    
    </td><td class="tableblock halign-left valign-top">This template provides case and bug-specific fields such as ID, Description, and Created By. Use this template to create a module that is similar to the Cases module or Bug Tracker module.
    
    </td></tr><tr><td class="tableblock halign-left valign-top">**Person**
    
    </td><td class="tableblock halign-left valign-top">This template provides individual-specific fields such as salutation, title, name, address, and phone number. Use this template to create a module that is similar to the Contacts module or the Leads module.
    
    </td></tr><tr><td class="tableblock halign-left valign-top">**Sale**
    
    </td><td class="tableblock halign-left valign-top">This template provides opportunity-specific fields such as Lead-Source and Probability. Use this template to create a module that is similar to the Opportunities module.
    
    </td></tr></tbody></table>
    
    Furthermore, you can configure the following options:
    
    <div class="ulist">
    - **Importing:** Selecting this option to allow data import into the module.
    - **Navigation Tab:** By default, this option is enabled to create a tab for the module on the top navigation bar.
        
        ```
        If you want to hide modules temporarily, use <<display_modules_subpanels>> after deployment. Disable this option only for backend modules which will never be shown in the user interface.
        ```
    
    </div>
3. Create new data fields. You can also rename default fields from the template.
4. Customize page layouts for List View, Edit View, Detail View, Sub-panels, Search form, and KiyoCRM Dashlets.
5. Create relationships between the new module and other modules.
6. Save the package and distribute it.

</div><div class="paragraph"><div class="notices tip"><div class="literalblock"><div class="content">  
</div></div></div></div></div></div></div></div>```
Steps 3-5 are optional and can be done in Studio after deployment.
```

<div class="padding highlightable sticky-parent" id="bkmrk--5"><div><div class="sect1"><div class="sectionbody"><div class="paragraph"><div class="notices tip"><div class="literalblock"><div class="content">  
</div></div></div></div><div class="sect2">  
</div></div></div></div></div>### Distribute a Package 

You can choose one of the following options to distribute the package:

<div class="padding highlightable sticky-parent" id="bkmrk-deploy-this-option-i"><div><div class="sect1"><div class="sectionbody"><div class="sect2"><div class="paragraph">  
</div><table class="tableblock frame-none grid-none stretch" style="width: 100%;"><colgroup><col style="width: 10.1234%;"></col><col style="width: 89.8528%;"></col></colgroup><tbody><tr><td class="tableblock halign-left valign-top">**Deploy**

</td><td class="tableblock halign-left valign-top">This option is designed to install the custom module on your local KiyoCRM instance and make it available to users in your organization. After deployment, if needed, you can make further changes to the module in Module Builder and deploy it again to update the installed module. However, note that if you change a deployed custom module in Studio and then re-deploy it from Module Builder, all changes made prior in Studio will be lost.

</td></tr><tr><td class="tableblock halign-left valign-top">**Publish**

</td><td class="tableblock halign-left valign-top">This option is designed for distribution to specific users or customers. The system creates a zip file, which you can save on your local machine. You can then email it to one or more individuals who can use the Module Loader to upload the zip file into their KiyoCRM instance. After the module is installed through Studio, you can add or remove fields and make other changes to a published module.

</td></tr><tr><td class="tableblock halign-left valign-top">**Export**

</td><td class="tableblock halign-left valign-top">This option is designed for distribution to developers. The system creates a zip file, which you can save on your local machine and share with others. Using the Module Loader, developers can install it on their KiyoCRM instance and customize it further in Module Builder if necessary. The package is visible only in Module Builder and, hence, only administrators can access it until it has been deployed.

</td></tr></tbody></table>

</div></div></div><div class="sect1">  
</div></div></div>## History Subpanel 

[![image.png](https://docs.kiyocrm.com/uploads/images/gallery/2025-05/scaled-1680-/8fTimage.png)](https://docs.kiyocrm.com/uploads/images/gallery/2025-05/8fTimage.png)

## Display Modules and Subpanels 

Control which modules and subpanels are visible in **KiyoCRM** by dragging and dropping modules or subpanels between the Displayed and Hidden columns.

This will show or hide modules in **KiyoCRM** for all users. Should you wish to control access to particular modules, this can be done using Role Management. See [Roles and Security Groups](https://docs.suitecrm.com/admin/administration-panel/roles-and-security-groups) for more information.

<div class="padding highlightable sticky-parent" id="bkmrk-allow-users-to-selec"><div><div class="sect1"><div class="sectionbody"><div class="paragraph">  
</div><table class="tableblock frame-none grid-none stretch"><colgroup><col></col><col></col></colgroup><tbody><tr><td class="tableblock halign-left valign-top">**Allow users to select modules to appear in the navigation bar**

</td><td class="tableblock halign-left valign-top">Selecting this option allows users to customize which module tabs are visible from their User Settings.

</td></tr></tbody></table>

<div class="paragraph">  
</div></div></div></div></div>[![image.png](https://docs.kiyocrm.com/uploads/images/gallery/2025-05/scaled-1680-/jhfimage.png)](https://docs.kiyocrm.com/uploads/images/gallery/2025-05/jhfimage.png)

## Module Loader 

Module Loader allows you to install and manage custom modules or plugins for your **KiyoCRM** instance.

Custom module packages that have been created and modified in Module Builder will be displayed in Module Loader once they have been deployed.

For more information on producing packages that can be uploaded using Module Loader, see the [Developer Guide](https://docs.suitecrm.com/developer/module-installer)

[![image.png](https://docs.kiyocrm.com/uploads/images/gallery/2025-05/scaled-1680-/zgQimage.png)](https://docs.kiyocrm.com/uploads/images/gallery/2025-05/zgQimage.png)

Modules and packages that are already installed are listed in the top pane. The lower panel is used to upload packages and will list any package that is uploaded but not yet installed.

### Upload and Install a Package 

Click **Choose File** and browse for the package .zip file. Click **UPLOAD**

Once uploaded, the package details will appear in the lower pane, including the version number, a short description and whether or not the module can be uninstalled.

**UNINSTALL** and **DELETE PACKAGE** options will appear.

Click **INSTALL** to install the module.

[![image.png](https://docs.kiyocrm.com/uploads/images/gallery/2025-05/scaled-1680-/D6dimage.png)](https://docs.kiyocrm.com/uploads/images/gallery/2025-05/D6dimage.png)

On the next screen, if there are no problems detected with the package and it is ready to install you will be asked to click **COMMIT** to complete the installation.

If any errors occur during installation, they will be displayed here. Otherwise, clicking the **Display Log** link will detail the steps taken in the installation process.

[![image.png](https://docs.kiyocrm.com/uploads/images/gallery/2025-05/scaled-1680-/f7Simage.png)](https://docs.kiyocrm.com/uploads/images/gallery/2025-05/f7Simage.png)

Click **BACK TO MODULE LOADER** to return to the Module Loader screen where the newly installed package will appear in the list of installed extensions.

[![image.png](https://docs.kiyocrm.com/uploads/images/gallery/2025-05/scaled-1680-/zgQimage.png)](https://docs.kiyocrm.com/uploads/images/gallery/2025-05/zgQimage.png)

### Uninstall a Package 

For a package to be Un installable it needs to be defined as Un installable in the package manifest file. For more information regarding the manifest file see the [Developer Guide](https://docs.suitecrm.com/developer/module-installer)

Uninstall a package by clicking the buttons next to the package name.

As with the install procedure, you will be asked to confirm the uninstall on the next screen. If the package added any tables to your database, you will be asked to if you wish to keep these, and any data within them, for example if you are replacing an older version of a module with a new one.

Click **COMMIT** to uninstall the package.

If any errors occur during the uninstall they will be displayed here. Otherwise, clicking the **Display Log** link will detail the process.

Click **BACK TO MODULE LOADER** to return to the Module Loader screen where the newly installed package will appear in the list of installed extensions.

An uninstalled module will be listed in the lower panel from where it can be re-installed or deleted.

[![image.png](https://docs.kiyocrm.com/uploads/images/gallery/2025-05/scaled-1680-/pkVimage.png)](https://docs.kiyocrm.com/uploads/images/gallery/2025-05/pkVimage.png)

## Configure Module Menu Filters 

Use this section to configure the module menus on the top navigation bar.

[![image.png](https://docs.kiyocrm.com/uploads/images/gallery/2025-05/scaled-1680-/GAlimage.png)](https://docs.kiyocrm.com/uploads/images/gallery/2025-05/GAlimage.png)

Drag modules from the list to the required menu or delete an item by dragging it to the wastepaper bin icon. Edit the menu name by clicking the pencil icon next to the module name. Delete a menu entirely by clicking the wastepaper bin icon next to the module name.

A new custom menu can be added by clicking **ADD FILTER** Add menu items by dragging and dropping as before

Any changes made will not take effect until you click **SAVE &amp; DEPLOY**

## Dropdown Editor 

The Dropdown Editor shows all the dropdown lists currently installed on the system.

Click on the dropdown name to edit it. If you are unsure which dropdown you require, it can be easier to edit via Studio where you can find the dropdown by its field name. See the [Studio guide](https://docs.suitecrm.com/admin/administration-panel/studio/#_adding_a_dropdown_field) for full instructions on adding or editing a dropdown list.

[![image.png](https://docs.kiyocrm.com/uploads/images/gallery/2025-05/scaled-1680-/IRtimage.png)](https://docs.kiyocrm.com/uploads/images/gallery/2025-05/IRtimage.png)

<div id="bkmrk--15"></div>

# Search

# 1. Elasticsearch

<div id="bkmrk-"></div>This enhancement is only available in KiyoCRM from version 7.11 onwards.

## Table of Contents

<div class="sect1" id="bkmrk-introduction-set-up-"><div class="sectionbody"><div class="paragraph">1. [Introduction](https://docs.suitecrm.com/admin/administration-panel/search/elasticsearch/introduction/)
2. [Set up Elasticsearch](https://docs.suitecrm.com/admin/administration-panel/search/elasticsearch/set-up-elasticsearch/)
3. [Set up Elasticsearch integration](https://docs.suitecrm.com/admin/administration-panel/search/elasticsearch/set-up-suitecrm/)
4. [Search Syntax](https://docs.suitecrm.com/admin/administration-panel/search/elasticsearch/syntax/)
5. [Command Line Tools](https://docs.suitecrm.com/admin/administration-panel/search/elasticsearch/command-line-tools/)
6. [Troubleshooting](https://docs.suitecrm.com/admin/administration-panel/search/elasticsearch/troubleshooting/)

</div></div></div>

# 1.1 Introduction

This enhancement is only available in KiyoCRM from version 7.11 onwards.

[Elasticsearch](https://www.elastic.co/) is an indexing engine that is built specifically to have almost real-time search results, optimized for searching text strings. It is built in Java and runs as a separate server/process.

Elasticsearch can be integrated with KiyoCRM to widely improve search quality and time. To achieve this, search-enabled modules are indexed on the Elasticsearch server. When a search query is received by KiyoCRM it is redirected to the Elasticsearch server, which will perform an optimized search and return the results back to the CRM.

KiyoCRM 7.11 requires Elasticsearch 5.6. KiyoCRM 7.12 requires Elasticsearch 7.

Synchronization between the database and the Elasticsearch index happens in three main ways:

<div class="dlist" id="bkmrk-logic-hooks-every-ti"><dl><dt class="hdlist1">Logic Hooks</dt><dd>Every time a record is updated it gets re-indexed automatically.

</dd><dt class="hdlist1">Scheduled task</dt><dd>A scheduler job will run periodically to make sure that the database and the index are synchronized.

</dd><dt class="hdlist1">Manual indexing</dt><dd>A full or partial index can be requested by an administrator via the admin panel or from a Robo task.

</dd></dl></div>

# 1.2 Set up Elasticsearch

This enhancement is only available in KiyoCRM from version 7.11 onwards.

KiyoCRM 7.11 requires Elasticsearch 5.6. KiyoCRM 7.12 requires Elasticsearch 7.

Elasticsearch requires Java 8 to run, supporting only `Oracle Java` and `OpenJDK`.

The quickest ways of having an Elasticsearch server up and running is by either using the official Docker image, or the .deb package for Debian-based systems (like Ubuntu).

In this guide we will assume that you are attempting to install Elasticsearch on an Ubuntu machine. Refer to the [official documentation](https://www.elastic.co/guide/en/elasticsearch/reference/5.6/install-elasticsearch.html) to know how to install Elasticsearch in different ways.

This guide will teach you how to have a development server up and running with very little configuration, either by installing via Docker or .deb package. Please keep in mind this guide is not suitable for setting up a production Elasticsearch server.

## Install via Docker (recommended) 

Be sure that the current user belongs to the `docker` group or you’ll receive permission issues.

Download image:

<div class="sect1" id="bkmrk-"><div class="sectionbody"><div class="paragraph">  
</div><div class="listingblock"><div class="content"></div></div></div></div>```bash
docker pull docker.elastic.co/elasticsearch/elasticsearch:5.6.10
```

<div class="sect1" id="bkmrk--1"><div class="sectionbody"><div class="listingblock"><div class="content"></div></div><div class="sect2">  
</div></div></div>### Start with `docker run` 

Start Elasticsearch. This is ideal for a test/development server.

<div class="sect1" id="bkmrk--2"><div class="sectionbody"><div class="sect2"><div class="paragraph">  
</div><div class="listingblock"><div class="content"></div></div></div></div></div>```bash
docker run -p 9200:9200 -p 9300:9300 \
-e "discovery.type=single-node" -e "xpack.security.enabled=false" \
docker.elastic.co/elasticsearch/elasticsearch:5.6.10
```

<div class="sect1" id="bkmrk--3"><div class="sectionbody"><div class="sect2"><div class="listingblock"><div class="content"></div></div></div><div class="sect2">  
</div></div></div>### Start with `docker-compose` 

Create a new `docker-compose.yml` file or add the elasticsearch configuration your pre-existing docker-compose.

<div class="sect1" id="bkmrk--4"><div class="sectionbody"><div class="sect2"><div class="paragraph">  
</div><div class="listingblock"><div class="content"></div></div></div></div></div>```yaml
version: '3'
services:
    elasticsearch:
        image: docker.elastic.co/elasticsearch/elasticsearch:5.6.10
        container_name: elasticsearch
        restart: unless-stopped
        ports:
            - 9200:9200
            - 9300:9300
        environment:
            - discovery.type=single-node
            - xpack.security.enabled=false
            - "ES_JAVA_OPTS=-Xms512m -Xmx512m"
```

<div class="sect1" id="bkmrk--5"><div class="sectionbody"><div class="sect2"><div class="listingblock"><div class="content"></div></div><div class="paragraph">  
</div></div></div></div>And start with:

<div class="sect1" id="bkmrk--6"><div class="sectionbody"><div class="sect2"><div class="paragraph">  
</div><div class="listingblock"><div class="content"></div></div></div></div></div>```bash
docker-compose up
```

## Install via .deb (not recommended) 

Download and install the public signing key:

<div class="sect1" id="bkmrk--7"><div class="sectionbody"><div class="paragraph">  
</div><div class="listingblock"><div class="content"></div></div></div></div>```bash
wget -qO - https://artifacts.elastic.co/GPG-KEY-elasticsearch | sudo apt-key add -
```

<div class="sect1" id="bkmrk--8"><div class="sectionbody"><div class="listingblock"><div class="content"></div></div><div class="paragraph">  
</div></div></div>You may need to install the `apt-transport-https` package on Debian before proceeding:

<div class="sect1" id="bkmrk--9"><div class="sectionbody"><div class="paragraph">  
</div><div class="listingblock"><div class="content"></div></div></div></div>```bash
sudo apt-get install apt-transport-https
```

<div class="sect1" id="bkmrk--10"><div class="sectionbody"><div class="listingblock"><div class="content"></div></div><div class="paragraph">  
</div></div></div>Save the repository definition to `/etc/apt/sources.list.d/elastic-5.x.list`:

<div class="sect1" id="bkmrk--11"><div class="sectionbody"><div class="paragraph">  
</div><div class="listingblock"><div class="content"></div></div></div></div>```bash
echo "deb https://artifacts.elastic.co/packages/5.x/apt stable main" | sudo tee -a /etc/apt/sources.list.d/elastic-5.x.list
```

<div class="sect1" id="bkmrk--12"><div class="sectionbody"><div class="listingblock"><div class="content"></div></div><div class="paragraph">  
</div></div></div>Update the repository and install OpenJDK 11 and Elasticsearch:

<div class="sect1" id="bkmrk--13"><div class="sectionbody"><div class="paragraph">  
</div><div class="listingblock"><div class="content"></div></div></div></div>```bash
sudo apt-get update && sudo apt-get install openjdk-11-jre elasticsearch
```

<div class="sect1" id="bkmrk--14"><div class="sectionbody"><div class="listingblock"><div class="content"></div></div><div class="paragraph"><div class="notices note"><div class="paragraph">  
</div></div></div></div></div>You might need to tweak the OpenJDK version to match the one available for your distribution.

Start Elasticsearch with:

<div class="sect1" id="bkmrk--15"><div class="sectionbody"><div class="paragraph">  
</div><div class="listingblock"><div class="content"></div></div></div></div>```bash
sudo systemctl start elasticsearch.service
```

<div class="sect1" id="bkmrk--16"><div class="sectionbody"><div class="listingblock"><div class="content"></div></div><div class="paragraph">  
</div></div></div>or on older Ubuntus:

<div class="sect1" id="bkmrk--17"><div class="sectionbody"><div class="paragraph">  
</div><div class="listingblock"><div class="content"></div></div></div></div>```bash
/etc/init.d/elasticsearch start
```

## Test Installation 

Check if the server is running with:

<div class="sect1" id="bkmrk--18"><div class="sectionbody"><div class="paragraph">  
</div><div class="listingblock"><div class="content"></div></div></div></div>```bash
curl -X GET "localhost:9200/"
```

<div class="sect1" id="bkmrk--19"><div class="sectionbody"><div class="listingblock"><div class="content"></div></div><div class="paragraph">  
</div></div></div>And you should receive something like this:

<div class="sect1" id="bkmrk--20"><div class="sectionbody"><div class="paragraph">  
</div><div class="listingblock"><div class="content"></div></div></div></div>```json
{
  "name" : "B5VzMdk",
  "cluster_name" : "elasticsearch",
  "cluster_uuid" : "KGoWI84GQ8SZipmDaeA7pA",
  "version" : {
    "number" : "5.6.10",
    "build_hash" : "b727a60",
    "build_date" : "2018-06-06T15:48:34.860Z",
    "build_snapshot" : false,
    "lucene_version" : "6.6.1"
  },
  "tagline" : "You Know, for Search"
}
```

<div class="sect1" id="bkmrk--21"><div class="sectionbody"><div class="listingblock"><div class="content"></div></div><div class="paragraph"><div class="notices warning"><div class="paragraph">  
</div></div></div></div></div>Note that the current setup does not provide authentication. Remember to secure your Elasticsearch server before going to production, or your data will be vulnerable!

# 1.3 Set up Elasticsearch integration

This enhancement is only available in KiyoCRM from version 7.11 onwards.

## Configure the Elasticsearch connection 

Go to the admin panel, scroll down to the Search settings, and open the Elasticsearch setting page. Enable Elasticsearch from the checkbox and fill the host, user and password fields. Simply leave user and password blank if you have anonymous access enabled.

If you are running both KiyoCRM and Elasticsearch via Docker, the hostname must be the name of the Elasticsearch container.

[![image.png](https://docs.kiyocrm.com/uploads/images/gallery/2025-05/scaled-1680-/Rlrimage.png)](https://docs.kiyocrm.com/uploads/images/gallery/2025-05/Rlrimage.png)

You can use **Test connection** to see if the current configuration is working.

Once you are satisfied with your settings hit **Save**.

## Initial indexing 

After having saved, perform a full indexing by opening the Elastisearch setting page again and now pressing **Schedule full indexing**. This task starts running within a minute, provided that the crontab has been configured correctly.

## Switch the search engine to Elasticsearch 

Now go to the Search Settings and set `Elasticsearch Engine` as the search engine. You can customize the modules that are used for indexing in the modules section.

[![image.png](https://docs.kiyocrm.com/uploads/images/gallery/2025-05/scaled-1680-/ouNimage.png)](https://docs.kiyocrm.com/uploads/images/gallery/2025-05/ouNimage.png)

## Setup the scheduled task 

The Elasticsearch data is updated each time a record is created, changed, deleted and imported. Nevertheless, a scheduled task keeps the elastic data in sync with the KiyoCRM database.

Go to the admin panel, open Scheduler. Check if a Task with a name like "Perform Elasticsearch index" already exists.

If no such task exists, then on the side panel click "Create Scheduler".

<div class="sect1" id="bkmrk-in-the-jobs-dropdown"><div class="sectionbody"><div class="paragraph">  
</div><div class="ulist">- In the Jobs dropdown, select "Elasticsearch indexer"
- At Job Name, enter a self-chosen title, for example "Perform Elasticsearch index"
- At Interval you specify the frequency at which the job should run. A frequency of about once a day should be sufficient. To have the task run at 4 o’clock at night, click "Advanced Options" and enter 0 at min and 4 at hrs., leave date, mo., day as they are.
- hit **Save**.

</div><div class="paragraph">  
</div></div></div>As AOD Lucene Indexing will no longer be used, edit the following entries in the Scheduler list, set status to "inactive", hit **Save**:

<div class="sect1" id="bkmrk-perform-lucene-index"><div class="sectionbody"><div class="paragraph">  
</div><div class="ulist">- Perform Lucene Index
- Optimize AOD Index

</div><div class="paragraph">  
</div></div></div>Make sure that you have correctly configured the crontab configuration, as described at the bottom of the Schedulers page.

# 1.4 Search Syntax

<section id="bkmrk-this-enhancement-is-">This enhancement is only available in KiyoCRM from version 7.11 onwards.

KiyoCRM Elasticsearch engine makes use of Elasticsearch’s *Query String DSL*. This allows very advanced search query to be performed.

For a complete understanding check the [official documentation](https://www.elastic.co/guide/en/elasticsearch/reference/5.6/query-dsl-query-string-query.html#query-string-syntax). A quick overview will be provided here.

## Examples 

Search for all the records having both 'John' and 'Doe' in any field:

<div class="padding highlightable sticky-parent"><div><div class="sect1"><div class="sectionbody"><div class="paragraph">  
</div><div class="listingblock"><div class="content">  
</div></div></div></div></div></div>```
John AND Doe
```

<div class="padding highlightable sticky-parent"><div><div class="sect1"><div class="sectionbody"><div class="listingblock"><div class="content">  
</div></div><div class="paragraph">  
</div></div></div></div></div>Search for all the records having the first name 'John' (note that this won’t include 'Johnny'):

<div class="padding highlightable sticky-parent"><div><div class="sect1"><div class="sectionbody"><div class="paragraph">  
</div><div class="listingblock"><div class="content">  
</div></div></div></div></div></div>```
name.first:John
```

<div class="padding highlightable sticky-parent"><div><div class="sect1"><div class="sectionbody"><div class="listingblock"><div class="content">  
</div></div><div class="paragraph">  
</div></div></div></div></div>Search for all the records having with the name starting with 'John':

<div class="padding highlightable sticky-parent"><div><div class="sect1"><div class="sectionbody"><div class="paragraph">  
</div><div class="listingblock"><div class="content">  
</div></div></div></div></div></div>```
named:John*
```

<div class="padding highlightable sticky-parent"><div><div class="sect1"><div class="sectionbody"><div class="listingblock"><div class="content">  
</div></div><div class="paragraph">  
</div></div></div></div></div>Search for all the Accounts having 'corp' in their name:

<div class="padding highlightable sticky-parent"><div><div class="sect1"><div class="sectionbody"><div class="paragraph">  
</div><div class="listingblock"><div class="content">  
</div></div></div></div></div></div>```
named:corp AND _type:Accounts
```

<div class="padding highlightable sticky-parent"><div><div class="sect1"><div class="sectionbody"><div class="listingblock"><div class="content">  
</div></div></div></div><div class="sect1">  
</div></div></div>## Joining 

By default, keywords are joined by OR clauses, meaning that searching for `John Doe` will be the same as searching for `John OR Doe`. Of course, results containing both 'John' and 'Doe' will appear on top.

## Boosting 

Names are boosted, meaning that if one of the keywords matches in the name the record will very likely appear on top.

## Wildcards 

By default the entire keywords must match. Thus, searching with 'John' won’t match someone named 'Johnathan'. To do that you need to use a wildcard character. Can be use interchangeably to replace zero or more characters. `?` can be used to replace exactly one character.

Search for both 'John' and 'Johnathan':

<div class="padding highlightable sticky-parent"><div><div class="sect1"><div class="sectionbody"><div class="paragraph">  
</div><div class="listingblock"><div class="content">  
</div></div></div></div></div></div>```
named:john*
```

<div class="padding highlightable sticky-parent"><div><div class="sect1"><div class="sectionbody"><div class="listingblock"><div class="content">  
</div></div><div class="paragraph">  
</div></div></div></div></div>Search for all the surnames starting with either 'Mc' or 'Mac':

<div class="padding highlightable sticky-parent"><div><div class="sect1"><div class="sectionbody"><div class="paragraph">  
</div><div class="listingblock"><div class="content">  
</div></div></div></div></div></div>```
name.last:(Mc* OR Mac*)
```

<div class="padding highlightable sticky-parent"><div><div class="sect1"><div class="sectionbody"><div class="listingblock"><div class="content">  
</div></div><div class="paragraph">  
</div></div></div></div></div>Wildcards can be used at the beginning of the keyword too, but it will make the search slightly slower.

Search for all the records having the last name ending with 'Connor':

<div class="padding highlightable sticky-parent"><div><div class="sect1"><div class="sectionbody"><div class="paragraph">  
</div><div class="listingblock"><div class="content">  
</div></div></div></div></div></div>```
name.last:*connor
```

<div class="padding highlightable sticky-parent"><div><div class="sect1"><div class="sectionbody"><div class="listingblock"><div class="content">  
</div></div></div></div><div class="sect1">  
</div></div></div>## Searching by modules 

You can restrict search to one or more module by using the `_type` keyword and the module name.

Search for all the Users:

<div class="padding highlightable sticky-parent"><div><div class="sect1"><div class="sectionbody"><div class="paragraph">  
</div><div class="listingblock"><div class="content">  
</div></div></div></div></div></div>```
_type:Users
```

<div class="padding highlightable sticky-parent"><div><div class="sect1"><div class="sectionbody"><div class="listingblock"><div class="content">  
</div></div></div></div><div class="sect1">  
</div></div></div>## Fuzzy search 

Using the `~` will make a keyword fuzzy, meaning that it will make a proximity search, finding all matches that have one different character (distance). The distance can be customized by adding a number after the tilde,

Search for 'Mackenzie', 'McKenzie', 'Makenzie', etc.

<div class="padding highlightable sticky-parent"><div><div class="sect1"><div class="sectionbody"><div class="paragraph">  
</div><div class="listingblock"><div class="content">  
</div></div></div></div></div></div>```
MacKenzie~3
```

<div class="padding highlightable sticky-parent"><div><div class="sect1"><div class="sectionbody"><div class="listingblock"><div class="content">  
</div></div></div></div><div class="sect1">  
</div></div></div>## Metadata 

Each records have the following meta fields that can be searched:

<div class="padding highlightable sticky-parent"><div><div class="sect1"><div class="sectionbody"><div class="paragraph">  
</div><div class="ulist">- meta.created.date
- meta.created.user\_id
- meta.created.user\_name
- meta.modified.date
- meta.modified.user\_id
- meta.modified.user\_name
- meta.assigned.user\_id
- meta.assigned.user\_name

</div><div class="paragraph">  
</div></div></div></div></div>Search all the records created by 'John Doe':

<div class="padding highlightable sticky-parent"><div><div class="sect1"><div class="sectionbody"><div class="paragraph">  
</div><div class="listingblock"><div class="content">  
</div></div></div></div></div></div>```
meta.created.user_name:(John Doe)
```

<div class="padding highlightable sticky-parent"><div><div class="sect1"><div class="sectionbody"><div class="listingblock"><div class="content">  
</div></div><div class="paragraph">  
</div></div></div></div></div>Search all the records modified on the first of August.

<div class="padding highlightable sticky-parent"><div><div class="sect1"><div class="sectionbody"><div class="paragraph">  
</div><div class="listingblock"><div class="content">  
</div></div></div></div></div></div>```
meta.modified.date:"2018-08-01"
```

<div id="bkmrk-"></div></section><div id="bkmrk--1"><div>  
</div></div>

# 1.5 Command Line Tools

<section id="bkmrk-this-enhancement-is-">This enhancement is only available in KiyoCRM from version 7.11 onwards.

KiyoCRM’s Elasticsearch integration ships with two useful command-line tools powered by [*Robo*](https://robo.li/).

These two commands allow to perform indexing and searches from the command-line, making debug and integration with external tools easier.

These commands require a working connection to the database, if you are running KiyoCRM behind Docker or a VM, please execute them from a shell on the same host as the KiyoCRM web server.

## elastic:index 

The `elastic:index` command allows to run an indexing from the command-line and see the step-by-step logs. Both partial and full indexing are supported.

### Usage 

```bash
elastic:index [<differential> = 1]
```

<div class="padding highlightable sticky-parent"><div><div class="sect1"><div class="sectionbody"><div class="sect2"><div class="listingblock"><div class="content"></div></div></div><div class="sect2">  
</div></div></div></div></div>### Examples 

Running a full indexing:

<div class="padding highlightable sticky-parent"><div><div class="sect1"><div class="sectionbody"><div class="sect2"><div class="paragraph">  
</div><div class="listingblock"><div class="content"></div></div></div></div></div></div></div>```bash
vendor/bin/robo elastic:index 0
```

<div class="padding highlightable sticky-parent"><div><div class="sect1"><div class="sectionbody"><div class="sect2"><div class="listingblock"><div class="content"></div></div><div class="paragraph">  
</div></div></div></div></div></div>Running a partial indexing:

<div class="padding highlightable sticky-parent"><div><div class="sect1"><div class="sectionbody"><div class="sect2"><div class="paragraph">  
</div><div class="listingblock"><div class="content"></div></div></div></div></div></div></div>```bash
vendor/bin/robo elastic:index 1
```

<div class="padding highlightable sticky-parent"><div><div class="sect1"><div class="sectionbody"><div class="sect2"><div class="listingblock"><div class="content"></div></div><div class="paragraph">  
</div></div></div></div></div></div><span class="image">[![Elasticsearch Index CLI](https://docs.suitecrm.com/images/en/admin/ElasticSearch/ElasticIndexCLI.png)](https://docs.suitecrm.com/images/en/admin/ElasticSearch/ElasticIndexCLI.png)</span>

## elastic:search 

The `elastic:search` command allows you to perform the same kind of queries you would do from the search bar directly from the CLI. It also allows to return a JSON with additional data about the record.

### Usage 

```bash
elastic:search <query> [<size> = 20] [<showJson> = false]
```

<div class="padding highlightable sticky-parent"><div><div class="sect1"><div class="sectionbody"><div class="sect2"><div class="listingblock"><div class="content"></div></div><div class="paragraph">  
</div></div></div></div></div></div>You can use the full query syntax for `query` argument.

The `size` option specifies the number of results.

When the `showJson` option is enabled, a JSON will be returned for each result

### Examples 

Search for everything using the keyword 'Rohan':

<div class="padding highlightable sticky-parent"><div><div class="sect1"><div class="sectionbody"><div class="sect2"><div class="paragraph">  
</div><div class="listingblock"><div class="content"></div></div></div></div></div></div></div>```bash
vendor/bin/robo elastic:search "rohan"
```

<div class="padding highlightable sticky-parent"><div><div class="sect1"><div class="sectionbody"><div class="sect2"><div class="listingblock"><div class="content"></div></div><div class="paragraph">  
</div></div></div></div></div></div><span class="image">[![Elasticsearch CLI](https://docs.suitecrm.com/images/en/admin/ElasticSearch/ElasticSearchCLI.png)](https://docs.suitecrm.com/images/en/admin/ElasticSearch/ElasticSearchCLI.png)</span>

Search for the first account named 'Maxwell' and show a JSON:

<div class="padding highlightable sticky-parent"><div><div class="sect1"><div class="sectionbody"><div class="sect2"><div class="paragraph">  
</div><div class="listingblock"><div class="content"></div></div></div></div></div></div></div>```bash
vendor/bin/robo elastic:search "_type:Accounts AND named:Maxwell" 1 true
```

<div id="bkmrk-"></div></section><div id="bkmrk--1"></div>

# 1.6 Troubleshooting

<section id="bkmrk-this-enhancement-is-">This enhancement is only available in KiyoCRM from version 7.11 onwards.

In order to make the troubleshooting process easier for the Elasticsearch extension, a separate file is used to offer very verbose and dedicated logging: `search_index.log`. This is mostly because the indexing procedures are run in the background, where they are hard to debug. Logging calls get redirected to the standard logging, filtered with the configured logging level.

In addition to checking the logs, you could try running the search or the indexing from the command-line using the [command line tools](https://docs.kiyocrm.com/books/kiyocrm-documentation-user-guide-api-setup-configurationkiyocrm/page/15-command-line-tools). Given the verbosity of the console output, this should surely help to narrow down the issue.

Finally, enabling **developer mode** in the admin settings, will provide a clear exception page if the error happens at some point during the search process.

<span class="image">[![An example of detailed error page](https://docs.suitecrm.com/images/en/admin/ElasticSearch/ErrorPage.png)](https://docs.suitecrm.com/images/en/admin/ElasticSearch/ErrorPage.png)</span>

<div id="bkmrk-"></div></section><div id="bkmrk--1"></div>

# Studio

<section id="bkmrk-introduction%C2%A0-the-st">## Introduction 

<div class="padding highlightable sticky-parent"><div class="sticky-spacer"><div class="sticky-wrapper is-sticky" id="bkmrk-"><div id="bkmrk--1"><div id="bkmrk--2"></div></div></div></div></div><div class="padding highlightable sticky-parent"><div><div id="bkmrk--3"></div></div></div>The Studio tools allow you to customize the information shown in the modules and how it is displayed.

To access Studio, log in as an Administrator user. In the top-right corner of the screen you find a menu with a profile figure icon. Click this icon, then select "Admin". Scroll down the page and click "Studio".

When Studio is opened, it will display a list of all the modules which can be customised. Click to select the required module.

[![image.png](https://docs.kiyocrm.com/uploads/images/gallery/2025-05/scaled-1680-/JhRimage.png)](https://docs.kiyocrm.com/uploads/images/gallery/2025-05/JhRimage.png)

For each module, there are several components which can be edited.

[![image.png](https://docs.kiyocrm.com/uploads/images/gallery/2025-05/scaled-1680-/VhHimage.png)](https://docs.kiyocrm.com/uploads/images/gallery/2025-05/VhHimage.png)

**Labels:** View/edit field labels and the module name

**Fields:** View/edit field properties and add new fields

**Relationships:** View/edit/add relationships between modules

**Layouts:** Customise the edit/detail/list and filter views

**Subpanels:** Set which columns are displayed on module subpanels

### Labels 

Selecting the Labels component lists all the field labels for the module. Edits to labels will be reflected on the module layouts.

Click and type to make the required changes to the labels and then click **SAVE &amp; DEPLOY**.

A confirmation message will appear once the changes have been saved. You should now be able to see the changes to the labels when you navigate to the module.

[![image.png](https://docs.kiyocrm.com/uploads/images/gallery/2025-05/scaled-1680-/u5Pimage.png)](https://docs.kiyocrm.com/uploads/images/gallery/2025-05/u5Pimage.png)

Clicking **CHANGE MODULE NAME** will allow you to change the label for the module itself. See the [Rename Modules](https://docs.suitecrm.com/admin/administration-panel/developer-tools/#_rename_modules) section of the Developer Tools documentation for more details.

### Fields 

Selecting the Fields component displays all the available fields for the module, with their display label and data type.

[![image.png](https://docs.kiyocrm.com/uploads/images/gallery/2025-05/scaled-1680-/xhsimage.png)](https://docs.kiyocrm.com/uploads/images/gallery/2025-05/xhsimage.png)

#### Adding A Field 

You can add a custom field to the selected module by clicking **ADD FIELD**.

[![image.png](https://docs.kiyocrm.com/uploads/images/gallery/2025-05/scaled-1680-/tb3image.png)](https://docs.kiyocrm.com/uploads/images/gallery/2025-05/tb3image.png)

Enter the details for the new field. Depending on the data type selected for the field, some or all of the following properties can be set for the field:

<div class="padding highlightable sticky-parent"><div><div class="sect2"><div class="sect3"><div class="paragraph">  
</div><table class="tableblock frame-none grid-none stretch" style="width: 100%;"><colgroup><col style="width: 14.8912%;"></col><col style="width: 85.085%;"></col></colgroup><tbody><tr><td class="tableblock halign-left valign-top">**Data Type:**

</td><td class="tableblock halign-left valign-top">The type you select determines what kind of characters can be entered for the field. For example, only numbers that are integers may be entered into fields that are of the Integer data type.

</td></tr><tr><td class="tableblock halign-left valign-top">**Field Name:**

</td><td class="tableblock halign-left valign-top">The field name must be alphanumeric and must not contain any spaces. Underscores are valid.

</td></tr><tr><td class="tableblock halign-left valign-top">**Display Label**

</td><td class="tableblock halign-left valign-top">The label which will be displayed alongside the field in the views.

</td></tr><tr><td class="tableblock halign-left valign-top">**System Label:**

</td><td class="tableblock halign-left valign-top">This label is used to refer to the field in the code.

</td></tr><tr><td class="tableblock halign-left valign-top">**Help Text:**

</td><td class="tableblock halign-left valign-top">Optional explanatory text to display temporarily when the user hovers over the field.

</td></tr><tr><td class="tableblock halign-left valign-top">**Comment Text:**

</td><td class="tableblock halign-left valign-top">This is only visible in Studio and Module Builder, as a description for administrator use.

</td></tr><tr><td class="tableblock halign-left valign-top">**Default Value:**

</td><td class="tableblock halign-left valign-top">The field will have the value set here unless the user enters a new value.

</td></tr><tr><td class="tableblock halign-left valign-top">**Max Size:**

</td><td class="tableblock halign-left valign-top">The maximum number of characters that can be entered into the field.

</td></tr><tr><td class="tableblock halign-left valign-top">**Mass Update:**

</td><td class="tableblock halign-left valign-top">Enable to mass Update feature for this field.

</td></tr><tr><td class="tableblock halign-left valign-top">**Required Field:**

</td><td class="tableblock halign-left valign-top">Whether or not a value must be entered for the field before a record containing the field can be saved.

</td></tr><tr><td class="tableblock halign-left valign-top">**Audit:**

</td><td class="tableblock halign-left valign-top">If this is selected, changes made to the field value can be tracked from the record’s Change Log.

</td></tr><tr><td class="tableblock halign-left valign-top">**Inline Edit:**

</td><td class="tableblock halign-left valign-top">Whether or not the field can be edited inline, when this option is enabled in the [System Settings](https://docs.kiyocrm.com/books/kiyocrm-documentation-user-guide-api-setup-configurationkiyocrm/page/system).

</td></tr><tr><td class="tableblock halign-left valign-top">**Importable:**

</td><td class="tableblock halign-left valign-top">Select an option to allow, disallow or require the field to be imported when using the Import Wizard.

</td></tr><tr><td class="tableblock halign-left valign-top">**DuplicateMerge:**

</td><td class="tableblock halign-left valign-top">Select an option to enable or disable the Merge Duplicates and Find Duplicates features.

</td></tr></tbody></table>

</div><div class="sect3">  
</div></div></div></div>#### Field Types 

Studio comes out-of-the-box with many different types of fields which can be created in KiyoCRM.

The following data types are available when creating fields in Studio:

<div class="padding highlightable sticky-parent"><div><div class="sect2"><div class="sect3"><div class="paragraph">  
</div><table class="tableblock frame-none grid-none stretch" style="width: 100%;"><colgroup><col style="width: 12.7457%;"></col><col style="width: 87.2305%;"></col></colgroup><tbody><tr><td class="tableblock halign-left valign-top">**Data Types**

</td><td class="tableblock halign-left valign-top">**Description**

</td></tr><tr><td class="tableblock halign-left valign-top">**Address**

</td><td class="tableblock halign-left valign-top">Creates fields for street, city, postal code, state, and country.  
Custom address fields cannot be grouped together like stock address fields (e.g. billing address)

</td></tr><tr><td class="tableblock halign-left valign-top">**Checkbox**

</td><td class="tableblock halign-left valign-top">Creates a checkbox for data fields with a Yes/No action

</td></tr><tr><td class="tableblock halign-left valign-top">**Currency**

</td><td class="tableblock halign-left valign-top">Creates a field to enter a currency value. The system automatically creates a dropdown of the currency type if the field does not already exist in that module

</td></tr><tr><td class="tableblock halign-left valign-top">**Date**

</td><td class="tableblock halign-left valign-top">Creates a field to enter a date. Includes a button for a calendar popup

</td></tr><tr><td class="tableblock halign-left valign-top">**DateTime**

</td><td class="tableblock halign-left valign-top">Creates a field to enter the date and time. Includes a Calendar icon button to choose a date via the popup calendar, as well as a dropdown list to select the time

</td></tr><tr><td class="tableblock halign-left valign-top">**Decimal**

</td><td class="tableblock halign-left valign-top">Creates a field to hold a number rounded to a specified decimal precision. KiyoCRM stores the exact representation of the number in the database (e.g. For a precision of 2: 2.539 is stored as 2.60)

</td></tr><tr><td class="tableblock halign-left valign-top">**DropDown**

</td><td class="tableblock halign-left valign-top">Creates a field where you can associate a dropdown list of values

</td></tr><tr><td class="tableblock halign-left valign-top">**DynamicDropdown**

</td><td class="tableblock halign-left valign-top">Creates a dropdown list from which you can relate a single record from a variety of modules.

</td></tr><tr><td class="tableblock halign-left valign-top">**Flex Relate**

</td><td class="tableblock halign-left valign-top">To specify a one-to-many relationship with another module but allows linking to several kinds of modules. For example, Notes use a Flex Relate so they can be related to Companies, Contacts, Leads, etc. Only one Flex Relate-type field is allowed per module, which explains why you can’t add another field of this kind to the Companies, Calls, Meetings, Notes, and Tasks modules.

</td></tr><tr><td class="tableblock halign-left valign-top">**Float**

</td><td class="tableblock halign-left valign-top">Creates a field to hold a number rounded to a specified decimal precision. KiyoCRM stores the value differently based on the database platform KiyoCRM is running on

</td></tr><tr><td class="tableblock halign-left valign-top">**HTML**

</td><td class="tableblock halign-left valign-top">Creates static HTML-formatted text to display in record views

</td></tr><tr><td class="tableblock halign-left valign-top">**IFrame**

</td><td class="tableblock halign-left valign-top">Creates a field to store a URL to display in an iFrame in record views. This URL can also be generated dynamically from data in other fields.

</td></tr><tr><td class="tableblock halign-left valign-top">**Image**

</td><td class="tableblock halign-left valign-top">Creates an image field to upload an image to display on a record

</td></tr><tr><td class="tableblock halign-left valign-top">**Integer**

</td><td class="tableblock halign-left valign-top">Creates a field to specify positive or negative numbers with no decimal places

</td></tr><tr><td class="tableblock halign-left valign-top">**Multiselect**

</td><td class="tableblock halign-left valign-top">Creates a dropdown list of values where multiple values can be selected at once

</td></tr><tr><td class="tableblock halign-left valign-top">**Phone**

</td><td class="tableblock halign-left valign-top">Creates a field to enter a phone number

</td></tr><tr><td class="tableblock halign-left valign-top">**Radio**

</td><td class="tableblock halign-left valign-top">Creates a radio button for a user to select one value from a dropdown list

</td></tr><tr><td class="tableblock halign-left valign-top">**Relate**

</td><td class="tableblock halign-left valign-top">Creates a field to associate a record with another module’s record as a one-way relationship. You can add multiple Relate fields to a module.  
Relate fields and custom relationships are independent of each other. Changes made to either one are not reflected in the other. Relate fields can be added to a report, but any data on the related record cannot be accessed in the report. To access related record data in a report you will need to create a custom relationship

</td></tr><tr><td class="tableblock halign-left valign-top">**TextArea**

</td><td class="tableblock halign-left valign-top">Creates an open text area field for multiple lines of text

</td></tr><tr><td class="tableblock halign-left valign-top">**URL**

</td><td class="tableblock halign-left valign-top">Creates a field to store a URL and display as a clickable link. This URL can also be generated dynamically from data in other fields.

</td></tr><tr><td class="tableblock halign-left valign-top">**Text Field**

</td><td class="tableblock halign-left valign-top">Creates a field for a single line of text

</td></tr></tbody></table>

</div><div class="sect3">  
</div></div></div></div>#### Adding A Dropdown Field 

When adding a field of type Dropdown, you need to additionally specify the dropdown list. This contains the list items which will be displayed for the dropdown.

[![image.png](https://docs.kiyocrm.com/uploads/images/gallery/2025-05/scaled-1680-/sCMimage.png)](https://docs.kiyocrm.com/uploads/images/gallery/2025-05/sCMimage.png)

You can select an existing dropdown list if appropriate or click **ADD** to create a new one.

[![image.png](https://docs.kiyocrm.com/uploads/images/gallery/2025-05/scaled-1680-/EgYimage.png)](https://docs.kiyocrm.com/uploads/images/gallery/2025-05/EgYimage.png)

For each item to include in the list, enter:

<div class="padding highlightable sticky-parent"><div><div class="sect2"><div class="sect3"><div class="paragraph">  
</div><table class="tableblock frame-none grid-none stretch"><colgroup><col></col><col></col></colgroup><tbody><tr><td class="tableblock halign-left valign-top">**Item Name**

</td><td class="tableblock halign-left valign-top">Used to refer to the dropdown item in the code, this must be alphanumeric, begin with a letter and contain no spaces.

</td></tr><tr><td class="tableblock halign-left valign-top">**Display Name**

</td><td class="tableblock halign-left valign-top">The text shown to the user. This may contain spaces and special characters

</td></tr></tbody></table>

<div class="paragraph">  
</div></div></div></div></div>Click **ADD** to add each new entry.

To add a blank item, click **ADD** without entering any values for the Item Name and the Display Label. It is not possible to add a blank name, but with a non-blank label.

The list can be optionally sorted alphabetically by the Display Label by clicking the appropriate **SORT** button. If you want to set a default item, this is not the place to configure that; instead, look for a "default value" option in the settings for the field that will be using this dropdown.

Click **SAVE** to save the new dropdown list and return to the field properties.

The dropdown list items you have created will now be visible. If desired, you can select a default value for the dropdown.

[![image.png](https://docs.kiyocrm.com/uploads/images/gallery/2025-05/scaled-1680-/lKdimage.png)](https://docs.kiyocrm.com/uploads/images/gallery/2025-05/lKdimage.png)

#### Editing A Field 

Click on a field to view the field’s properties. These can be edited in the same way as detailed above for adding a new field.

#### Deleting A Field 

Only fields that have been created in Studio can be deleted via Studio. Core fields cannot be deleted.

Select the field you wish to delete and click **DELETE** A warning message will appear asking you to confirm the deletion as both the field and any data related to the custom field will be deleted from the database and the field will no longer appear on any module views.

[![image.png](https://docs.kiyocrm.com/uploads/images/gallery/2025-05/scaled-1680-/0RMimage.png)](https://docs.kiyocrm.com/uploads/images/gallery/2025-05/0RMimage.png)

### Relationships 

A relationship represents a two-way link between two modules. Selecting the Relationships component displays all the relationships between the currently selected module and other deployed modules.

[![image.png](https://docs.kiyocrm.com/uploads/images/gallery/2025-05/scaled-1680-/ZXsimage.png)](https://docs.kiyocrm.com/uploads/images/gallery/2025-05/ZXsimage.png)

Click on a relationship to view the relationship properties.

Click **ADD RELATIONSHIP** to add a new relationship for the selected module.

[![image.png](https://docs.kiyocrm.com/uploads/images/gallery/2025-05/scaled-1680-/MbIimage.png)](https://docs.kiyocrm.com/uploads/images/gallery/2025-05/MbIimage.png)

The **Primary Module** will be set to the currently selected module.

Specify the relationship type:

**One to One**

With a One-to-One relationship, each record in the primary module may only have one related record in the related module, and vice versa. This type of relationship will add a relate field to both modules' records.

**One to Many**

With a One-To-Many relationship, records in the primary module may be related to one or more records in the related module, but each related module record is only related to one primary module record. This will add a relate field to the related module’s records, but the primary module will display a subpanel where more than one related module records can be added.

**Many to Many**

With a Many-To-Many relationship, records in the primary module can be related to one or more records in the related module, and vice versa. Each module’s records will contain a subpanel for the related records.

Select the **Related Module** from the dropdown list.

Where there are subpanels, subpanel views for the module(s) can be selected.

Click **SAVE AND DEPLOY** to save the relationship.

### Layouts 

Layouts can be edited in Studio to customize the module views shown to users.

#### Edit View 

Edit view is displayed when editing a record or creating a new one.

[![image.png](https://docs.kiyocrm.com/uploads/images/gallery/2025-05/scaled-1680-/BtKimage.png)](https://docs.kiyocrm.com/uploads/images/gallery/2025-05/BtKimage.png)

The current layout is displayed in the main panel on the right-hand side. Unused fields are shown in the list on the left hand side.

Select **Sync to Detail View** if you wish any changes made to fields or field placement to be automatically applied to the corresponding Detail View. Note that layout changes cannot be made to the Detail View when this option is set.

**Adding Fields**

Fields can be added to the view either as a new row in an existing panel (section), or by adding a new panel.

Click and drag the **New Row** or **New Panel** element to the desired location in the layout on the right-hand side.

[![image.png](https://docs.kiyocrm.com/uploads/images/gallery/2025-05/scaled-1680-/ykTimage.png)](https://docs.kiyocrm.com/uploads/images/gallery/2025-05/ykTimage.png)

If you have added a new panel, this can be renamed by clicking the pencil icon. This will open the edit view for the panel label. Edit the label and click **SAVE** to return to the layout.

[![image.png](https://docs.kiyocrm.com/uploads/images/gallery/2025-05/scaled-1680-/WxSimage.png)](https://docs.kiyocrm.com/uploads/images/gallery/2025-05/WxSimage.png)

A new row will automatically be created with two columns.

Drag and drop the required fields to the new row. Clicking the + button will span the field across both columns.

Click **SAVE AND DEPLOY** to save the layout changes. These should now be visible when you navigate to the Edit view for the module.

**Deleting Fields**

Delete fields, row or panels from the layout by dragging them to the Delete area on the left-hand side.

Click **SAVE AND DEPLOY** to save the layout changes.

#### Detail View 

Detail View is a read-only view, shown when a record is opened.

The Detail View layout can be edited in exactly the same way as for the Edit View. Note that if you have **Sync to Detail View** selected on the Edit View, you will not be able to make changes to the Detail View.

#### List View 

The List View is shown when a module is opened and lists all the records in the module.

Customise which fields are shown in the list view, and the order in which they are displayed here.

<div class="padding highlightable sticky-parent"><div><div class="sect2"><div class="sect3"><div class="paragraph">  
</div><table class="tableblock frame-none grid-none stretch"><colgroup><col></col><col></col></colgroup><tbody><tr><td class="tableblock halign-left valign-top">**Default**

</td><td class="tableblock halign-left valign-top">Fields in this column will be shown by default in the list view. Re-order by dragging and dropping the field names.

</td></tr><tr><td class="tableblock halign-left valign-top">**Available**

</td><td class="tableblock halign-left valign-top">Fields in this column are available for users to add to the list view using the Column Chooser button on the list view.

</td></tr><tr><td class="tableblock halign-left valign-top">**Hidden**

</td><td class="tableblock halign-left valign-top">These fields are hidden from users and cannot be added to the view.

</td></tr></tbody></table>

<div class="paragraph">  
</div></div></div></div></div>Drag and drop the module fields between the columns to customize the list view.

### Subpanels 

Use this section to customize which fields are shown on a particular subpanel.

Select the subpanel. Fields shown in the Default column will be shown on the subpanel. Drag and drop the required fields between the two columns.

Click **SAVE &amp; DEPLOY**

[![image.png](https://docs.kiyocrm.com/uploads/images/gallery/2025-05/scaled-1680-/SZJimage.png)](https://docs.kiyocrm.com/uploads/images/gallery/2025-05/SZJimage.png)

### Export Customizations 

You can export module customizations that you have made in Studio, and upload these into another KiyoCRM instance via [Module Loader](https://docs.suitecrm.com/admin/administration-panel/developer-tools#_module_loader)

[![image.png](https://docs.kiyocrm.com/uploads/images/gallery/2025-05/scaled-1680-/tIcimage.png)](https://docs.kiyocrm.com/uploads/images/gallery/2025-05/tIcimage.png)

Enter a name for the package, and optional author and description details.

Select the module(s) that contain the customisations you wish to export. Only modules containing customisations will appear for you to select.

Click **EXPORT**. This will create and download a .zip file containing the module customizations. Use [Module Loader](https://docs.kiyocrm.com/books/kiyocrm-documentation-user-guide-api-setup-configurationkiyocrm/page/developer-tools#bkmrk-module-loader%C2%A0) to upload and install the customizations on another KiyoCRM instance.

<div id="bkmrk--4"></div></section><div id="bkmrk--5"><div>  
</div></div>

# Google Maps

This section allows you to configure the settings for integrating KiyoCRM with Google Maps.

## Google Map Setup 

Before you start working with maps, you must obtain an API key and save it in the system. To do this, in the Administration panel in the subsection **Google services** → **Setting up Google maps** click on the **Get API key** link, follow the requested steps to get the key and save it in the map configuration settings.

The description of the main settings of the maps is presented in detail in the system interface, therefore, these parameters will not be described here.

[![image.png](https://docs.kiyocrm.com/uploads/images/gallery/2025-05/scaled-1680-/GDMbhSimage.png)](https://docs.kiyocrm.com/uploads/images/gallery/2025-05/GDMbhSimage.png)

A detailed description of the Google Maps API is available at [Google Maps](https://developers.google.com/maps/).

## Geocoding addresses 

When this section is selected, the automatic assignment of geographical coordinates to the system addresses immediately begins.

If you only need to **view** the results of geocoding performed earlier, use the module **Geocoding results**.

Depending on the size of the database and the speed of data processing, the process can take a long time. At the end of geocoding, the results will be shown, for example:

[![image.png](https://docs.kiyocrm.com/uploads/images/gallery/2025-05/scaled-1680-/5jyimage.png)](https://docs.kiyocrm.com/uploads/images/gallery/2025-05/5jyimage.png)

If Google doesn’t use a Premium **account**, then Google Maps imposes a limit on determining the number of coordinates equal to 2500 requests per day for one ip-address - detailed information can be found at [Google Maps Geocoding API Usage Limits](https://developers.google.com/maps/documentation/geocoding/usage-limits). To avoid repeated queries, all geocoding results are cached in the system, as described in the section below.

To perform automatic geocoding of system addresses, it is recommended to configure the appropriate task for CRON by adding the URL `./index.php?module=jjwg_Maps&entryPoint=jjwg_Maps&cron=1` to the task of the scheduler and perform it at an appropriate time.

[![image.png](https://docs.kiyocrm.com/uploads/images/gallery/2025-05/scaled-1680-/Luaimage.png)](https://docs.kiyocrm.com/uploads/images/gallery/2025-05/Luaimage.png)

For more information about setting up a job, see the [Scheduler](https://docs.kiyocrm.com/books/kiyocrm-documentation-user-guide-api-setup-configurationkiyocrm/page/system#bkmrk-scheduler%C2%A0).

If it is necessary to geocode addresses with third-party utilities, you can export addresses from the corresponding modules. At the end of geocoding, import the updated addresses through the module **Address cache**.

If you need to clear the cache of individual modules, use the **Reset** link in the right part of the table. If you need to clear the entire cache, use the appropriate link at the bottom of the page.

## Geocoding results 

This option displays previous results of the option **Geocoding addresses**.

## Geocoding Testing 

The module is designed to quickly obtain the geographical coordinates of the entered address.

## Address Cache 

The module is intended for viewing, changing and importing data into the cache of geocoded addresses.

# SSO

<section id="bkmrk-azure-saml-single-si"># Azure SAML Single Sign On

<div class="padding highlightable sticky-parent"><div><div id="bkmrk-"></div><div class="paragraph"><div class="notices info"><div class="paragraph">  
</div></div></div></div></div>The following documentation is for KiyoCRM Version 7.x; to see documentation on the same topic for Version 8+

## Azure SAML Single Sign On 

KiyoCRM can utilize a third-party identity provider such as Microsoft Azure Active Directory and the SAML protocol to achieve single sign-on authentication. You can then use Azure AD to control who has access to KiyoCRM and enable automatic sign in.

**Considerations**

<div class="padding highlightable sticky-parent"><div><div class="sect1"><div class="sectionbody"><div class="paragraph">  
</div><div class="ulist">- We recommend using the latest release of KiyoCRM 7.x to benefit from the latest improvements and fixes.
- The user must exist in both Azure AD and KiyoCRM for login to be successful.
- The usernames in KiyoCRM 7.x must match the email address in Azure. If you have used abbreviated or shortened usernames these should be changed to email addresses in advance.

</div></div></div><div class="sect1">  
</div></div></div>## 1. Setup APP in Azure 

The first step is to create a new Enterprise Application in Azure. This app defines how Azure, as the Identify provider (IdP) will interact with your KiyoCRM instance. Doing so will also provide you with the required values and certificate to configure KiyoCRM. SAML apps in Azure are unique to each instance, as the CRM URL is verified as part of the sign in process. If SAML is needed for multiple staging, test or production environments a new app will be needed for each.

### 1.1. Create the new application 

Login to Microsoft Azure and navigate to 'Azure Active Directory' section using the icon on the home page

From the left-hand Menu select 'Enterprise applications'

<span class="image">[![SuiteCRM SSO Azure side menu](https://docs.suitecrm.com/images/en/admin/sso/suitecrm-sso-azure-side-menu.png)](https://docs.suitecrm.com/images/en/admin/sso/suitecrm-sso-azure-side-menu.png)</span>

From the top menu, select 'New Application'

<span class="image">[![SuiteCRM SSO Azure top menu](https://docs.suitecrm.com/images/en/admin/sso/suitecrm-sso-azure-top-menu.png)](https://docs.suitecrm.com/images/en/admin/sso/suitecrm-sso-azure-top-menu.png)</span>

From the top menu, select 'Create your own application'

A new side window will open; you can use this to create your application.

<div class="padding highlightable sticky-parent"><div><div class="sect1"><div class="sectionbody"><div class="sect2"><div class="paragraph">  
</div><div class="olist arabic">1. Enter a descriptive name such as KiyoCRM SAML Authentication'
2. Choose 'Integrate any other application you don’t find in the gallery (non-gallery)'
3. Click Create and you will be taken to the 'Application Overview' after a short delay

</div><div class="paragraph">  
</div></div></div></div></div></div>[![Screenshot 9.png](https://docs.kiyocrm.com/uploads/images/gallery/2025-05/scaled-1680-/screenshot-9.png)](https://docs.kiyocrm.com/uploads/images/gallery/2025-05/screenshot-9.png)

### 1.2. Configure the new application 

From the left-hand Menu select 'Single sign-on' from the Manage category

<span class="image">[![SuiteCRM SSO Azure Application side menu](https://docs.suitecrm.com/images/en/admin/sso/suitecrm-sso-azure-application-side-menu.png)](https://docs.suitecrm.com/images/en/admin/sso/suitecrm-sso-azure-application-side-menu.png)</span>

Select SAML from the available options

<span class="image">[![SuiteCRM SSO Azure Application protocol select](https://docs.suitecrm.com/images/en/admin/sso/suitecrm-sso-azure-application-protocol-select.png)](https://docs.suitecrm.com/images/en/admin/sso/suitecrm-sso-azure-application-protocol-select.png)</span>

Click on the pen icon to Edit the Basic SAML Configuration

<span class="image">[![SuiteCRM SSO Azure Application SAML configuration](https://docs.suitecrm.com/images/en/admin/sso/suitecrm-sso-azure-application-saml-configuration.png)](https://docs.suitecrm.com/images/en/admin/sso/suitecrm-sso-azure-application-saml-configuration.png)</span>

KiyoCRM uses the same value for Entity ID, ACS URL and Sign On URL.

The value should be your KiyoCRM URL in the following format:

**{CRM URL}/index.php?action=Login&amp;module=Users**

For example: [https://kiyocrmdemo.com/index.php?action=Login&amp;module=Users](https://demo.suiteondemand.com/index.php?action=Login&module=Users)

<div class="padding highlightable sticky-parent"><div><div class="sect1"><div class="sectionbody"><div class="sect2"><div class="paragraph">  
</div><div class="olist arabic">1. In the Identifier (Entity ID) section, enter your KiyoCRM URL as prepared in the previous step
2. In the Reply URL (Assertion Consumer Service URL) section, enter your KiyoCRM URL as prepared in the previous step
3. In the Sign on URL (Optional) section, enter your KiyoCRM URL as prepared in the previous step
4. Verify that the same URL is present in all three of these fields, then click Save

</div></div><div class="sect2">  
</div></div></div></div></div>### 1.3. Store the required settings for later use 

Scroll down to the SAML Certificates section and download the Certificate (Base64) and store it for later

Scroll further down and store the Login URL and Logout URL and again, store these for later.

<span class="image">[![SuiteCRM SSO Azure Application SAML settings](https://docs.suitecrm.com/images/en/admin/sso/suitecrm-sso-azure-application-saml-settings.png)](https://docs.suitecrm.com/images/en/admin/sso/suitecrm-sso-azure-application-saml-settings.png)</span>

## 2. Add users to APP in Azure 

Before your users can login to KiyoCRM using SSO with Azure, they must be added to the newly created application. Users can be added individually or in groups, depending upon how your Azure Active Directory is configured. Only users which have been added to the KiyoCRM SAML Authentication' Application will be able to login.

From within your newly created Enterprise Application:

<div class="padding highlightable sticky-parent"><div><div class="sect1"><div class="sectionbody"><div class="paragraph">  
</div><div class="olist arabic">1. From the left-hand menu, select 'Users and Groups'

</div><div class="paragraph">  
</div></div></div></div></div><span class="image">[![SuiteCRM SSO Azure Application Users and Groups](https://docs.suitecrm.com/images/en/admin/sso/suitecrm-sso-azure-application-users-groups.png)](https://docs.suitecrm.com/images/en/admin/sso/suitecrm-sso-azure-application-users-groups.png)</span>

<div class="padding highlightable sticky-parent"><div><div class="sect1"><div class="sectionbody"><div class="paragraph">  
</div><div class="olist arabic">1. From the top menu, select 'add user/group'

</div><div class="paragraph">  
</div></div></div></div></div>You can now assign either users or groups to your KiyoCRM SAML Authentication' Application.

## 3. Setup SAML in KiyoCRM 

Before you can finish setting up your users in KiyoCRM you must first enable SAML. Once this step is complete your users will no longer be able to login in the normal way and SSO must be used.

### 3.1. Enable SAML 

Sign in to KiyoCRM as an administrator

Go to Admin → Password Management

<span class="image">[![SuiteCRM SSO Enable SAML](https://docs.suitecrm.com/images/en/admin/sso/suitecrm-sso-suitecrm-saml-configuration.png)](https://docs.suitecrm.com/images/en/admin/sso/suitecrm-sso-suitecrm-saml-configuration.png)</span>

Select Enable SAML Authentication

In the SAML Authentication section, add the following information

<div class="padding highlightable sticky-parent"><div><div class="sect1"><div class="sectionbody"><div class="sect2"><div class="paragraph">  
</div><div class="olist arabic">1. Login URL: Paste the value of the Login URL retrieved from Azure
2. SLO URL: Paste the value of the Logout URL retrieved from Azure
3. X.509 Certificate: Paste the contents of the Base64 Certificate retrieved from Azure

</div><div class="paragraph">  
</div></div></div></div></div></div>Save your changes

### 3.2. Enable SAML for your users 

Once KiyoCRM has been configured to use SAML, you can configure your individual users to use SAML to login. You must complete this step for each user who will login using SSO.

<div class="padding highlightable sticky-parent"><div><div class="sect1"><div class="sectionbody"><div class="sect2"><div class="paragraph">  
</div><div class="olist arabic">1. Create or edit an existing CRM User, setting their username to match the email address in Azure.
2. Enable SAML Login for that user, by navigating to the Advanced tab, and checking the SAML2Authenticate
3. You may wish to setup and assign any Roles, Security Groups required for the user at this stage before they first login

</div><div class="paragraph">  
</div></div></div></div></div></div><span class="image">[![SuiteCRM SSO Users enable SAML](https://docs.suitecrm.com/images/en/admin/sso/suitecrm-sso-suitecrm-user-enable-saml.png)](https://docs.suitecrm.com/images/en/admin/sso/suitecrm-sso-suitecrm-user-enable-saml.png)</span>

<div id="bkmrk--1"></div></section><div id="bkmrk--2"></div>

# Sales Module Settings

<section id="bkmrk-aos-settings%C2%A0-the-ad"><div class="padding highlightable sticky-parent"><div class="sticky-spacer"><div class="sticky-wrapper is-sticky" id="bkmrk-"><div id="bkmrk--1"></div></div></div></div>## AOS Settings 

The Advanced Open Sales suite of modules allow you to manage the post-Opportunity Sales processes such as Quoting, Invoicing and recurring Contracting.

[![image.png](https://docs.kiyocrm.com/uploads/images/gallery/2025-05/scaled-1680-/5Smimage.png)](https://docs.kiyocrm.com/uploads/images/gallery/2025-05/5Smimage.png)

You can customize the following settings within the AOS Settings:

<div class="padding highlightable sticky-parent"><div><div class="sect1"><div class="sectionbody"><div class="paragraph">  
</div><div class="ulist">- **Renewal Reminder Period** This defines how many days before the Contract End Date that a reminder call should be created.
- **Initial Invoice Number** Allows users to set the initial invoice number. For example 20001.
- **Initial Quote Number** Allows users to set the initial quote number. For example 456.
- **Enable Line Items Groups** If selected then users will be able to bundle line items into groups. If this is not selected then you will not be able to use the AOS Group functionality.
    
    The Enable Line Item Groups setting should be selected before using AOS. It is difficult to migrate from/to groups once Quotes/Invoices have been created.
- **Add Tax to Line Total** If this is selected then the Tax will be added into the Line Total on Line Items. If this is not the selected the Line Total will not include Tax.

</div><div class="paragraph">  
</div></div></div></div></div>Once configured, click **Save** to apply your AOS Settings.

## AOD Settings 

Enable or disable **KiyoCRM**'s full text global search here.

<span class="image">[![Advanced OpenDiscovery Settings](https://docs.suitecrm.com/images/en/admin/AdminAODSettings.png)](https://docs.suitecrm.com/images/en/admin/AdminAODSettings.png)</span>

The full text global search is powered by Zend Lucene search framework. The search works very similar to the standard global search but provides the enhanced functionality of searching text in documents and other files, compared to the record-level search provided by the standard global search.

## AOP Settings 

Here you can enable or disable the Advanced Open Portal functionality, configure the Joomla URL, set the case distribution method, the 'from' name and email address and configure the email templates.

[![image.png](https://docs.kiyocrm.com/uploads/images/gallery/2025-05/scaled-1680-/JAqimage.png)](https://docs.kiyocrm.com/uploads/images/gallery/2025-05/JAqimage.png)

[![image.png](https://docs.kiyocrm.com/uploads/images/gallery/2025-05/scaled-1680-/d8Uimage.png)](https://docs.kiyocrm.com/uploads/images/gallery/2025-05/d8Uimage.png)

## Business Hours 

Specify business working hours here.

These settings will determine when workflows set to run 'Only In The Scheduler' will run and will be used when "Consider Working days" is set on [Project](https://docs.kiyocrm.com/books/kiyocrm-documentation-user-guide-api-setup-configurationkiyocrm/page/projects) records.

<div id="bkmrk--2"></div></section><div id="bkmrk--3"></div>[![image.png](https://docs.kiyocrm.com/uploads/images/gallery/2025-05/scaled-1680-/T9Bimage.png)](https://docs.kiyocrm.com/uploads/images/gallery/2025-05/T9Bimage.png)

# Google Credentials and Syncing

<section id="bkmrk-this-enhancement-is-">This enhancement is in **Beta** please help by providing us your feedback! It is only available in KiyoCRM versions 7.11 and newer.

## Overview 

KiyoCRM has the ability to synchronize a user’s meetings with their Google Calendar. This is a bidirectional sync, and changes on either end of the synchronization cause updates on the other.

There is no middle man in this process. Your data does not pass through any 3rd parties. It’s just your KiyoCRM instance, and Google’s servers.

### Requirements 

#### Valid API Credentials 

In order to synchronize a user’s KiyoCRM meetings with their Google Calendar, the system must have valid credentials saved.

These credentials are created on the Google Developer’s Console, downloaded as a JSON file, and imported into KiyoCRM. There are instructions on how to do this further down this page.

#### Internet Access from the KiyoCRM Server 

The KiyoCRM server must also have access to the internet. However, the KiyoCRM server does not need to be publicly accessible. The user must be able to reach both Google and KiyoCRM at the same time to authorize calendar access. Once that is done, the synchronization process runs on a schedule without any user interaction. The user does not need to be logged in to KiyoCRM for the synchronization to function.

#### At Least One Google Account 

You’ll need a Google Account to create the API credentials, and an account to synchronize with. They can be the same account if you only have one user. The API credentials only need to be generated once, from a single account. These credentials can be used to synchronize all the users once they authorize access to their account. These accounts can be generic @gmail.com accounts, or any level of GSuite accounts (Basic/Business/Enterprise).

## Generating &amp; Installing Google Credentials 

### Generating Credentials 

Make sure you’re logged into a Google account before proceeding.

Go to [Google Developers Console](https://console.developers.google.com/apis/dashboard)

<div class="padding highlightable sticky-parent"><div class="sect1"><div class="sectionbody"><div class="sect2"><div class="paragraph">  
</div><table class="tableblock frame-all grid-all stretch"><colgroup><col></col><col></col></colgroup><tbody><tr><td class="tableblock halign-left valign-top">Click on the drop-down at the top of the screen.

</td><td class="tableblock halign-left valign-top"><span class="image left">[![cred 1](https://docs.suitecrm.com/images/en/googleapi/cred_1.png)](https://docs.suitecrm.com/images/en/googleapi/cred_1.png)</span>

</td></tr><tr><td class="tableblock halign-left valign-top">Click on the 'New Project' Button.

</td><td class="tableblock halign-left valign-top"><span class="image left">[![cred 2](https://docs.suitecrm.com/images/en/googleapi/cred_2.png)](https://docs.suitecrm.com/images/en/googleapi/cred_2.png)</span>

</td></tr><tr><td class="tableblock halign-left valign-top">Give the project a descriptive name, like 'SuiteCRM Google Sync', and click 'Create'.

</td><td class="tableblock halign-left valign-top">[![Screenshot 3.png](https://docs.kiyocrm.com/uploads/images/gallery/2025-05/scaled-1680-/screenshot-3.png)](https://docs.kiyocrm.com/uploads/images/gallery/2025-05/screenshot-3.png)

</td></tr><tr><td class="tableblock halign-left valign-top">At the top of the page, click on the 'Select a project' dropdown…​

</td><td class="tableblock halign-left valign-top"><span class="image left">[![cred 4](https://docs.suitecrm.com/images/en/googleapi/cred_4.png)](https://docs.suitecrm.com/images/en/googleapi/cred_4.png)</span>

</td></tr><tr><td class="tableblock halign-left valign-top">…​then click on the project you just created.

</td><td class="tableblock halign-left valign-top">[![Screenshot 4.png](https://docs.kiyocrm.com/uploads/images/gallery/2025-05/scaled-1680-/screenshot-4.png)](https://docs.kiyocrm.com/uploads/images/gallery/2025-05/screenshot-4.png)

</td></tr><tr><td class="tableblock halign-left valign-top">You’ll now see the project in the dropdown, and a notice that no API’s are enabled. Click on the ‘Library’ link in the notice.

</td><td class="tableblock halign-left valign-top">[![Screenshot 5.png](https://docs.kiyocrm.com/uploads/images/gallery/2025-05/scaled-1680-/screenshot-5.png)](https://docs.kiyocrm.com/uploads/images/gallery/2025-05/screenshot-5.png)

</td></tr><tr><td class="tableblock halign-left valign-top">In the search window, type in “Calendar”, then click on the ‘Google Calendar API’ result.

</td><td class="tableblock halign-left valign-top">[![Screenshot 6.png](https://docs.kiyocrm.com/uploads/images/gallery/2025-05/scaled-1680-/screenshot-6.png)](https://docs.kiyocrm.com/uploads/images/gallery/2025-05/screenshot-6.png)

</td></tr><tr><td class="tableblock halign-left valign-top">Click the ‘Enable’ button.

</td><td class="tableblock halign-left valign-top"><span class="image left">[![cred 8](https://docs.suitecrm.com/images/en/googleapi/cred_8.png)](https://docs.suitecrm.com/images/en/googleapi/cred_8.png)</span>

</td></tr><tr><td class="tableblock halign-left valign-top">Now that we’ve enabled the API, we create the credentials. Click the ‘Create credentials’ button.

</td><td class="tableblock halign-left valign-top">[![Screenshot 7.png](https://docs.kiyocrm.com/uploads/images/gallery/2025-05/scaled-1680-/screenshot-7.png)](https://docs.kiyocrm.com/uploads/images/gallery/2025-05/screenshot-7.png)

</td></tr><tr><td class="tableblock halign-left valign-top">Set the options in section 1 like this. Click on ‘What credentials do I need?’ to continue.

</td><td class="tableblock halign-left valign-top"><span class="image left">[![cred 10](https://docs.suitecrm.com/images/en/googleapi/cred_10.png)](https://docs.suitecrm.com/images/en/googleapi/cred_10.png)</span>

</td></tr><tr><td class="tableblock halign-left valign-top">For Section 2, give it a descriptive name. Leave ‘JavaScript origins’ blank.  
  
Under ‘Authorized redirect URIs’, you need to fill in the full URI to the ‘saveGoogleApiKey’ Entry Point.  
For example, if you reach your SuiteCRM install at the URI 'http://crm.yourdomain.com/' then you would append 'index.php?entryPoint=saveGoogleApiKey' to the end of that. The full URI would be  
`<a class="bare highlight" href="http://crm.yourdomain.com/index.php?entryPoint=saveGoogleApiKey">http://crm.yourdomain.com/index.php?entryPoint=saveGoogleApiKey</a>`  
If your SuiteCRM install is under a subdirectory, you’ll need to include that. For instance  
`<a class="bare highlight" href="http://crm.yourdomain.com/SuiteCRM/index.php?entryPoint=saveGoogleApiKey">http://crm.yourdomain.com/SuiteCRM/index.php?entryPoint=saveGoogleApiKey</a>`

Note that this does not need to be a public URL. It only needs to be accessible to the user who is enabling the calendar sync. It is strongly recommend having an https enabled site for production on a publicly accessible site.  
  
Then click on ‘Create OAuth client ID’.

</td><td class="tableblock halign-left valign-top"><span class="image left">[![cred 11](https://docs.suitecrm.com/images/en/googleapi/cred_11.png)](https://docs.suitecrm.com/images/en/googleapi/cred_11.png)</span>

</td></tr><tr><td class="tableblock halign-left valign-top">Again, create a descriptive name. There are more options under ‘More customization options’, but they are unnecessary for this to function. Then click ‘Continue’.

</td><td class="tableblock halign-left valign-top"><span class="image left">[![cred 12](https://docs.suitecrm.com/images/en/googleapi/cred_12.png)](https://docs.suitecrm.com/images/en/googleapi/cred_12.png)</span>

</td></tr><tr><td class="tableblock halign-left valign-top">Click on the ‘Download’ button. Save the .json file. We use this later in SuiteCRM. Click ‘Done’ when finished. This is all we need for all our users to be able to sync their calendars.

</td><td class="tableblock halign-left valign-top"><span class="image left">[![cred 13](https://docs.suitecrm.com/images/en/googleapi/cred_13.png)](https://docs.suitecrm.com/images/en/googleapi/cred_13.png)</span>

</td></tr></tbody></table>

</div><div class="sect2">  
</div></div></div></div>### [Installing Credentials ](https://docs.suitecrm.com/admin/administration-panel/google-sync/#_installing_credentials)

Log into SuiteCRM as the administrative user.

Go to ‘Administration’.  
Then scroll down to the 'Google Suite' section.  
Click on the 'Google Calendar Settings' item.

<div class="padding highlightable sticky-parent"><div><div class="sect1"><div class="sectionbody"><div class="sect2"><div class="paragraph">  
</div><table class="tableblock frame-all grid-all stretch"><colgroup><col></col><col></col></colgroup><tbody><tr><td class="tableblock halign-left valign-top">Note how it says 'Unconfigured'. This means there is no JSON file currently installed.  
Click on the 'Choose File' button here, and select the JSON file you downloaded from the Developer’s Console.  
Click the ‘Save’ button at the bottom of the screen.

</td><td class="tableblock halign-left valign-top"><span class="image left">[![cred 14](https://docs.suitecrm.com/images/en/googleapi/cred_14.png)](https://docs.suitecrm.com/images/en/googleapi/cred_14.png)</span>

</td></tr><tr><td class="tableblock halign-left valign-top">This will return you to the 'Administration' menu. Go back into 'Google Calendar Settings'.  
Now it says 'Configured' in green to show that the JSON file has been successfully saved.

</td><td class="tableblock halign-left valign-top"><span class="image left">[![cred 15](https://docs.suitecrm.com/images/en/googleapi/cred_15.png)](https://docs.suitecrm.com/images/en/googleapi/cred_15.png)</span>

</td></tr></tbody></table>

<div class="paragraph">  
</div></div></div></div></div></div>If you ever need to install new credentials, simply upload them. They will overwrite the old ones.

## Authorizing Calendar Access 

This needs to be performed by the User to enable syncing with their Google Calendar

<div class="padding highlightable sticky-parent"><div class="sect1"><div class="sectionbody"><div class="paragraph">  
</div><table class="tableblock frame-all grid-all stretch"><colgroup><col></col><col></col></colgroup><tbody><tr><td class="tableblock halign-left valign-top">Click on your name dropdown in the upper right of the KiyoCRM site, then on ‘Profile’.

</td><td class="tableblock halign-left valign-top">[![image.png](https://docs.kiyocrm.com/uploads/images/gallery/2025-05/scaled-1680-/Nrximage.png)](https://docs.kiyocrm.com/uploads/images/gallery/2025-05/Nrximage.png)

</td></tr><tr><td class="tableblock halign-left valign-top">Go to the ‘Advanced’ tab.

</td><td class="tableblock halign-left valign-top">[![image.png](https://docs.kiyocrm.com/uploads/images/gallery/2025-05/scaled-1680-/Lolimage.png)](https://docs.kiyocrm.com/uploads/images/gallery/2025-05/Lolimage.png)

</td></tr><tr><td class="tableblock halign-left valign-top">You should see the ‘Google Account Synchronization’ Subheading at the bottom. If it’s not shown, then the KiyoCRM server doesn’t have Google Credentials installed.  
Click on the ‘Authorize’ button.

</td><td class="tableblock halign-left valign-top">[![image.png](https://docs.kiyocrm.com/uploads/images/gallery/2025-05/scaled-1680-/Bfkimage.png)](https://docs.kiyocrm.com/uploads/images/gallery/2025-05/Bfkimage.png)

</td></tr><tr><td class="tableblock halign-left valign-top">If you are logged into multiple Google accounts, you’ll be asked which Google account you want to sync with. Otherwise, you’ll be taken directly to this dialog:

</td><td class="tableblock halign-left valign-top"><span class="image left">[![cred 19](https://docs.suitecrm.com/images/en/googleapi/cred_19.png)](https://docs.suitecrm.com/images/en/googleapi/cred_19.png)</span>

</td></tr><tr><td class="tableblock halign-left valign-top">Once you click on ‘Allow’, you’ll be taken back to the user profile page. Click on the ‘Advanced’ tab again, and you should see:

</td><td class="tableblock halign-left valign-top">[![image.png](https://docs.kiyocrm.com/uploads/images/gallery/2025-05/scaled-1680-/3W5image.png)](https://docs.kiyocrm.com/uploads/images/gallery/2025-05/3W5image.png)

</td></tr></tbody></table>

<div class="paragraph">  
</div></div></div></div>Check the ‘Enable Calendar Sync’ checkbox, and then click the ‘Save’ button.

That’s it! By default, the sync happens every quarter hour. That can be changed by the Administrator in the Scheduler configuration.

### Known Issues 

If the value of "google\_calendar\_sync\_name" is changed then this will cause ALL Meetings to re-sync. This is due to the fact that if the value changes, then Google detects all current meetings as new, unique Calendar items.

The best way to avoid this from happening is to not edit/change the "google\_calendar\_sync\_name" that is located in your config.php file.

## Disabling Google Calendar Sync 

If you want to disable the Google Calendar sync completely or re-add its token from scratch, perform these actions:

<div class="padding highlightable sticky-parent"><div class="sect1"><div class="sectionbody"><div class="paragraph">  
</div><table class="tableblock frame-all grid-all stretch"><colgroup><col></col><col></col></colgroup><tbody><tr><td class="tableblock halign-left valign-top">Disable the ‘Google Sync Calendars’ task(s) from Admin/Scheduler.

</td><td class="tableblock halign-left valign-top">[![image.png](https://docs.kiyocrm.com/uploads/images/gallery/2025-05/scaled-1680-/cWhimage.png)](https://docs.kiyocrm.com/uploads/images/gallery/2025-05/cWhimage.png)

</td></tr><tr><td class="tableblock halign-left valign-top">Delete the Google Cloud token line in `config_override.php`

</td><td class="tableblock halign-left valign-top"><span class="image left">[![disable 2](https://docs.suitecrm.com/images/en/googleapi/disable-2.png)](https://docs.suitecrm.com/images/en/googleapi/disable-2.png)</span>

</td></tr></tbody></table>

<div class="paragraph">  
</div></div></div></div>In order to reset Google authorization, user can reset their personal settings. It might be excessive if the token is already deleted from the admin config and the scheduler task is not active.

<div id="bkmrk-"></div></section><div id="bkmrk--1"><div>  
</div></div>