Advanced Modules
Advanced Modules
Sales
AOS (Advanced Open Sales) is the first set of advanced modules. It helps manage everything after a sales opportunity, like sending quotes, creating invoices, and handling ongoing contracts. These features are available through modules like:
- Product Categories
- Products
- PDF Templates
- Quotations
- Invoices
- Contracts
- Payments
-
Product Categories
The Product Categories module allows Users to structure Products into a hierarchical category structure. To create a Product Category record, navigate to the Product Categories module and click the 'Create Product Categories' button in the action bar.

The Parent Category field is a relationship field to another Product Categories record. If you check the 'Is Parent Category' field then this signifies that the category is the highest level. Once selected you will not be able to select a Parent Category using the related field

Note: Other features like Import, Filters, Column Chooser, Bulk Actions and Detail view Actions are similar to other modules. Refer Leads.
-
Products
You can create Product records using the Products module. Creating products allows users to select product lines when preparing Quotes using AOS. The products module allows users to specify the Products Name, Part Number, Category and Type. Additional fields for Products can be added using Admin settings.

The module also allows users to define a Cost and Price for the product. Price is the selling price which will be used in the quoting process. A related Contact can be associated with the product. This is the point of contact with the supplier concerning this product. If you have an Image of the product then this can be uploaded within the products record. A URL to the products page on your website can also be specified.
Note: Other features like Import, Filters, Column Chooser, Bulk Actions and Detail view Actions are similar to other modules. Refer Leads.
-
PDF Templates
The PDF Templates module in CRM allows users to create and manage customized templates for generating PDF documents, such as quotes, invoices, contracts, and reports. These templates can include company branding, predefined layouts, and dynamic fields that pull data directly from CRM records, ensuring consistent, professional, and automated document generation. Please contact the support team for PDF template creation or updates.

-
Quotations
Creating a Quote
You can create a Quote by going to the Quotes module and clicking 'Create Quote' from within the actions bar. The first panel allows you to specify details concerning the quote such as the Title, related Opportunity, Stage and Payment Terms. The Quote Number field is calculated automatically.

The second panel allows you to specify who the Quote is for by relating a Company and Contact to the Quote. When you select the Company, the Billing Address and Shipping Address are dynamically pulled from the Company and populated into the fields on the Quote record.

The third panel allows users to specify Line Items and the Currency. A Line Item can be a Product Line or a Service Line, each with its own details such as quantity, price, and description. The panel helps organize and calculate the total amount for the quote.
To add a Product Line, click on Add Product Line button and to add Service line click on Add Service Line button.
To select a Product, you can start typing in the Product or Part Number field which will provide a list of results similar to any related field. Alternatively click the arrow button next to the Part Number field. This will display a pop-up window allowing you to select from a list of Products.

Once you have selected a Product, the List, Sale Price and Total will populate automatically. You can change the Quality, add Discounts (Percentage or Amount) and increase the Tax percentage. These will alter the Sale Price, Total Price and Total fields.
For Service Lines, you must specify the List price. This will populate the Sale Price. Tax and Discounts can be added similarly to the Product Line.
The Shipping field allows you to add a shipping cost. The Shipping Tax field allows you to add tax to this value. Once the Quote has been compiled, Click on Save to save the quote.

Sending Quotations / Detail View Actions
To output a Quote, you can select one of the following three buttons from the Quote Detail View.

AOS provides users with three methods of sending Quotes:
- Print as PDF – Allows you to select a template and download or save a PDF of the Quote.
- Email PDF – Allows you to select a template then directs you to the KiyoCRM email client 'Compose' screen. The Quote PDF will be attached to email and the email will be addressed to the related Contact of the Quote. This allows you to fill out the email body.
- Email Quotation – This directs you to the KiyoCRM email client 'Compose' screen. The email will be addressed to the related Contact of the Quote. There will be no attachment, and the Quote will be displayed within the body of the email.
- Create Opportunity -- Create Opportunity from Quotation allows users to generate a new sales opportunity directly based on the details of a quote, ensuring a smooth transition into the sales pipeline.
- Edit, Duplicate, Delete, Find Duplicates, View Changelog are similar to other modules (Refere leads detail view actions for reference)
- Convert to Invoice – With AOS you can convert Quotes to Invoices. This can be achieved by clicking the 'Convert to Invoice' button on the Quote Detail View.
This functionality will redirect users to the Edit View of an Invoice record. Fields will be populated based on your Quote counterparts and Line Items will be copied over. When you are ready to create the Invoice, click the Save button. Converting a Quote to an Invoice will set the Invoice Status of the quote to 'Invoiced'.
- Create Contract: As well as converting to an Invoice, AOS allows users to create a Contract based on a Quote. This can be done by clicking the 'Create Contract' button on the Quote Detail View.
This will redirect you to the Edit View of a Contract record, pulling through any appropriate fields from the Quote. This includes any Line Items on the Quote.

Bulk Actions
In list view, select group of records by checking the checkbox, the actions are as follows:

-
Mass Update: Allows users to update multiple quote records at once, saving time on repetitive changes.
-
Export: Enables users to download quote data in a structured format for reporting or offline use.
-
Delete: Lets users remove one or more quote records from the system as needed.
List View Page Actions

-
Import, Filter, Column Chooser functionalities are similar to other modules. Refer Leads module Column Chooser, Filter and Import features.
-
Import Line Items:-- Import Line Items feature in Quotes allows users to quickly add multiple products to a quote by uploading them from a file, streamlining the quote creation process.
Download sample file using Download Import File Template. Add data and upload file (.csv)

- To sort records on the Quotes List View, click any column title which is sortable. This will sort the column either ascending or descending.
- To search for a Quotes, Use Search engine on top
-
Clicking on the pencil icon Quotes list view page to the display of record edit view.
Quotes Submodules
Click on the detailed view of a Quote to view Submodules.
Contracts
The Contracts submodule under Quotes links approved quotes to contract generation, allowing seamless transfer of terms, products, and pricing into a formal agreement.
Can Create a new one or select from existing records.

Invoices
The Invoices submodule under Quotes allows users to generate invoices directly from approved quotes, carrying over all relevant billing details to streamline the payment process.
Can Create a new one or select from existing records.

Projects
The Projects submodule under Quotes links quotes to related projects, helping track the delivery of quoted products or services once the quote is accepted.
Can Create a new one or select from existing records.

Invoices
Creating Invoice
Creating an Invoice record is very similar to creating a Quote record. You can create an Invoice by going to the Invoices module and clicking 'Create Invoice' from within the actions bar. The first panel allows you to specify details about the Invoice such as Status and Due Date.

The second panel allows you to specify who the Invoice is for by relating a Company and Contact to the Invoice. When you select the Company, the Billing Address and Shipping Address are dynamically pulled from the Account and populated into the fields on the Invoice record.

The third panel allows users to specify Line Items and the Currency. A Line Item can be a Product Line or a Service Line, each with its own details such as quantity, price, and description. The panel helps organize and calculate the total amount for the quote.
To add a Product Line, click on Add Product Line button and to add Service line click on Add Service Line button.
To select a Product, you can start typing in the Product or Part Number field which will provide a list of results similar to any related field. Alternatively click the arrow button next to the Part Number field. This will display a pop-up window allowing you to select from a list of Products.


Once you have selected a Product, the List, Sale Price and Total will populate automatically. You can change the Quality, add Discounts (Percentage or Amount) and increase the Tax percentage. These will alter the Sale Price, Total Price and Total fields.
Sending Invoices / Detail View Actions
To output an Invoice you can select one of the following three buttons from the Invoice Detail View.

AOS provides users with three methods of sending Invoices:
- Print as PDF – Allows users to select a template and download or save a PDF of the Invoice.
- Email PDF – Allows users to select a template then directs you to the KiyoCRM email client 'Compose' screen. The Invoice PDF will be attached to email and the email will be addressed to the related Contact of the Invoice. This allows the user to fill out the email body.
- Email Invoice – This directs you to the KiyoCRM email client 'Compose' screen. The email will be addressed to the related Contact of the Invoice. There will be no attachment, and the Invoice will be displayed within the body of the email.
- Edit, Duplicate, Delete, Find Duplicates, View Changelog are similar to other modules (Refer leads detail view actions for reference)
Bulk Actions
In list view, select group of records by checking the checkbox, the actions are as follows:
- Mass Update: Allows users to update multiple invoice records at once, saving time on repetitive changes.
-
Export: Enables users to download invoice data in a structured format for reporting or offline use.
-
Delete: Lets users remove one or more invoice records from the system as needed.

List View Page Actions

- Import, Filter, Column Chooser functionalities are similar to other modules. (Refer Leads module Actions)
- Import Line Items:-- Import Line Items feature in Quotes allows users to quickly add multiple products to a quote by uploading them from a file, streamlining the quote creation process.
- Download sample file using Download Import File Template. Add data and upload file (.csv)
- To sort records on the Invoices List View, click any column title which is sortable. This will sort the column either ascending or descending.
- To search for a Invoice, Use Search engine on top
-
Clicking on the pencil icon Invoices list view page to the display of record edit view.
Invoice Submodules
Click on the detailed view of an Invoice to view Submodules.
Quotes
The Quotes submodule under Invoices links each invoice to its original quote, ensuring accurate billing based on agreed items, pricing, and terms.
Can create a new or select from existing records.

Payments
The Payments submodule under Invoices manages and tracks payment details like amount, date, and method. In KiyoCRM, whenever an invoice is created or updated, a corresponding payment record is automatically generated or refreshed. A Razor pay payment link is sent to the customer via SMS. For every partial payment, the system creates a new payment record for the remaining amount and sends an updated Razor pay link to the customer, ensuring accurate tracking until full payment is received.
Can create a new or select from existing records.

Contracts
AOS allows users to create Contracts using the Contracts module.
When the Contract is created the Renewal Reminder Date will populate automatically based on the amount of days specified in the AOS Settings in Admin. A Call will be scheduled and assigned to the Contract Manager for this date.

AOS allows users to add Line Items for Contracts. This is completed in the same way as Quotes. Please refer to the Quotes section for details on how to create Line Items.
The Second panel shows the Line items section.

Contracts List View Actions
Import, Column Chooser, Filter, My Filters, Favorites are Similar to other modules actions. Refer Leads module.

- To sort records on the Contracts List View, click any column title which is sortable. This will sort the column either ascending or descending.
- To search for a Contracts, Use Search engine on top
-
Clicking on the pencil icon Contracts list view page to the display of record edit view.
Bulk Actions
In list view, select group of records by checking the checkbox, the actions are as follows:
- Mass Update: Allows users to update multiple invoice records at once, saving time on repetitive changes.
-
Export: Enables users to download invoice data in a structured format for reporting or offline use.
-
Delete: Lets users remove one or more invoice records from the system as needed.

Detail View Actions
Refer Quotes module for Edit, Duplicate, Delete, Find Duplicates, Print as PDF, Email PDF, View Changelog Log functionalities similar to quotes.

Contracts Submodules
Click on the detailed view of a Contract to view Submodules.
Documents
Allows users to upload, manage, and associate relevant documents with contract records for easy reference and compliance.
Can create a new one or select from existing records.

Quotes
Enables users to create, manage, and link sales quotes to contracts, supporting pricing, product details, and customer terms for streamlined contract generation.
Can create a new one or select from existing records.

Payments
The Payments module in CRM enables users to record, track, and manage customer payment transactions efficiently. It links payments to related invoices, contracts, and customer records, ensuring transparency and accuracy in financial tracking. The module supports multiple payment methods, partial or full payments, and provides a clear overview of outstanding balances and payment history based on Invoice. This helps sales and finance teams monitor cash flow, follow up on overdue payments, and maintain strong customer relationships through timely financial interactions.
List View Page Actions
- View Payments: Displays a list of all recorded payments with details like amount, status, payment method, and linked invoices for easy tracking and management.
- Import Payments: Allows users to bulk upload payment records using a CSV file, streamlining data entry and ensuring efficient payment tracking.
- Filters, Column Chooser, Favorites functionalities similar to other modules. Refer Leads module.
- To sort records on the Payments List View, click any column title which is sortable. This will sort the column either ascending or descending.
- To search for a Payment, Use Search engine on top
- Clicking on the pencil icon Payments list view page to the display of record edit view.

Creating Payments
When Invoice is created, a payment record is generated initially and later updated manually. Initial payment record will be created, later on need to update manually.
Note: Name filed will generate automatically or we can mention manually.

Enables users to record and manage customer payments, link them to invoices, and track status, amount, and method for accurate financial reporting.

When Razor pay is selected as the payment gateway, the Razor pay details panel is enabled. Upon saving, a Razorpay payment link is automatically sent to the contact associated with the linked invoice.
If customer paid through the link and response will be updated in payment as well as in Invoice record.
Detail View Actions
- Edit, Duplicate, Delete, Find Duplicates, View Changelog functionalities are similar to other modules. Refer Leads module Detail view actions.

Payments Submodules
Click on the detailed view of a Contract to view Submodules
Security groups
Control access to payment records by assigning user roles and permissions, ensuring data security and proper authorization.

PDF Templates
This module allows you to create document templates. In the future, based on these templates, PDF documents or emails can be created, in which the necessary data from KiyoCRM will automatically be added during the merge process.
Creating a PDF Template
- PDF Template:
-
Specify the name of the template being created.
- Assigned to:
-
Please enter/ select the name of the Assigned to user of this template.
- Type:
-
Here you should select the type of document to be created based on this template. By default, the system suggests creating templates for the following documents: Quotes, Invoices, Contracts, Contacts or a Lead.
Note: When adding a new item to the combo box list pdf_template_type_dom, the name of the key to be added must match the module name. In the following example, the item Prospects is added to the list.
Detailed information on adding a new element to the combo box is described in the Developer Tools page.
- Load Sample
-
The system Quotes several options for ready-made templates, if necessary.
- Active
-
An option that determines whether the current template will be offered in the list of templates when creating a document (see the section below, Creating PDF Documents Based on a Template),
- Page Size/ Orientation
-
If necessary, select the size and orientation of the template page. Then default is A4 size and portrait page orientation.
- Inserting into a Field
-
This option allows you to add the necessary variable to the template, which later (in the process of creating a document-based template) will be replaced with the necessary data from the KiyoCRM+
- To insert a variable:
-
-
In the left combo box, select the module from which you want to get information.
-
In the middle combo box, select the name of the field of the selected module, then the name of the necessary variable corresponding to the selected field, so it appears in the right field.
-
In the text of the template, specify the place where the selected variable should be added and click the button Insert.
The following picture shows an example of adding the variable $aos_invoices_number, which, when creating the document based on the current template, will be automatically replaced with the account number.

If it is necessary to add data in the template, for example, listing positions in the Offer or Invoice, then such data should be arranged in a table:

Creating Headers and Footers
At the bottom of the Template Editing Form are two fields that allow you to customize the header and footer for the current template:

Footers are able to use special variables:
-
{PAGENO}, Showing the current page number.
-
{DATE D.m.Y}, Showing the current date in the required format
Setting Page Parameters:
Under the header and footer there are several fields that allow you to customize different page parameters, such as the size of the indents from the page edges of the header and footer fields:

Creating PDF documents based on a Template
-
When creating a PDF document for modules Companies, Contacts and Leads use the menu item Print as PDF from the action menu of the View module of the corresponding module:
-

If several templates were created for the current module, they will be presented in the form of a list, from which you need to select the desired position:
If only one template was created for the current module, then the necessary document will be immediately created on its basis.
If you need to create several similar documents for several module entries at once, select the necessary entries in the List Form and then use the Create Letter (PDF) from the action menu:
Contacts:

-
When creating a PDF document for Quotes, Invoices or Contracts, use the items Print as PDF, Email PDF and Email Invoice from the action menu of the View module of the corresponding.

For a detailed description of this functionality, see the relevant sections of the Sales Modules.
Manage PDF Templates:
-
Search Templates - utilize Filters and Advanced Filters in the module list form.
-
Export templates, for this, select the necessary records in the form.
-
Editing or deleting information about several templates at once, use this Mass Update in list form.
-
View detailed information about the template, to do this, click on the name of the template in the general list.
-
Data editing, for the purpose or in the Form of viewing click on the button Edit or directly in the List Form, click the button to the left of the record being edited. You can also perform Quick Edit.
-
To duplicate a template, in the action menu select Duplicate. Duplication is a convenient way to quickly create similar records; you can change the duplicated information to create a new template.
-
To delete a template, click on the button Delete.
-
You can track changes to the entered information; to do this select the button View Changelog in the form of viewing.


Knowledge Base
The knowledge base can be used as a structured repository of solutions coming Appeals. When a new treatment is entered into the system, the system compares the topic of the new treatment with the topics and contents of the existing Knowledge Base articles and automatically suggests options for suitable articles, which makes it possible to speed up the search for an answer to the received treatment.
Adding an Article to the Knowlege Base

- Status:
-
From the drop-down list, select the article status option: Draft, Expired, Pending, Not Published, Published.
- Article text:
-
Enter a detailed description of the solution. If further when entering the topic of a new appeal, matches are found with the topic or text of the Knowledge Base article, then this article will be automatically offered as a possible solution.
- Version of the article:
-
Specify the version of the article.
- Resolution:
-
Indicate a brief solution to the question under discussion. In the future, the text of the resolution can be specified as decision incoming treatment.
- Author of the Article:
-
Specify the author of the text.
- Approved by:
-
Select a user of the system that approved the text of the article.
Categories of Knowlege Base Articles
With a large number of articles, they can be grouped into different categories. Categories are created in a separate module Knowledge Base Categories.
When creating a category, fill in the following fields.:
- Category
-
Enter a category name.
- Description
-
Enter a description of the category.
- Created
-
If necessary, change the user who created the category description category.

After creating a category, a list of articles can be added to it. To do this, use the sub-panel Knowledge Base Article in the Category View Form.
Managing Articles and Knowledge Base Article Categories
-
Sorting the list of records. To do this, click on the icon in the header of the column to be sorted. To reverse sort, click on the icon again.
-
Editing or deleting information in several records at once, for this use Mass Update Panel. (Refer Leads module List view Actions)
-
View detailed information on the entry, to do this, click on the name of the article or category in the general list.
-
Data editing, for this purpose or in the Form of viewing, click on the button Correct or directly in the List Form, click the button to the left of the record being edited. You can also perform Quick Edit using icon in list form.
-
Duplication of information, for this in the action menu, select Duplicate. Duplication is a convenient way to quickly create similar records; you can change the duplicated information to create a new record.
-
Merge Duplicates, to do this, select the necessary entries in the List Form and in the action menu select the Combine item.
-
Delete a record, to do this, click on the button Delete.
-
Tracking changes to the entered information, to do this, click on the button View Changelog in the form of viewing.
-
Search for information - use Filters or Advanced Filters in the module list form.
-

WorkFlows
Workflows is a module for KiyoCRM allowing users to create custom workflow processes. Historically this module was called Advanced Open Workflow (AOW). It allows users to trigger various system actions based on conditions from any KiyoCRM module.
Creating a Workflow Process
You can create workflow processes by navigating to the 'Workflow' module within KiyoCRM. Click the 'Create Workflow' button within the action bar to start creating the process. The first panel allows users to set up the workflow process.

This allows you to specify the following:
-
Name – Any name you want to give to the Workflow.
-
Assigned To - The assigned user of the Workflow process.
-
Workflow Module – A drop down list of all the modules found within the KiyoCRM instance. This is the module the Workflow is run against. For example, when an Company is created/edited.
-
Status – Active or Inactive. Only active processes will run, so you can use this field to deactivate a Workflow without having to delete it.
-
Run – This controls the way the Workflow is triggered.
On Save
The Workflow will run immediately for a given record when a save action occurs in the module specified.
On Scheduler
The Workflow will be started from the Scheduler Job Process Workflow Tasks, the next time the job runs, and will apply to every record in the module, restricted by the Run on property and by the Workflow’s conditions.
Always
The Workflow will run on both the situations described above.
-
Run On – This specifies the selection of records for which the Workflow will be executed.
New Records
The Workflow will run only for new records being created.
Modified Records
The Workflow will run only for records that were already created and are being changed.
All Records
-
For On Save workflows, this means the Workflow will run for both new and modified records.
-
For On Scheduler Workflows, this means the Workflow will go through every record in the module, even old ones that weren’t changed.
When setting On Scheduler, All Records Workflows, consider that they might cause very long operations if your module has many records. These operations will run in the background, but will still consume server resources, so it’s a good idea to run them after work hours.
-
-
Repeated Runs – Workflows keep track of each individual record that they have been applied to in the past. This allows you to control whether you want the Workflow actions to run only once for each record, or repeatedly, as the Workflow is triggered again.
Unchecked
The Workflow will be blocked from running against any record that has already been handled by the current Workflow in the past.
Checked
The Workflow will run against every record, regardless of whether that record has already been handled by the current Workflow in the past.
It is wise to consider whether there are enough restrictions in place so that this will not create excessive runs.
For example, if one of the specified Actions negates (or will lead to the negation) of one of the specified Conditions; or if the Workflow is set to target individual records (On Save, New Records, Modified Records). -
Description – useful to include a description of the process, its intended goals, and other notes to clarify what the current Workflow is all about.
Conditions
Adding Conditions
Once set up, you can add conditions to a workflow process using the conditions panel. This allows you to specify restrictive criteria so that only the records matching all these conditions will be affected by the Workflow’s Actions.

To add a Condition Line, you must click Add Condition.
Note: You must select your Workflow Module on the first panel before adding a Condition Line.

You can have an unlimited amount of Condition Lines. To add another line click Add Condition again and it will appear. On the line you will have four fields: Field, Operator, Type and Value.
Field and Operator
Field is a drop down which automatically populates with all the fields found in the Workflow Module.

The Field selected will determine the options available for Operator and Type. If the field type is not a number or date then the operators available will be 'Equal To' or 'Not Equal To'. For number and date fields you can also choose from additional logical operators; 'Less Than', 'Greater Than' 'Less Than or Equal To' or 'Greater Than or Equal To'.

Condition Types
You can specify workflow processes to trigger on different condition types. These are as follows:
-
Value – This is used to directly compare the Field to a value. The value type offered is dynamic to the field type of the Field selected. For example, if the field type is a drop down then the value field type will be the same drop-down list.

-
Field – This is used to action a workflow process when one field is compared to another field in the record.

-
Multiple – This can be selected if the Field is a drop down/multiselect. This allows users to specify multiple values to action the workflow from.

-
Date – This allows you to specify the record to be selected for the Workflow after/before an amount of time from either another date field or 'Now'. For example, when the start date of a call is 'Now + 10 minutes'. This can only be used when the Field is a date field. The amount of time before or after the date can be specified in Minutes, Hours, Days, Weeks or Months.

Removing Conditions
You can remove Condition Lines by clicking '-' on the left-hand side of the condition.

Actions
Adding Actions
Actions are defined in the third panel. These specify what events should occur when the conditions have been met. You can add an Action by clicking the Add Action button.

This will cause the Action Line to appear.

From the Action Line you can Select Action and give it a Name. The actions available are; 'Create Record', 'Modify Record' and 'Send Email'. You can specify an unlimited number of actions for each workflow process.
Create Record
If you select 'Create Record' you will be prompted to select a Record Type. This is the module type of the record you are looking to create.

Once selected you can add fields or relationships to this record using the Add Field and Add Relationship buttons.

When Adding fields the first drop down in the line will populate with all the fields from that module. The second drop down allows you to specify how the value for that field is going to be derived. For most cases the options are as follows:
-
Value – This will allow you to input the value directly using the same field type as the field selected.
-
Field – This will make the field the same value as a field found in the Workflow Module.
-
Date – Only selectable if the field is a date field. This will allow you to specify the value as an amount of time after/before another date field or 'Now'.

Selecting the 'Assigned-To' field also gives you more options. As well as by value and field you can assign a user by:
-
Round Robin – This will select each user in turn.
-
Least Busy – This will select you with the least amount of records assigned to you for that module.
-
Random – This will select a random user.
For each of the above options you can choose if you want you to be selected from all users or users from a specific role. If you have the Security Suite module installed, you can additionally choose if you want you to be selected from all users from a particular Security Group or all users from a particular security group with a particular role.

When adding relationships, you must select the related module from the drop-down list then select the record that the new record should be related to.

Note: You must select the related module using the arrow button – The auto completion on the text field is not currently developed.
Modify Record
This provides the same functionality as 'Create Record' but instead of creating a new record you are modifying the record which met the conditions of the workflow process. With this action you can modify any field found within the record or you can add a relationship to another record. This is completed in the same way as 'Create Record' except you are not required to specify the Record Type.
Send Email
The 'Send Email' action allows users to create workflow processes which will send an email based on an template to individuals.
Note: The Email will be sent from the System Email Account. It is not possible to send from emails specified in the User Profile, because Workflows sometimes run from a Scheduler job, without any user being logged on.
Using this action there are four different types of recipients.
- Email – This will send an email to a specific email address. You must specify the email address and the email template.

-
Record Email – This will send an email to the primary email address specified on the record which actioned the workflow process. This can only be used if the record has an email field such as Companies and Contacts. For this option you only need to specify the template.

-
User – This will send the email to a specified Users email address. You must specify the recipient user and the template of the email.


Calculate fields
If you select 'Calculate Fields' from the Action dropdown the Calculate Fields user interface will be loaded after a second and looks like the picture below.

There is a separate page with detailed documentation of the many possibilities of Calculated Fields in Workflows. Refer that.
Process Audit
Advanced OpenWorkflow allows users to audit your processes. In the Detail View of each Workflow record there is a sub-panel called 'Processed Flows'.

This lists all the workflow processes which have been actioned including details on the record which actioned the flow, its status and the date it was created.
You can view this information at a higher level by clicking the 'View Process Audit' button within the module action bar. This will show all the processes that have run for all the Workflow records.
Examples
Customers To Target List
This tutorial will show you how to create a workflow process to add companies who are customers to a Target-List when the record is created or modified. Set Up
Conditions
-
Create a new Condition Line by clicking Add Condition.
-
Select 'Type' from the Field drop down.
-
Keep the Operator as 'Equals To' and the Type as 'Value'.
-
From the Value drop down select 'Customer'.
Once these steps have been completed the Conditions panel should look like this:

Actions
Create a new Action by clicking Add Action.
-
Select 'Modify Record from the Select Action drop down list.
-
Using the Name field, give the action a name such as 'Add to Target List'
-
Add a Relationship Line by clicking the Add Relationship button.
-
A drop down will appear above the 'Add Relationship' button. Select the relationship from this drop down box. In this case we are looking for 'Target Lists: Prospect List'
-
This will populate the rest of the line. Click the arrow button next to the relate field to select your target list.
Once these steps have been completed your Actions panel should look like this:

Cases Remainder
This tutorial will show you how to create a workflow process to notify the assigned user and then a particular manger user when an open Case has not been updated/modified within two days. Set Up
Once these steps have been completed the first panel should look like this:

Conditions
Create a new Condition Line by clicking Add Condition.
Select 'Date Modified' from the Field drop down.
Change the Operator to 'Less Than or Equal To' and the Type to 'Date'
From the Value fields select 'Now', '-', '2', 'Days' in order.
Once these steps have been completed the Conditions panel should look like this:

Repeat step 1.
This time select 'Status' from the Field drop down.
Keep the Operator as 'Equals To' and change the Type to 'Multiple'.
From the Value multi-select field select any values which signify an open case
Once these steps have been completed the Conditions panel should look like this:

Actions
-
Create a new Action by clicking Add Action button.
-
Select 'Send Email' from the Select Action down-down list.
-
Give the action a Name such as 'Assigned User Reminder'
-
On the Email Line select 'Related Field' from the first drop down, 'Users: Assigned To' from the second drop down and a email template from the third drop down.
Once these steps have been completed the Actions panel should look like this:

Repeat steps 1, 2 and 3 but change the name of this action to 'Manager Escalation Email'. 2. On the Email Line select 'User' and then select you who should receive the email. Select an email template from the third drop down. 3. When you are finished click Save to create your workflow. Once these steps have been completed the Actions panel should look like this:


Follow-up Web Leads
This tutorial will show you how to create a workflow process to assign web Leads to a particular user from a particular role within KiyoCRM. This user will be chosen by round robin. The workflow process will also set a follow up call for one day after the Lead is created.
Note: You can change the Sales role to any role found in your own system.
Set Up
Once these steps have been completed the first panel should look like this:

Conditions
-
Create a new Condition Line by clicking Add Condition.
-
Select 'Lead Source' from the Field drop down.
-
Keep the Operator as 'Equals To' and the Type as 'Value'
-
From the Value drop down select our condition, 'Web Site'
Once these steps have been completed the Conditions panel should look like this:

Actions
-
Create a new Action by clicking Add Action.
-
Select 'Modify Record' from the Select Action down-down list.
-
Using the Name field, give the action a name such as 'Assign to Sales'
-
Add a Field Line by clicking Add Field.
-
Select 'Assigned-To' from the new drop-down box that has appeared above the Add Field button.
-
Change the middle drop-down box from 'Value' to 'Round Robin'
-
Change the third drop down box from 'ALL Users' to 'ALL Users in Role'
Once these steps have been completed the Actions panel should look like this:

-
Now create a new Action by repeating step 1.
-
This time select 'Create Record' from the Select Action down-down list.
-
Using the Name field, give the action a name such as 'Create Follow Up Call'.
-
From the Record Type drop down select 'Calls'.
-
Click the Add Field button to add a new field:
-
Select 'Subject' from the first drop down box. Leave the second drop down box as 'Value' then type the desired subject into the text field at the end.
-
Add another field, this time selecting the 'Start Date' from the first drop down box.
-
Change the second drop down box from 'Value' to 'Date'.
-
In the third drop down box select 'Now'. In the fourth drop down box on the line select '+'.
-
In the text box type '1' and in the drop down next to it select 'Days'.
-
Add another field, this time select 'Assigned-To', 'Field', 'Assigned-To' – This will relate the assigned User of the Lead to the Call.
-
You can add any other fields that you wish to include in the call at this stage. To finish click Save.
Once these steps have been completed the Actions panel should look like this:

Workflow Calculated Fields
In Workflows, there is a particularly powerful and complex Action called Calculated Fields which allows you to do operations on the values in the records you’re handling.

Adding Parameters
It is possible to add parameters to the formulas by using the dropdown in the Parameters section of the Calculate Fields’s user interface. The dropdown contains all of the (basic and custom) fields which belongs to the module selected in the basic fields section.
To add a parameter, select the field from the dropdown and click Add Parameters After this action, a new line appears in the parameter table with the name of the field and the given identifier.
For some fields (dropdowns and multi-selects) an additional dropdown shown up where the user can select if the raw or the formatted value should be used in Calculated Fields. The raw format means the value which is stored in the database and the formatted value means the label for that database value.
To remove a parameter from the table, simply click the '-' in the row of the parameter. Be aware, that if you remove a parameter, all of the identifiers are recalculated, so the identifiers could change for fields!

The identifier is used to reference this field when the user creates the formula. For example, all appearances of the {P0} identifier will be replaced with the Company’s name in the formula. All parameters are like {Px} where x is the sequential order of the parameter. The amount of the parameters is not limited.
Adding Relation Parameters
Relation parameters are very similar to the regular parameters; the only difference is that the user first selects an entity which is in a one-to-one or one-to-many relationship with the actual entity.
To add a relation parameter, select the relation first, and then select the field from the connected entity and push the Add relation parameter button. After this action, a new line appears in the relation parameter table with the name of the relationship, the name of the field and the given identifier.
As for parameters for some relation parameter fields (dropdowns and multi-selects) an additional dropdown shown up where the user can select if the raw or the formatted value should be used in Calculate Fields.
To remove a relation parameter from the table, simply click on the '-' button in the row of the relation parameter. Be aware, that if you remove a relation parameter, all of the identifiers are recalculated, so the identifiers could change for fields!

The identifier is used to reference this field when the user creates the formula. For example, all appearances of the {R0} identifier will be replaced with the creator user‘s username in the formula. All relation parameters are like {Rx} where x is the sequential order of the relation parameter. The amount of the relation parameters is not limited.
Creating Formula for a Field
In the Formulas part of the user interface the user can add formulas for fields of the actual entity.
To add a formula, select a field from the dropdown first and then push the Add formula button. After this action, a new line appears in the formula table with the name of the field and with the place for the formula.
To remove a formula from the table, simply click on the '-' in the row of the formula.

The formula is a textbox where the user can write the formulas. The module evaluates the formula on the given time (on save, on scheduler run or both) and fills the selected field with the evaluated value.
The formula can contain any text (with full UTF-8 support), but only the function parts (functions with parameters between ‘{‘and ‘}’) are evaluated. For example, and with the parameters added in the previous sections, if we fill the formula like: Company {P0} created by username {R0}, then the description field will have the following value after save: Company My Company created by username My User (implying the Company’s name is My Company and the creator user’s username is My User).
The Calculate Fields has many built-in functions which allows the user to build complex formulas to achieve various goals. These functions are described in the next section.
Available Functions
As it is mentioned above, all of the functions are wrapped between {and} signs, and they look like {function Name (parameter1; parameter2; …)}. The count of the parameters is different for the different functions. The module evaluates the functions and changes them with their result in the formula.
The functions can be embedded into each other (using a result of a function as a parameter for another function) like in this example:
{power({subtract({divide({add({multiply(10; 2)}; 12)}; 8)}; 1)}; 2)}
This function is the formalized look of the following mathematical expression:
((((10 * 2) + 12) / 8) – 1)2
The functions are divided to six groups. These groups are described in the next section of the document.
Logical Functions
Logical functions are returning true or false in the form of 1 and 0 so checkboxes typed fields can be filled with these functions. They can be also used as the logical condition for the ifThenElse function.
equal
|
Signature |
{equal(parameter1;parameter2)} |
|
Parameters |
parameter1: can be any value of any type |
|
parameter2: can be any value of any type |
|
|
Description |
Determines if parameter1 equals with parameter2 |
|
Returns |
1 if the two parameters are equal or 0 if not |
|
Example call |
{equal(1; 2)} returns 0 |
notEqual
|
Signature |
{not Equal(parameter1; parameter2)} |
|
Parameters |
parameter1: can be any value of any type |
|
parameter2: can be any value of any type |
|
|
Description |
Determines if parameter1 not equals with parameter2 |
|
Returns |
0 if the two parameters are equal or 1 if not |
|
Example calls |
{not Equal(1; 2)} returns 1 |
greaterThan
|
Signature |
{greater Than(parameter1; parameter2)} |
|
Parameters |
parameter1: can be any value of any type |
|
parameter2: can be any value of any type |
|
|
Description |
Determines if parameter1 greater than parameter2 |
|
Returns |
1 if parameter1 greater than parameter2, 0 if not |
|
Example call |
{greaterThan(3; 3)} returns 0 |
greaterThanOrEqual
|
Signature |
{greaterThanOrEqual(parameter1; parameter2)} |
|
Parameters |
parameter1: can be any value of any type |
|
parameter2: can be any value of any type |
|
|
Description |
Determines if parameter1 greater than or equal parameter2 |
|
Returns |
1 if parameter1 greater than or equal parameter2, 0 if not |
|
Example call |
{greaterThanOrEqual(3; 3)} returns 1 |
lessThan
|
Signature |
{lessThan(parameter1; parameter2)} |
|
Parameters |
parameter1: can be any value of any type |
|
parameter2: can be any value of any type |
|
|
Description |
Determines if parameter1 less than parameter2 |
|
Returns |
1 if parameter1 less than parameter2, 0 if not |
|
Example call |
{lessThan(3; 3)} returns 0 |
lessThanOrEqual
|
Signature |
{lessThanOrEqual(parameter1; parameter2)} |
|
Parameters |
parameter1: can be any value of any type |
|
parameter2: can be any value of any type |
|
|
Description |
Determines if parameter1 less than or equal parameter2 |
|
Returns |
1 if parameter1 less than or equal parameter2, 0 if not |
|
Example call |
{lessThanOrEqual(3; 3)} returns 1 |
empty
|
Signature |
{empty(parameter)} |
|
Parameters |
parameter: text value |
|
Description |
Determines if parameter is empty |
|
Returns |
1 if parameter is empty, 0 if not |
|
Example call |
{empty(any text)} returns 0 |
notEmpty
|
Signature |
{notEmpty(parameter)} |
|
Parameters |
parameter: text value |
|
Description |
Determines if parameter is not empty |
|
Returns |
1 if parameter is not empty, 0 if empty |
|
Example call |
{notEmpty(any text)} returns 1 |
not
|
Signature |
{not(parameter)} |
|
Parameters |
parameter: logical value |
|
Description |
Negates the logical value of the parameter |
|
Returns |
1 if parameter is 0, 0 if parameter is 1 |
|
Example call |
{not(0)} returns 1 |
and
|
Signature |
{and(parameter1; parameter2)} |
|
Parameters |
parameter1: logical value |
|
parameter2: logical value |
|
|
Description |
Applies the AND logical operator to two logical values |
|
Returns |
1 if parameter1 and parameter2 is 1, 0 if any parameters are 0 |
|
Example call |
{and(1; 0)} returns 0 |
or
|
Signature |
{or(parameter1; parameter2)} |
|
Parameters |
parameter1: logical value |
|
parameter2: logical value |
|
|
Description |
Applies the OR logical operator to two logical values |
|
Returns |
1 if parameter1 or parameter2 is 1, 0 if both parameters are 0 |
|
Example call |
{or(1; 0)} returns 1 |
Text Functions
Text functions are used to manipulate text in various ways. All the functions listed here are fully supports UTF-8 texts, so special characters should not raise any problems.
substring
|
Signature |
{substring(text; start; length)} |
|
Parameters |
text: text value |
|
start: decimal value |
|
|
length [optional parameter]: decimal value |
|
|
Description |
Cuts the substring of a text field from start. If the length optional parameter is not set, then it cuts all characters until the end of the string, otherwise cuts the provided length. Indexing of a text’s characters starting from 0. |
|
Returns |
Substring of the given text |
|
Example call |
{substring(This is my text; 5)} returns is my text |
|
{substring(This is my text; 5; 5)} returns is my |
length
|
Signature |
{length(parameter)} |
|
Parameters |
parameter: text value |
|
Description |
Count the characters in a text. |
|
Returns |
The count of the characters in a text. |
|
Example call |
{length(sample text)} returns 11 |
replace
|
Signature |
{replace(search; replace; subject)} |
|
Parameters |
search: text value |
|
replace: text value |
|
|
subject: text value |
|
|
Description |
Replace all occurrences of search to replace in the text subject. |
|
Returns |
subject with replaced values. |
|
Example call |
{replace(apple; orange; This is an apple tree)} returns This is an orange tree |
position
|
Signature |
{position(subject; search)} |
|
Parameters |
subject: text value |
|
search: text value |
|
|
Description |
Find position of first occurrence of search in a subject |
|
Returns |
Numeric position of search in subject or -1 if search not present in subject |
|
Example call |
{position(Where is my text?; text)} returns 12 |
lowercase
|
Signature |
{lowercase(parameter)} |
|
Parameters |
parameter: text value |
|
Description |
Make text lowercase |
|
Returns |
The lowercased text. |
|
Example call |
{lowercase(ThIs iS a sAmPlE tExT)} returns this is a sample text |
uppercase
|
Signature |
{uppercase(parameter)} |
|
Parameters |
parameter: text value |
|
Description |
Make text uppercase |
|
Returns |
The uppercased text. |
|
Example call |
{uppercase(ThIs iS a sAmPlE tExT)} returns THIS IS A SAMPLE TEXT |
Mathematical Functions
Mathematical functions are used to manipulate numbers in various ways. Several mathematical operators are implemented as functions in Calculate Fields.
add
|
Signature |
{add(parameter1; parameter2)} |
|
Parameters |
parameter1: number value |
|
parameter2: number value |
|
|
Description |
Adds parameter1 and parameter2 |
|
Returns |
The sum of parameter1 and parameter2 |
|
Example call |
{add(3.12; 4.83)} returns 7.95 |
subtract
|
Signature |
{subtract(parameter1; parameter2)} |
|
Parameters |
parameter1: number value |
|
parameter2: number value |
|
|
Description |
Subtracts parameter2 from parameter1 |
|
Returns |
The distinction of parameter2 and parameter1 |
|
Example call |
{subtract(8; 3)} returns 5 |
multiply
|
Signature |
{multiply(parameter1; parameter2)} |
|
Parameters |
parameter1: number value |
|
parameter2: number value |
|
|
Description |
Multiplies parameter1 and parameter2 |
|
Returns |
The product of parameter1 and parameter2 |
|
Example call |
{multiply(2; 4)} returns 8 |
divide
|
Signature |
{divide(parameter1; parameter2)} |
|
Parameters |
parameter1: number value |
|
parameter2: number value |
|
|
Description |
Divides parameter2 with parameter1 |
|
Returns |
The division of parameter2 and parameter1 |
|
Example call |
{divide(8; 2)} returns 4 |
power
|
Signature |
{power(parameter1; parameter2)} |
|
Parameters |
parameter1: number value |
|
parameter2: number value |
|
|
Description |
Raises parameter1 to the power of parameter2 |
|
Returns |
parameter1 raised to the power of parameter2 |
|
Example call |
{power(2; 7)} returns 128 |
squareRoot
|
Signature |
{squareRoot(parameter)} |
|
Parameters |
parameter: number value |
|
Description |
Calculates the square root of parameter |
|
Returns |
The square root of parameter |
|
Example call |
{squareRoot(4)} returns 2 |
absolute
|
Signature |
{absolute(parameter)} |
|
Parameters |
parameter: number value |
|
Description |
Calculates the absolute value of parameter |
|
Returns |
The absolute value of parameter |
|
Example call |
{absolute(-4)} returns 4 |
Date functions
There are several date functions implemented in Calculate Fields, so the user can manipulate dates in many ways. Most of the functions uses a format parameter, which is used to set the result of the functions formatted as the user wants to. The options for these formats are equivalent with the PHP format parameters:
| Format character | Description | Example returned values |
|---|---|---|
|
For day |
||
|
d |
Day of the month, 2 digits with leading zeros |
01 to 31 |
|
D |
A textual representation of a day, three letters |
Mon through Sun |
|
j |
Day of the month without leading zeros |
1 to 31 |
|
l |
A full textual representation of the day of the week |
Sunday through Saturday |
|
N |
ISO-8601 numeric representation of the day of the week |
1 (for Monday) through 7 (for Sunday) |
|
S |
English ordinal suffix for the day of the month, 2 characters |
st, nd, rd or th. Works well with j |
|
w |
Numeric representation of the day of the week |
0 (for Sunday) through 6 (for Saturday) |
|
z |
The day of the year (starting from 0) |
0 through 365 |
|
For week |
||
|
W |
ISO-8601 week number of year, weeks starting on Monday |
42 (the 42nd week in the year) |
|
For month |
||
|
F |
A full textual representation of a month, such as January or March |
January through December |
|
m |
Numeric representation of a month, with leading zeros |
01 through 12 |
|
M |
A short textual representation of a month, three letters |
Jan through Dec |
|
n |
Numeric representation of a month, without leading zeros |
1 through 12 |
|
t |
Number of days in the given month |
28 through 31 |
|
For year |
||
|
L |
Whether it’s a leap year |
1 if it is a leap year, 0 otherwise |
|
o |
ISO-8601 year number. This has the same value as Y, except that if the ISO week number (W) belongs to the previous or next year, that year is used instead |
1999 or 2003 |
|
Y |
A full numeric representation of a year, 4 digits |
1999 or 2003 |
|
y |
A two digit representation of a year |
99 or 03 |
|
For time |
||
|
a |
Lowercase Ante meridiem and Post meridiem |
am or pm |
|
A |
Uppercase Ante meridiem and Post meridiem |
AM or PM |
|
B |
Swatch Internet time |
000 through 999 |
|
g |
12-hour format of an hour without leading zeros |
1 through 12 |
|
G |
24-hour format of an hour without leading zeros |
0 through 23 |
|
h |
12-hour format of an hour with leading zeros |
01 through 12 |
|
H |
24-hour format of an hour with leading zeros |
00 through 23 |
|
i |
Minutes with leading zeros |
00 to 59 |
|
s |
Seconds, with leading zeros |
00 through 59 |
|
For timezone |
||
|
e |
Timezone identifier |
UTC, GMT, Atlantic/Azores |
|
l |
Whether or not the date is in daylight saving time |
1 if Daylight Saving Time, 0 otherwise |
|
O |
Difference to Greenwich time (GMT) in hours |
+0200 |
|
P |
Difference to Greenwich time (GMT) with colon between hours and minutes |
+02:00 |
|
T |
Timezone abbreviation |
EST, MDT |
|
Z |
Timezone offset in seconds. The offset for timezones west of UTC is always negative, and for those east of UTC is always positive. |
-43200 through 50400 |
|
For full date/time |
||
|
c |
ISO 8601 date |
2004-02-12T15:19:21+00:00 |
|
r |
RFC 2822 formatted date |
Thu, 21 Dec 2000 16:01:07 +0200 |
|
U |
Seconds since the Unix Epoch (January 1 1970 00:00:00 GMT) |
|
For all functions without timestamp parameter, we assume that the current date/time is 2016.04.29. 15:08:03
date
|
Signature |
{date(format; timestamp)} |
|
Parameters |
format: format text |
|
timestamp: date/time value |
|
|
Description |
Creates a date in the given format |
|
Returns |
timestamp in the given format |
|
Example call |
{date(ymd; 2016-02-11)} returns 160211 |
now
|
Signature |
{now(format)} |
|
Parameters |
format: format text |
|
Description |
Creates the actual date/time in the given format |
|
Returns |
Current date/time in the given format |
|
Example call |
{now(Y-m-d H:i:s)} returns 2016-04-29 15:08:03 |
yesterday
|
Signature |
{yesterday(format)} |
|
Parameters |
format: format text |
|
Description |
Creates yesterday’s date/time in the given format |
|
Returns |
Yesterday’s date/time in the given format |
|
Example call |
{yesterday(Y-m-d H:i:s)} returns 2016-04-28 15:08:03 |
tomorrow
|
Signature |
{tomorrow(format)} |
|
Parameters |
format: format text |
|
Description |
Creates tomorrow’s date/time in the given format |
|
Returns |
Tomorrow’s date/time in the given format |
|
Example call |
{tomorrow(Y-m-d H:i:s)} returns 2016-04-30 15:08:03 |
datediff
|
Signature |
{datediff(timestamp1; timestamp2; unit)} |
|
Parameters |
timestamp1: date/time value |
|
timestamp2: date/time value |
|
|
unit: years/months/days/hours/minutes/seconds; default: days |
|
|
Description |
Subtracts timestamp2 from timestamp1 |
|
Returns |
The difference between the two dates returned in unit |
|
Example call |
{datediff(2016-02-01; 2016-04-22; days)} returns 81 |
addYears
|
Signature |
{addYears(format; timestamp; amount)} |
|
Parameters |
format: format text |
|
timestamp: date/time value |
|
|
amount: decimal number |
|
|
Description |
Adds amount years to timestamp |
|
Returns |
Incremented date in format |
|
Example call |
{addYears(Ymd; 2016-04-22; 1)} returns 20170422 |
addMonths
|
Signature |
{addMonths(format; timestamp; amount)} |
|
Parameters |
format: format text |
|
timestamp: date/time value |
|
|
amount: decimal number |
|
|
Description |
Adds amount months to timestamp |
|
Returns |
Incremented date in format |
|
Example call |
{addMonths(Ymd; 2016-04-22; 1)} returns 20160522 |
addDays
|
Signature |
{addDays(format; timestamp; amount)} |
|
Parameters |
format: format text |
|
timestamp: date/time value |
|
|
amount: decimal number |
|
|
Description |
Adds amount days to timestamp |
|
Returns |
Incremented date in format |
|
Example call |
{addDays(Ymd; 2016-04-22; 1)} returns 20160423 |
addHours
|
Signature |
{addHours(format; timestamp; amount)} |
|
Parameters |
format: format text |
|
timestamp: date/time value |
|
|
amount: decimal number |
|
|
Description |
Adds amount hours to timestamp |
|
Returns |
Incremented date in format |
|
Example call |
{addHours(Ymd H:i:s; 2016-04-22 23:30; 5)} returns 20160423 04:30:00 |
addMinutes
|
Signature |
{addMinutes(format; timestamp; amount)} |
|
Parameters |
format: format text |
|
timestamp: date/time value |
amount: decimal number |
|
Description |
Adds amount minutes to timestamp |
|
Returns |
Incremented date in format |
|
Example call |
{addMinutes(Ymd H:i:s; 2016-04-22 22:58; 5)} returns 20160422 23:03:00 |
addSeconds
|
Signature |
{addSeconds(format; timestamp; amount)} |
|
Parameters |
format: format text |
|
timestamp: date/time value |
|
|
amount: decimal number |
|
|
Description |
Adds amount seconds to timestamp |
|
Returns |
Incremented date in format |
|
Example call |
{addSeconds(Ymd H:i:s; 2016-04-22 22:58; 5)} returns 20160422 22:58:05 |
subtractYears
|
Signature |
{subtractYears(format; timestamp; amount)} |
|
Parameters |
format: format text |
|
timestamp: date/time value |
|
|
amount: decimal number |
|
|
Description |
Subtracts amount years from timestamp |
|
Returns |
Decremented date in format |
|
Example call |
{subtractYears(Ymd; 2016-04-22; 5)} returns 20110422 |
subtractMonths
|
Signature |
{subtractMonths(format; timestamp; amount)} |
|
Parameters |
format: format text |
|
timestamp: date/time value |
|
|
amount: decimal number |
|
|
Description |
Subtracts amount months from timestamp |
|
Returns |
Decremented date in format |
|
Example call |
{subtractMonths(Ymd; 2016-04-22; 5)} returns 20151122 |
subtractDays
|
Signature |
{subtractDays(format; timestamp; amount)} |
|
Parameters |
format: format text |
|
timestamp: date/time value |
|
|
amount: decimal number |
|
|
Description |
Subtracts amount days from timestamp |
|
Returns |
Decremented date in format |
|
Example call |
{subtractDays(Ymd; 2016-04-22; 5)} returns 20160417 |
subtractHours
|
Signature |
{subtractHours(format; timestamp; amount)} |
|
Parameters |
format: format text |
|
timestamp: date/time value |
|
|
amount: decimal number |
|
|
Description |
Subtracts mount hours from timestamp |
|
Returns |
Decremented date in format |
|
Example call |
{subtractHours(Ymd H:i:s; 2016-04-22 12:37; 5)} returns 20160422 07:37:00 |
subtractMinutes
|
Signature |
{subtractMinutes(format; timestamp; amount)} |
|
Parameters |
format: format text |
|
timestamp: date/time value |
|
|
amount: decimal number |
|
|
Description |
Subtracts amount minutes from timestamp |
|
Returns |
Decremented date in format |
|
Example call |
{subtractMinutes(Ymd H:i:s; 2016-04-22 12:37; 5)} returns 20160422 12:32:00 |
subtractSeconds
|
Signature |
{subtractSeconds(format; timestamp; amount)} |
|
Parameters |
format: format text |
|
timestamp: date/time value |
amount: decimal number |
|
Description |
Subtracts amount minutes from timestamp |
|
Returns |
Decremented date in format |
|
Example call |
{subtractSeconds(Ymd H:i:s; 2016-04-22 12:37; 5)} returns 20160422 12:36:55 |
Control Functions
There is only one control function implemented in Calculate Fields so far, but this function ensures that the user can write very complex formulas with conditions. Since the functions can be embedded in each other, the user can write junctions with many branches.
ifThenElse
|
Signature |
{ifThenElse(condition; trueBranch; falseBranch)} |
|
Parameters |
condition: logical value |
|
trueBranch: any expression |
|
|
falseBranch: any expression |
|
|
Description |
Selects one of the two branches depending on condition |
|
Returns |
trueBranch if condition is true, falseBranch otherwise |
|
Example call |
{ifThenElse(\{equal(1; 1)}; 1 equals 1; 1 not equals 1)} returns 1 equals 1 |
Counters
There are several counters implemented in Calculate Fields which can be used in various scenarios.
The counters sorted into two groups:
-
Global counters: Counters which are incremented every time an affected formula is evaluated
-
Daily counters: Counters which resets every day. (Starting from 1)
In this chapter we assume that the counters current value is 4, so the incremented value will be 5 with the given format.
GlobalCounter
|
Signature |
{GlobalCounter(name; numberLength)} |
|
Parameters |
name: any text |
|
numberLength: decimal number |
|
|
Description |
Increments and returns the counter for name with length numberLength |
|
Returns |
Counter with length numberLength |
|
Example call |
{GlobalCounter(myName; 4)} returns 0005 |
GlobalCounterPerUser
|
Signature |
{GlobalCounterPerUser(name; numberLength)} |
|
Parameters |
name: any text |
|
numberLength: decimal number |
|
|
Description |
Increments and returns the counter for name for the user who creates the entity with length numberLength |
|
Returns |
Counter with length numberLength |
|
Example call |
{GlobalCounterPerUser(myName; 3)} returns 005 |
GlobalCounterPerModule
|
Signature |
{GlobalCounterPerModule(name; numberLength)} |
|
Parameters |
name: any text |
|
numberLength: decimal number |
|
|
Description |
Increments and returns the counter for name for the module of the entity with length numberLength |
|
Returns |
Counter with length numberLength |
|
Example call |
{GlobalCounterPerModule(myName; 2)} returns 05 |
GlobalCounterPerUserPerModule
|
Signature |
{GlobalCounterPerUserPerModule(name; numberLength)} |
|
Parameters |
name: any text |
|
numberLength: decimal number |
|
|
Description |
Increments and returns the counter for name for the user who creates the entity and for the module of the entity with length numberLength |
|
Returns |
Counter with length numberLength |
|
Example call |
{GlobalCounterPerUserPerModule(myName; 1)} returns 5 |
DailyCounter
|
Signature |
{DailyCounter(name; numberLength)} |
|
Parameters |
name: any text |
|
numberLength: decimal number |
|
|
Description |
Increments and returns the counter for name with length numberLength |
|
Returns |
Counter with length numberLength, or if the counter is not incremented this day then 1 with length numberLength |
|
Example call |
{DailyCounter(myName; 1)} returns 5 |
DailyCounterPerUser
|
Signature |
{DailyCounterPerUser(name; numberLength)} |
|
Parameters |
name: any text |
|
numberLength: decimal number |
Description |
|
Increments and returns the counter for name for the user who creates the entity with length numberLength |
Returns |
|
Counter with length numberLength, or if the counter is not incremented this day for this user then 1 with length numberLength |
Example call |
DailyCounterPerModule
|
Signature |
{DailyCounterPerModule(name; numberLength)} |
|
Parameters |
name: any text |
|
numberLength: decimal number |
|
|
Description |
Increments and returns the counter for name for the module of the entity with length numberLength |
|
Returns |
Counter with length numberLength, or if the counter is not incremented this day for this module then 1 with length numberLength |
|
Example call |
{DailyCounterPerModule(myName; 1)} returns 5 |
DailyCounterPerModule
|
Signature |
{DailyCounterPerUserPerModule(name; numberLength)} |
|
Parameters |
name: any text |
|
numberLength: decimal number |
|
|
Description |
Increments and returns the counter for name for the user who creates the entity and for the module of the entity with length numberLength |
|
Returns |
Counter with length numberLength, or if the counter is not incremented this day for the user who creates the entity and for this module then 1 with length numberLength |
|
Example call |
{DailyCounterPerUserPerModule(myName; 1)} returns 5 |
Example - Calculate monthly fee for an Opportunity
Use Case
The user would like to calculate a monthly fee of an opportunity to a custom field by dividing the amount of the opportunity by the duration.
Setup
Our opportunities module has a dropdown field called Duration with values: (database value in brackets) 6 months [6], 1 year [12], 2 years [24]. There is also a currency field called Monthly.
Workflow
Go to Workflow module and create a new Workflow. Set the base options like the following:
|
Name: as you wish |
Workflow Module: Opportunities |
|
Status: Active |
Run: Only on save |
|
Run on: All records |
Repeated runs: checked |

We do not create any conditions, since we would like the Workflow to run on all opportunities.
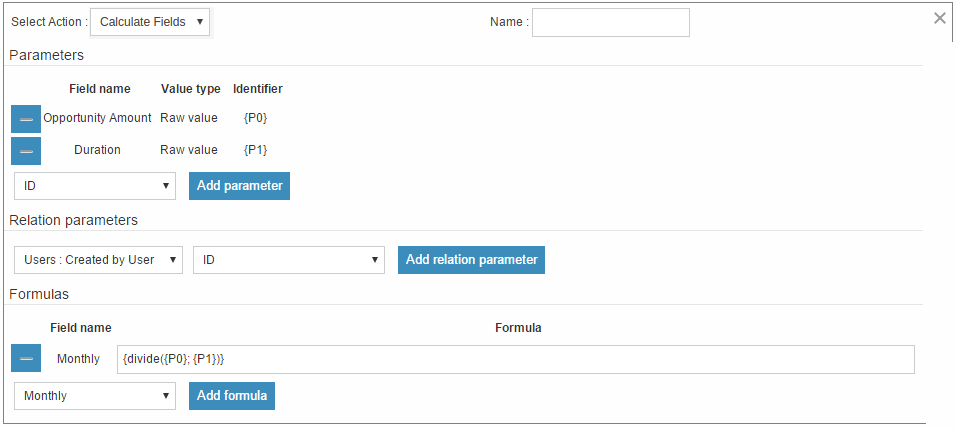
Now, add an action and select Calculate Fields from the dropdown.
Then, add two fields from Opportunities as parameters. First, select Opportunity amount (amount) and add it as a parameter (it will be {P0}) then select Duration and the raw value option from the data type dropdown and add it as parameter two (it will be {P1}). There is no need to add any relational parameters for this formula.
Now, add a formula for the monthly field and fill the textbox with the following formula:
{divide({P0}; {P1})}
So the whole action should look like this:
Save the Workflow and create a new Opportunity:
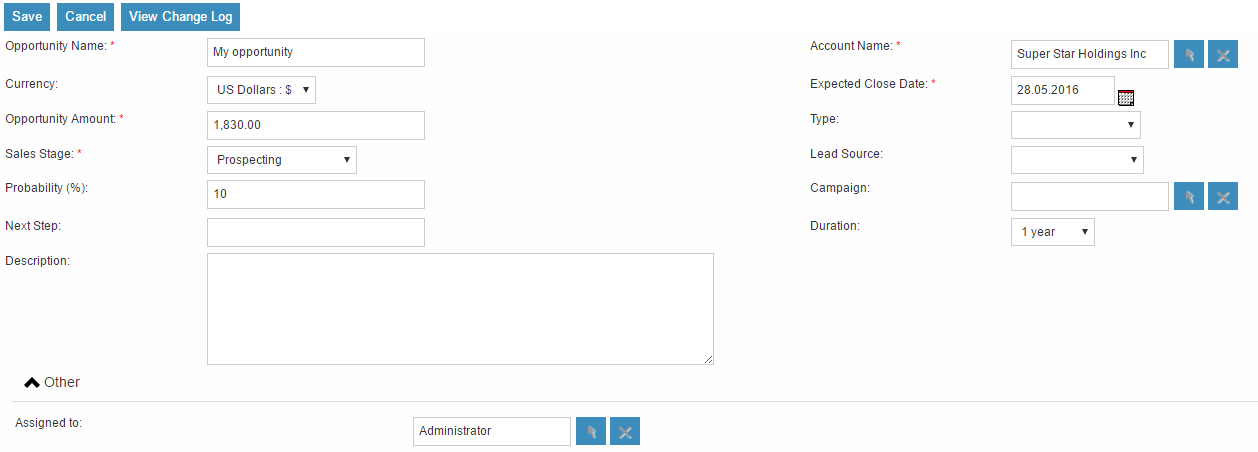
As you can see, we did not even add the monthly field to the EditView, because we don’t want to force the user to make calculations. Save the Opportunity and check the results on the DetailView:

AOW Calculated Fields was contributed by diligent technology & business consulting GmbH
Removing Actions
You can remove Action Lines by clicking the 'X' on the top right-hand side of the Action.

Removing Fields and Relationship Lines
You can remove Field and Relationship Lines by clicking the '-' on the left-hand side of the Action.

Events
Event Locations
The Locations module is used to capture the venue/site information where events are held.
Creating Locations
1. Access locations module from second side nav bar and select 'Create Location'.

2. This will take you to the Edit View. Enter information into the appropriate fields, all required fields are marked with a red asterisk and must be completed prior to saving.


3. Once the necessary information is entered, click Save.
Events
The Events module is used to capture information an particular event and send out invites to delegates. To view the Events held within the system click the 'Events' tab on the navigation bar. This will take you to the Events List View.
Creating Events
1. You can access the Events module on the side navigation bar and select 'Create Event'.

2. This will take you to the Edit View. Enter information into the appropriate fields, all required fields are marked with a red asterisk and must be completed prior to saving.

The following fields are found on the Events module:
-
Name – The name of the event
-
Start Date – The date and time of when the event starts
-
End Date – The date and time of when the event ends
-
Duration – The duration of the event. This will automatically change the end date or be altered automatically if the end date is changed.
-
Location – This is a relationship to the Event Locations module.
-
Budget – The budget for the event.
-
Email Invite Template – The Email Template that will be sent to associated Delegates.
-
Accept Redirect URL – The web page invitees should be redirected to after you accept an invite using the link provided in the Email Template.
-
Decline Redirect URL – The web page invitees should be redirected to after you decline an invite using the link provided in the Email Template.
-
Description – More information about the Event.
-
Assigned-To – Who the assigned user is for this event. This defaults to you who creates the event.
-
Created By – Which user created the event.
3. Once the necessary information is entered, click Save
Adding Delegates

3. Click 'Select Delegates'. A list of options will appear.

4. Select the appropriate option depending on who should be added to the Event.
-
Target List – Select a Target List of individuals to be associated to the event. All Targets, Leads and Contacts on this '''Target List '''will be added to the Event.
-
Targets – Select Targets to be associated to this Event.
-
Contacts – Select Contacts to be associated to this Event.
-
Leads – Select Leads to be associated to this Event.
-
Events – Select an Event to associate that Event’s delegates to this Event.
5. Once an option has been chosen a new pop-up box will appear to search and select records from the module type that was chosen.
6. The Delegates sub-panel will populate with the records selected.
Sending Invites To Delegates
2. Choose action 'Send Invites'.

3. This will send the email template selected in the 'Email Invite Template' to all Delegates who have the status 'Not Invited'
4. Once selected the Delegate status will automatically update to 'Invited'.
5. Choosing 'Resend Invites' will send invites out to all Delegates associated to the Event who have yet to respond.
Managing Delegates Acceptance Manually
2. Select the Delegates that require your 'Accept Status' to be updated.
3. Choose action 'Manage Acceptances'

4. A list of options will appear. Select appropriate statuses:
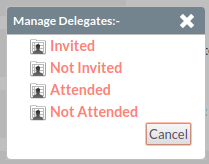
5. This will update the Delegates 'Accept Status' accordingly.
Acceptance will my automatically updated if the Delegate chooses to accept using the link provided in the email template.
Updating Delegates Status Manually
2. Select the Delegates that require your attendance to be updated.
3. Choose action 'Manage Delegates'

4. A list of options will appear. Select the appropriate status; Invited, Not Invited, Attended or Not Attended.
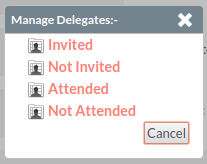
5. This will update the Delegates 'Status' accordingly.
Acceptance will be automatically updated if the Delegate chooses to accept using the link provided in the email template.
List view Actions, Detail View Actions and Bulk actions are similar to Leads module. Refer Leads module.
Reports
Advanced Open Reports (AOR) is the reporting module within KiyoCRM. AOR can be accessed by clicking the 'Reports' link within the navigation menu. The reporting module allows users to report on CRM data from any module and has many features to display key information quickly.
Creating Reports
You can access the reports module from the side nav bar and select 'Reports', then click on 'Create Report'.


You will be presented with the report Edit View. To obtain a list of fields to add to the report, you have to select a module from the Report Module drop down.

Adding Fields
Once you have selected a Report Module, the list of fields available will display on the left panel. You can add fields to the 'Fields' section of the report by expanding the module you wish to select fields from and then drag and drop those fields into the field section.

Once you have added fields to a Report, there are multiple options to configure for those fields:
-
Display – True or false option. Allows you to specify whether this field should be displayed on the report, or hidden. Users may wish to add fields to perform a function/sort/group/total but may not wish to show this on the Report.
-
Link – True or false option. Allows you to make the field a link. Setting this option to true will hyperlink the field on the Detail View of the report, allowing you to click on the record. This will navigate you to the appropriate record. For example, linking the Opportunity Name will take you to the Detail View of that Opportunity.
-
Label – This is the label that will be displayed for the Column/Field on the Report. You can change the label from the default to any alphanumerical value.
-
Function - Provides five options: Count, Minimum, Maximum, Sum and Average. Allows you to perform functions on alphanumerical fields. Users may wish to calculate the average Opportunity Amount, or Count total Opportunities at a given Sales Stage.
-
Sort – Ascending or Descending. Allows you to select whether to sort the field/column descending or ascending. This can be done for all fields.
-
Group – True or false option. Allows you to group by this field. For example, you may wish to group by Sales Stage when reporting on an Opportunity.
-
Total – Provides three options: Count, Sum and Average. This allows users to perform total calculations on numerical fields. This is useful for financial reporting such as the total value of all Opportunities at a given Sales Stage.
Adding Conditions
Once you have added the fields to your Report, you can add condition lines to the Report. You can add conditions with the same procedure as adding fields. Using the drag and drop functionality, you can drag fields into the 'Conditions' area which will add the field and allow you to specify the condition for that field.
Charts
You can add charts to Reports. Charts provide a visual representation of the Report data to you. In some scenarios, or for particular users, visual aids such as charts can assist quicker analysis and better understanding.
Chart Types
There are six types of charts that the user can select to display Report data. These are:
-
Pie Chart
-
Bar Chart
-
Line Chart
-
Radar Chart
-
Stacked Bar
-
Grouped Bar
To add a chart, you can click the 'Add Chart' button, below the Conditions section within the Report Edit View.

Once you click add chart, you will be presented with the option to specify the following information:
-
Title – Allows the user to specify the title for the chart. This will show on the Detail View of the Report and also on the dashlet chart.
-
Type – This allows the user to select from one of the six chart types detailed above.
-
X Axis – Allows the user to select the column that should be used for the X Axis.
-
Y Axis – Allows the user to select the column that should be used for the Y Axis.

Once you have specified the chart details, save the Report. This will display the chart on the Detail View of the Report, below the list of records returned.
Reports Dashlets
You can display a Report within a dashlet. It is possible to view multiple Report results as you can add multiple Report dashlets and select different Reports within each dashlet. To do this, add the Reports dash let to your homepage.


Once you have added the dashlet, you need to select the Report you wish to display within the dashlet. To do this, click the pencil icon to edit the dashlet.

This allows the user to select the Report they wish to display within the dashlet.

Once you have selected the Report, click Save. This will update your Reports dashlet to show the results of the Report.
For full details on adding and managing dashlets, see the Dashboard section of this user guide.
Reports Charts Dashlets
You can specify to only select to display a chart for Report dashlets. To do this, edit your Report dashlet and select the 'Only use charts' option. This will then list all charts you have created for this Report.

Select a chart or multiple charts and click Save. This will display the results in the chart selected.

Scheduled Reports
You can schedule reports to be automatically run and emailed to the required Contact(s). This allows users to schedule reports to be sent to Managers or Team Leads either Daily, Weekly or Monthly. To create a Scheduled Report, you can click the 'Create' option within the Scheduled Reports Sub-panel on the Detail View of the Report. You can also select existing Scheduled Reports to relate to the Report.

Once you have clicked 'Create', there are options to set for the Scheduled Report. Give the Scheduled Report a relevant name. In this example, we will use 'Daily Opportunities Report for Managers'.

You can select the 'Advanced' option for report scheduling. This will provide a cron notation style option. This is best suited for System Administrators or advanced users.

Once you have entered a name and selected a schedule, click Save.

Once you save the Scheduled Report record, this will display in the Scheduled Reports subpanel within the Detail View of the Report.

You can view when the Scheduled Report last ran by viewing the 'Last Run' column/field on the sub-panel. This shows in a date/time format.
Reschedule
Rescheduling a Call
To reschedule a Call, you can click the 'Reschedule' button on the Detail View of a Call which has been defined as Outbound and Planned.

Defining the Details
Clicking the Reschedule button will produce a pop up or dialogue box up. This enables users to set the date and time for the rescheduled Call.

You can also select a reason for the incomplete/unsuccessful Call from the drop-down list. Once the details have been defined, click the 'Save' button to save the Call.

Tracking History
Once Saved, the Call is rescheduled for the new date and time. you can view all Call Reschedule history by clicking the 'Reschedule' tab on the Calls Detail View.

Altering Reasons Dropdown
System Administrator users can edit the reasons available in the Reschedule pop-up using the drop-down editor. The drop-down list used is called 'call_reschedule_dom'.
Summary
In this chapter we have covered the functionality of the advanced modules. These modules have a very specific purpose - enabling users to improve processes and efficiently report on and manage data.
In the next chapter, we will cover some third-party modules which are part of the KiyoCRM product. These third-party modules provide additional functionality to you such as teams and location mapping.