KiyoCRM Documentation | User Guide, API, Setup & ConfigurationKiyoCRM
Explore the complete documentation for KiyoCRM — a powerful, low-code CRM platform by Kiyo Solutions Pvt Ltd. Learn how to set up, configure, and use sales, marketing, support, and automation modules. Access integration guides, API references, admin tools, and user tips for both KiyoCRM Pro and Lite editions.
- Introduction
- Dashboards
- Core Modules
- Leads
- Contacts
- Meetings
- Companies
- Opportunities
- Calls
- Tasks
- Documents
- Emails
- Email Templates
- Notes
- Targets
- Target - Lists
- Campaigns
- Surveys
- Bugs
- Cases
- Projects
- Spots
- Employees
- Advanced Modules
- Administration
- Emails
- 1. How to configure a Microsoft OAuth Provider
- 2. Compose Email 'From' Dropdown Behavior Compose Email 'From' Dropdown Behavior
- 3. How to configure Inbound Email with OAuth
- 4. External OAuth Provider Overview
- 5. Configuring Security Groups for Inbound Email
- Users
- Roles and Security Groups
- System
- Developer Tools
- Search
- 1.1 Introduction
- 1.2 Set up Elasticsearch
- 1.3 Set up Elasticsearch integration
- 1.4 Search Syntax
- 1.5 Command Line Tools
- 1.6 Troubleshooting
- Studio
- Google Maps
- SSO
- Sales Module Settings
- Google Credentials and Syncing
Introduction
Introduction
Introduction
The KiyoCRM Team and Vision
KiyoCRM is a result of the innovation, dedication, and long-standing experience of the Kiyo Solutions team. Built with a mission to empower organizations with flexible and scalable CRM solutions, KiyoCRM combines modern user experience with powerful automation to meet the needs of businesses across industries. KiyoCRM has been thoughtfully developed with continuous input from real-world users, consultants, and CRM experts, ensuring a platform that’s both robust and adaptable.
Our team is committed to delivering an intuitive, high-performance system that simplifies CRM complexity, helps teams sell smarter, and supports customers more efficiently. With each release, new features and improvements are added to enhance usability, performance, and flexibility — making KiyoCRM one of the most configurable low-code CRM platforms on the market today.
What is KiyoCRM?
KiyoCRM is a powerful, low-code Customer Relationship Management system designed for businesses of all sizes. It is available in two models — KiyoCRM Lite, a SaaS-based platform for small and mid-sized businesses, and KiyoCRM Pro, a fully customizable on-premise/enterprise-ready solution designed to support complex CRM needs.
KiyoCRM includes a comprehensive set of modules covering Sales, Marketing, Support, and Operations. It provides full control over workflows, automation, access roles, data security, and user experience — all without the need for heavy coding. Whether you're looking to manage your leads, track your sales pipeline, run automated campaigns, or handle customer support cases, KiyoCRM offers a seamless and efficient way to do so.
KiyoCRM also supports powerful integrations — from Google and Outlook calendars to payment gateways and messaging platforms like WhatsApp and SMS — giving businesses a unified system that adapts to their operations.
Our Mission
Kiyo Solutions’ mission is simple:
-
To provide a powerful CRM platform that grows with your business.
-
To enable teams to work smarter, automate routine processes, and deliver exceptional customer experiences.
-
To foster innovation through open customization, flexible deployment, and continuous enhancements.
We believe that a CRM should work for you, not the other way around.
What's in This User Guide?
This User Guide is crafted for end users, admins, and teams adopting KiyoCRM in their day-to-day operations. Whether you're a sales rep logging your first lead, a marketing manager launching a campaign, or a system administrator configuring access roles, this guide will walk you through each part of the platform with clear, practical instructions.
Topics in the guide include:
-
Getting Started with KiyoCRM
-
Navigating the Dashboard
-
Managing Leads, Contacts, and Companies
-
Tracking Opportunities and Sales Pipelines
-
Creating Quotes, Invoices, and Contracts
-
Running Marketing Campaigns
-
Handling Support Tickets and SLAs
-
Configuring Workflows and Automations
-
Customizing Modules and Fields
-
Generating Reports and Analytics
No prior experience with KiyoCRM is necessary, though basic familiarity with CRM concepts and standard web applications will help. This guide aims to be your go-to companion in making the most of KiyoCRM’s features and helping your team achieve CRM success.
Getting Started
The login page provides secure access to the KiyoCRM system for registered users. It supports traditional username/password login as well as Google-based authentication.

Username/Password Login: On clicking "Log In", credentials are validated on the server. On success, the user is redirected to the dashboard or home screen. On failure, an error message is shown.

Google Login: Redirects to Google OAuth and returns to the application with authenticated user details.

Forgot Password: Redirects to a password recovery process with Username and Email Address

Language Selector: Before logging into KiyoCRM, you can select the language you wish to use. There are many default languages for KiyoCRM and there are also additional language packs available for other languages around the world.
Once you have chosen your language and have entered your user credentials, you will be able to click Login to access KiyoCRM

Dashboards
The KiyoCRM Dashboard allows for a highly customizable layout using panels and tabs, accessible via the three-dot menu at the top right of the dashboard interface.

Dashboard Options
1. Add Panel
-
Opens a form to insert a new dashlet (e.g., bar chart, pie chart, reports etc.).
-
Users can choose panel type and data source to display relevant insights.

2. Add Tab
-
Creates a new dashboard
-
Ideal for organizing data by department, role, or workflow.
-
Prompts for:
-
Tab name
-
Number of columns (for layout)

3. Manage Panel
-
Allows users to:
-
Rearrange Dashboards in an order.
-
Customize the layout within a tab.

Dashboard Search Function
The Search bar at the top-left of the KiyoCRM Dashboard provides a fast and intuitive way to locate records, modules, or actions within the CRM system.

What It Does
-
Instant Global Search: Search across all CRM modules—Contacts, Leads, Deals, Tasks, Notes, etc.from one place.
-
Full-Text Indexing: Every piece of CRM data is indexed, allowing deep keyword-based search, including partial and fuzzy matches.

Core Modules
Core Modules
Leads
The Leads module in KiyoCRM allows users to capture, track, and manage potential clients throughout the sales funnel.

List View Actions
Lead Creation:
Click + Create Lead to manually add new leads.


-
Options for importing leads from external sources (.CSV file). Can download sample file using Download Sample Import File Template


- Lead creation via web forms or integrations is also supported through Campaigns

2.Lead Views
-
List View: Displays all leads with columns such as Name, Status, Company, Phone, Email, and Assigned User.
-
Kanban View: Visual workflow by lead status (New, Assigned, In Process, etc.).


Note: Set the filter by changing kanban settings using Settings icon on the top right side

3. Lead Status Tags:
-
Easily identify progress with colored labels:
-
New, Converted, Assigned, In Process, Recycled, Dead etc

4. Filters and Sorting:
-
Use the Filters section to segment data (e.g., by user, status, company). Having Quick filter and Advanced filter options

Quick Filter
The Quick Filter feature in KiyoCRM provides a fast and user-friendly way to narrow down lead records based on basic criteria without needing complex conditions.
Available Filter Options:
-
Name: Search leads by entering all or part of the name.
-
Open Items: Check this to view only active or unresolved leads.
-
My Items: Filters to display only leads assigned to the currently logged-in user.
-
My Favorites: Shows leads marked as favorites by the user.
Once criteria are selected, click Search to apply the filter and instantly update the leads list.

The Advanced Filter provides a comprehensive set of fields to refine lead searches based on contact details, company information, status, source, and assignment.
Sorting & Saving:
-
Save your custom filter with a name for reuse by selecting saved filter from My Filters dropdown
-
Sort results by a selected column in Ascending or Descending order.

Saved filters, recently viewed records list and favourite records displayed in the sidebar.

User Assignment:
-
Each lead is assigned to a CRM user for follow-up and activity tracking.

Quick Contact Options
-
Click-to-call, WhatsApp, and SMS icons available for quick contact. Record history will be tracked under the History Submodule of detail view.
Note: Call recordings are also tracked and responses updated automatically through API.

- Use the global Elastic Search bar to instantly locate any lead by name, phone, email, or keyword.

- To sort records on the Leads List View, click any column title which is sortable. This will sort the column either ascending or descending

-
Clicking on the pencil icon on leads list view page to the display of record edit view.
- ‘i’ icon in the leads list view page gives the additional details of the lead.

Leads Bulk Actions
In list view, Select group of records by checking the checkbox, the actions are as follows:
1. Mass Update —-- To update some or all the Leads on the List View, use the Mass Update panel as described in the Mass Update of Records section of this user guide.


2. Merge —To merge duplicate Leads, select the records from the Leads List View, click the Merge link in the Actions drop-down list, and progress through the merge process.


3. Email – Send a direct email to the selected leads using the system's email template or custom message.


4. Add To Target List – Add the selected leads to a predefined marketing or outreach list for future campaigns.


4. Print as PDF – Generate and download a PDF document containing details of the selected leads.
5. Export – Export the selected lead records into a file format (usually CSV or Excel) for offline use or reporting.
6. Print as PDF – Generate and download a PDF document containing details of the selected leads.
7. Export – Export the selected lead records into a file format (usually CSV or Excel) for offline use or reporting.
8. Map – View the geographic location of the selected leads on a map, if address data is available.
9. Send Bulk SMS – Send text messages to all selected leads simultaneously using an integrated SMS service.
10. Delete – Permanently remove the selected lead records from the system.

Column Chooser
The Column Chooser allows you to customize which columns are displayed in the list view by showing or hiding specific fields.


Leads Detail View Actions
To view a lead’s details, click the lead name in the list view. This will open the record in the detail view.

- Edit – Open the lead record in edit mode to update its details.
-
Duplicate – Create a new lead record by copying the details of the current one.
-
Delete – Permanently remove the current lead record from the system.
-
Find Duplicates – Search for and display any duplicate lead records in the system.
-
Convert Lead – Convert the lead into an opportunity, contact, or company and also create notes, schedule meetings, calls, create tasks based on our requirement.
We can Select an existing company or contact or else will create a new one.


After the Lead Conversion records list would be created.

- Manage Subscriptions – View or update the lead’s subscription preferences (e.g., for emails or newsletters).
-
Send SMS – Send a text message directly to the lead's mobile number.
-
Print As PDF – Generate a printable PDF version of the lead's detail view.
-
View Change Log – View a history of changes made to the lead’s record, including who made them and when.
Lead's Activities Management
Lead Activity Management allows users to track and manage interactions with a lead by creating tasks, scheduling meetings, logging calls, or composing emails. Navigate to a detailed view of a record to view Activities.
All actions (emails sent, updates, etc.) are tracked per lead.
- Create Task – Assign a task related to the lead to ensure follow-up actions are completed on time.
- Schedule Meeting – Set up a meeting with the lead to discuss business opportunities or next steps.
- Log Call– Record details of a phone conversation with the lead for future reference.
- Compose Email – Draft and send an email to the lead directly from the system.


Lead's History Management
Click to Call statuses, SMS and emails history of a lead would track here.


Leads Submodules
Click on detailed view of a records to and navigate to submodules:
Campaigns
The "Campaigns" tab in the Lead detail view displays any campaign-related activities linked to the lead, including the campaign name, activity type, activity date, and related details.

Events
The "Events" tab in the Lead detail view shows any events associated with the lead, with options to create or select events.

SMS
The "SMS" tab in the Lead detail view displays details of text messages sent to the lead, including sender, recipient, phone number, message content, template, message ID, status, and send date.

Security Groups
The "Security Groups" tab in the Lead detail view lists the security groups associated with the lead, showing each group's name and description, along with options to select or remove them.
When a user is created, a security group creates a default with the user name and it is assigned to the records by default to track which user created the records.

Note: --Edit view, Detail view and list view form fields and layouts can be customized as per requirement using Administration Settings. Submodules also Customized as per usage.
Contacts
In KiyoCRM a Contact is an individual who is typically associated with a Company (organization) or Opportunity (qualified prospect). For example, if Techco is the Company, then John Smith, Sales Manager of Techco is the Contact. This module holds all information relating to these individuals and also provides a vantage point for any history relating to a Contact record, for example if they were involved in a Meeting, raised a Case or sent an Email.

List View Actions
You can access the Contacts actions from the Contacts module menu drop down or via the Sidebar. The Contacts actions are as follows:

-
Create Contact – A new form is opened in Edit View to allow you to create a new Contact record.
-
View Contacts – Redirects you to the List View for the Contacts module. This allows you to search and list Contact records.
-
Import Contacts – Redirects you to the Import Wizard for the Contacts module.
-
Kanban View – Visual workflow by Contacts title (Mr., Ms., Mrs. )
Note: Set the filter by changing kanban settings using Settings icon on the top right side

-
Use Filter for Search of records - Quick filter and Advanced filters
Note: Refer Quick filter of Leads.
-
Recently viewed records displayed in the side nav bar.
-
Saved filters list showing in the side nav bar as My Filters
-
Favourite records of contacts would be displayed in the side nav bar. (From a detailed view of records, selecting the star beside the title undergoes a record into the favourites list.)
-
Column Chooser — The Column Chooser allows you to customize which columns are displayed in the list view by showing or hiding specific fields.
Note: Refer Leads module Column Chooser.
-
To sort records on the Contacts List View, click any column title which is sortable. This will sort the column either ascending or descending.
- To search for a Contact, Use Search engine on top
-
Clicking on the pencil icon Contacts list view page to the display of record edit view.
Bulk Actions of Contacts
In list view, select group of records by checking the checkbox, the actions are as follows:
-
Email: Send an email to the selected contacts directly.
-
Mass Update: Apply changes to multiple contact records at once.
-
Merge: Combine duplicate or similar contact records into one.
-
Add to Target List: Add selected contacts to a marketing or campaign list.
-
Print as PDF: Generate a PDF version of the selected contact records.
-
Export: Download the selected contact data in a preferred format (CSV).
-
Map: View the geographical location of contacts on a map.
-
Send Bulk SMS: Send a text message to multiple selected contacts.
-
Delete: Remove selected contacts from the system.

Quick Contact Options
In List view – Click to Call Configuration, WhatsApp and SMS icons are available for quick contacting. History should be tracked under a detailed view of every record under the History Submodule.
Note: Call recordings are also tracked and responses updated automatically through API.

Customer One view
The Customer One View provides a consolidated, real-time snapshot of a customer's interactions, transactions, and engagement across the system. This interface is designed for quick decision-making and streamlined customer management.
Click on eye icon in list view to open the Customer one view
🧍♂️ Profile Section
-
Customer Name & Initials: Displayed prominently with initials inside a circle.
-
Rating Stars: Visual representation of customer priority or satisfaction (e.g., 3 out of 5 stars).
Contact Actions -
📧 Email
-
📞 Call
-
🎥 Video Call
-
💬 WhatsApp
-
Basic Info: Includes phone number, email, and location.
-
Links: Navigate to the Compose email, Call initiation, Video Call initiation, WhatsApp chat pages when user click on Email, Phone, Video, WhatsApp icons respectively.
📂 Activity Summary Cards
Each module shows the number of related records, with format:
[Closed / Total]
-
Cases
-
Tasks
-
Opportunities
-
Leads
-
Projects
-
Quotes
-
Invoices
-
Contracts
-
Documents
-
Events
💰 Revenue & Purchase Insights
Displays financial and transactional data:
-
First Purchase Date
-
Last Purchase Date
-
Purchased Products
-
Pending Revenue
-
Received Revenue
-
Total Revenue
Note: If no data is available, the field displays None or 0.
🎯 Quick Actions
-
Create Case: Instantly open a support or service ticket.
-
Create Opportunity: Initiate a new sales process from the customer profile.
🔚 Close Button
-
Closes the one-view screen and returns to the previous interface.

Contact’s Detail view Actions
The Contacts Detail View in KiyoCRM provides a comprehensive snapshot of an individual contact's information. This includes personal details, communication history, activity timeline, associated companies, tasks, and notes. From this centralized interface, users can access essential tools and perform actions related to the contact, ensuring efficient management and seamless engagement.
To view Contacts detail view, click on the Name in list view.
- Edit – Modify the contact's existing information.
-
Duplicate – Create a new contact by copying current contact details.
-
Delete – Permanently remove the contact from the system.
-
Find Duplicate – Scan and identify possible duplicate contact entries.
-
Manage Subscriptions – Control the contact's email preferences and opt-in/opt-out settings.
-
Print as PDF – Generate a downloadable PDF version of the contact's details.
-
View Changelog – Review the history of changes made to this contact.
-
Send Welcome Email – Send a predefined welcome message to the contact having customer portal access.
-
Send Reset Password Email – Trigger a password reset email for portal access.

Contact’s Activities Management
Contact Activity Management allows users to track and manage interactions with a Contact by creating tasks, scheduling meetings, logging calls, or composing emails
All actions (emails sent, updates, etc.) are tracked per contact.
- Create Task – Assign a task related to the contact to ensure follow-up actions are completed on time.
-
Schedule Meeting – Set up a meeting with the contact to discuss business opportunities or next steps.
-
Log Call – Record details of a phone conversation with the contact for future reference.
-
Compose Email – Draft and send an email to the contact directly from the system'

Contacts History Management
Click to Call statuses, SMS and emails history of a lead would be tracked here.

Contact’s Submodules
Click on detailed view of a records to and navigate to submodules:
Opportunities
The Opportunities submodule displays all sales opportunities linked to the contact, showing deal stages, values, expected close dates, and statuses. It helps track how the contact is contributing to your sales pipeline and enables quick access to each opportunity for updates or follow-up.
Create or select from existing records to linkup with contact. When lead is converted, opportunity records are linked to the contact.

Documents
The Documents submodule lists all files associated with the contact, such as contracts, proposals, or identification documents. It provides quick access to upload, preview, or manage relevant files directly from the contact’s profile.
Can create a new or select from an existing list.

Leads
The Leads submodule shows all lead records linked to the contact, including their source, status, and qualification progress. It helps track the contact’s journey from initial interest to potential conversion.
Can create a new or select from an existing list.

Campaigns
The Campaigns submodule displays all marketing campaigns the contact is part of, showing participation status, engagement metrics, and response history. It helps monitor the contact's interaction with your marketing efforts.

Cases
The Cases submodule lists all support or service cases associated with the contact, including issue descriptions, statuses, priorities, and resolutions. It provides a clear view of the contact’s support history and helps ensure timely follow-up and resolution.
Can create a new or select from an existing list.

Bugs
The Bugs submodule tracks all software bugs reported by or related to the contact. It includes details like bug status, severity, and resolution progress, helping teams stay informed about product issues affecting the contact.
Can create a new or select from an existing list.

Direct Reports
The Direct Reports submodule lists contacts who report directly to the current contact, typically used in organizational hierarchies. It provides quick visibility into reporting structures and team relationships linked to the contact.
Can create a new or select from an existing list.

Quotes
The Quotes submodule shows all sales quotes associated with the contact, including quote status, total value, and validity dates. It allows users to manage pricing proposals and track progress toward deal closure.
Can create a new or select from an existing list.

Invoices
The Invoices submodule displays all invoices linked to the contact, including invoice numbers, amounts, due dates, and payment statuses. It helps monitor billing history and manage financial interactions with the contact.
Can create a new or select from an existing list.

Contracts
The Contracts submodule lists all contractual agreements related to the contact, showing contract terms, start and end dates, and current status. It ensures quick access to legal and binding documents associated with the contact.
Can create a new or select from an existing list.

Events
The Events submodule shows all calendar events linked to the contact, such as meetings, webinars, or scheduled calls. It provides a timeline of past and upcoming engagements to support effective planning and follow-up.
Can create a new or select from an existing list.

Projects
The Projects submodule displays all projects associated with the contact, including project names, statuses, deadlines, and roles. It helps track the contact’s involvement in ongoing or completed initiatives, ensuring better collaboration and accountability.
Can create a new or select from an existing list.

Security Groups
The Security Groups submodule shows which access control groups the contact belongs to, helping manage visibility, permissions, and data security across the CRM. It ensures the right users can access and manage the contact's information.

SMS
The SMS submodule lists all text message interactions with the contact, including message content, timestamps, and delivery status. It provides a quick overview of mobile communication for better engagement tracking.

Note: --Edit view, Detail view and list view form fields and layouts can be customized as per requirement using Administration Settings. Submodules also Customized as per usage.
Meetings
The Meetings module in KiyoCRM allows Users to create a record of any Meeting that they have been involved in. The Meeting scheduler allows a User to invite attendees, email invitees, set reminders, reschedule and relate to other modules including a Company, Contact, Project and many other Objects. This module has many more helpful functions that assist the User to plan and organize their Meetings.
List view Actions
You can access the Meetings actions from the Meetings module menu drop down or via the Sidebar. The Meetings actions are as follow:
- Schedule Meeting – A new form is opened in Edit View to allow you to create a new Meeting record. Allows users to schedule meetings by setting the subject, date, time, duration, and related records. Users can add reminders, invite participants, and send notifications via popup or email.

Let's users assign meetings, view availability, add invitees by name or email, and create new contacts or leads directly from the scheduling interface.

- View Meetings – Redirects you to the List View for the Meetings module. This allows you to search and list Meeting records.
- Import Meetings – Redirects you to the Import Wizard for the Meetings module. For more information, see the leads module Import.
- Kanban View: Visual workflow by Meeting Status (Planned, held, not held)
Note: Set the filter by changing kanban settings using Settings icon on the top right side

- To sort records on the Meetings List View, click any column title which is sortable. This will sort the column either ascending or descending.
- To search for a Meeting, Use Search engine on top
-
Clicking on the pencil icon Meetings list view page to the display of record edit view.
-
Clicking on the ‘i’ icon Meetings to the display of Additional Details popup.
-
Clicking on the X icon Meetings to the closure of the meeting in the list view page.

Bulk Actions
In list view, select group of records by checking the checkbox, the actions are as follows:
- Mass Update: Allows users to update multiple meeting records at once with common changes, saving time and effort.
-
Export: Enables users to download meeting data in various formats for reporting or backup purposes.
-
Map: Displays meeting locations on a map for better visualization and route planning.
-
Delete: Lets users remove selected meeting records in bulk from the system.

Detail View Actions
Click on the Subject to view detail view:
- Edit, Duplicate, Delete, Find Duplicates functionalities are similar to other modules. Refer Leads module Detail view actions.
- Close and Create New: Saves the current meeting record and immediately opens a new blank form to schedule another meeting, streamlining back-to-back entries.
- Close: Saves the current meeting record and exits the form without opening a new one.

Submodules
Contacts:
Displays and manages the list of attendees linked to a meeting, allowing users to add, search, or create contact records for scheduling.

Allows assignment of CRM users to meetings, enabling collaboration, ownership tracking, and calendar visibility for scheduled events.

Leads
Enables users to link potential customers (leads) to meetings for follow-ups, demos, or discussions, helping track engagement throughout the sales process.

Notes
Allows users to add and view notes related to a meeting, capturing key discussion points, decisions, and follow-up actions for future reference.

Security Groups
Control access to meeting records by assigning them to specific user groups, ensuring only authorized users can view or modify the information.

Note: --Edit view, Detail view and list view form fields and layouts can be customized as per requirement using Administration Settings. Submodules also Customized as per usage.
Companies
The Companies module is the centralized base from which you can create an association with most records in KiyoCRM. It is possible to create a relationship with Contacts, Converted Leads, Opportunities, any Activity such as Emails or Meetings and Cases. Companies in KiyoCRM will typically hold all information specific to a company that your organization will have a relationship with. In real world terms a Company may be a business entity that is a qualified Sales Prospect, Customer, Supplier or Re-seller and can be used to track all interactions that take place between these entities and your organization.
List View Actions
You can access the Companies actions from the Companies module menu drop down or via the Sidebar. The Companies actions are as follows: -

- Create Company – Once clicked, a new form is opened in Edit View to allow you to create a new Company record.
- View Companies – Once clicked, you will be redirected to the List View for the Companies module. This allows you to search and list Companies records.
- Import Companies – Redirects you to the Import Wizard for the Companies module.
- Kanban View – Visual workflow by Company type (Analyst, Competitor etc.)
Note: Set the filter by changing kanban settings using Settings icon on the top right side.

-
Use Filter for Search of records - Quick filter and Advanced filters
Note: Refer Quick filter of Leads.
-
Recently viewed records displayed in the side nav bar.
-
Saved filters list showing inside nav bar as My Filters.
-
Favorite records of companies would be displayed in the side nav bar. (From a detailed view of records, selecting the star beside the title undergoes a record into the favorites list.)
-
Column Chooser — The Column Chooser allows you to customize which columns are displayed in the list view by showing or hiding specific fields.
Note: Refer Leads module for Column Chooser.
-
To sort records on the Companies List View, click any column title which is sortable. This will sort the column either ascending or descending.
- To search for a Company, Use Search engine on top
Bulk Actions
In Companies list view, there are some groups of actions which can be done by selecting group of records wish are as follows:
- Email: Send an email to the selected companies directly.
- Mass Update: Apply changes to multiple company records at once.
- Merge: Combine duplicate or similar company records into one.
- Add to Target List: Add selected companies to a marketing or campaign list.
- Print as PDF: Generate a PDF version of the selected company records.
- Export: Download the selected company data in a preferred format (.CSV).
- Map: View the geographical location of companies on a map.
- Add Contacts to Target List: Add selected companies related Contacts to a marketing or campaign list.
- Send Bulk SMS: Send a text message to multiple selected companies.
- Delete: Remove selected companies from the system.

Quick Contact Options
In List view – Click to Call Configuration, WhatsApp and SMS icons are available for quick contacting. History should be tracked under a detailed view of every record under the History Submodule.
Note: Call recordings are also tracked and responses updated automatically through API.

Company One View
The Company One View provides a centralized, comprehensive snapshot of all key data and interactions related to a company. It consolidates associated contacts, opportunities, quotes, cases, documents, projects, and communication history into a single interface, enabling sales, support, and marketing teams to collaborate effectively and make informed decisions.
Click on the eye icon in the list view to open the Company One View.
🧾 Profile Section:
-
Company Name & Logo Details: Displayed prominently with either the uploaded logo or initials inside a circle.
-
Rating Stars: Visual representation of customer priority or satisfaction (e.g., 3 out of 5 stars).
Company Actions:
-
📧 Email
-
📞 Call
-
🎥 Video Call
-
💬 WhatsApp
Basic Info: Displays the company phone, email, website, and location.
📂 Activity Summary Cards:
Each module card shows the number of related records, with format:
[Closed / Total]
-
Cases
-
Tasks
-
Opportunities
-
Leads
-
Projects
-
Quotes
-
Invoices
-
Contracts
-
Documents
-
Events
💰 Revenue & Purchase Insights:--
Displays financial and transactional data:
-
First Purchase Date
-
Last Purchase Date
-
Purchased Products
-
Pending Revenue
-
Received Revenue
- Total Revenue
Note: If no data is available, the field displays None or 0.
🎯 Quick Actions:
-
Create Case – Instantly open a support or service ticket.
-
Create Opportunity – Launch a new sales deal from the company profile.
Closes the One View screen and returns to the previous interface.

Detail view Actions
The Company Detail View provides a complete overview of a company's profile, including key information, associated contacts, sales data, support history, and related records. It serves as the central hub for managing all interactions and relationships tied to the company.
Click on the company name to view a detailed view of the record.
- Edit – Modify the company's existing information.
-
Duplicate – Create a new company by copying current company details.
-
Delete – Permanently remove the company from the system.
-
Find Duplicate – Scan and identify possible duplicate company entries.
-
Print as PDF – Generate a downloadable PDF version of the company's details.
-
View Changelog – Review the history of changes made to this company.


Company’s Activities Management
Company Activity Management tracks all interactions and engagements with a company, including calls, meetings, tasks, emails, and notes. It helps teams stay coordinated, follow up effectively, and maintain a complete timeline of activity history.
In the detailed view, there is an activities tab. All actions (emails sent, updates, etc.) are tracked per company.
- Create Task – Assign a task related to the company to ensure follow-up actions are completed on time.
-
Schedule Meeting – Set up a meeting with the company to discuss business opportunities or next steps.
-
Log Call – Record details of a phone conversation with the company for future reference.
-
Compose Email – Draft and send an email to the company directly from the system.

Company’s History Management
Click to Call statuses, SMS and emails history of a lead would be tracked here.

Submodules
Click on detailed view of a records to and navigate to submodules:
Documents
The Documents submodule stores and organizes all files related to the company, such as contracts, proposals, and reference materials, enabling easy access and centralized document management.
Can create a new or select from an existing list.

Contacts
The Contacts submodule lists all individuals linked to the company, showing their roles, contact details, and interaction history, making it easy to manage relationships and communication.
Can create a new or select from an existing list.

Opportunities
The Opportunities submodule tracks all potential deals and sales pipelines associated with the company, helping teams monitor progress, forecast revenue, and drive conversions.
Can create a new or select from an existing list.

Campaigns
The Campaigns submodule under a company helps manage and track marketing campaigns. It allows for the creation, budgeting, execution, and analysis of campaigns, ensuring effective targeting and measurement of results across various channels.

Leads
The Leads submodule under a company focuses on managing potential customer leads. It helps capture, track, and nurture leads through the sales funnel. Key features include lead generation, segmentation, follow-up management, and converting leads into opportunities or sales, ensuring an organized and efficient sales process.
Can create a new or select from an existing list.

Member Organizations
The Member Organizations submodule refers to managing relationships with organizations that are part of a larger network, association, or partnership. It helps track details about each member organization, including contact information, membership status, participation in activities, and any agreements or collaborations. This submodule ensures effective communication, collaboration, and management of the organization's relationships with its members.
Can create a new or select from an existing list.

Cases
The Cases submodule helps manage customer support requests by tracking, prioritizing, and resolving issues efficiently, ensuring timely responses and customer satisfaction.
Can create a new or select from an existing list.

Quotes
The Quotes submodule is used to create, manage, and track sales quotes or price estimates provided to potential customers. It typically includes features for generating customized quotes, applying discounts, tracking approval processes, and converting quotes into sales orders once accepted. This submodule ensures streamlined sales processes and accurate pricing.
Can create a new or select from an existing list.

Invoices
The Invoices submodule manages the creation, tracking, and processing of company billing. It allows businesses to generate invoices, record payments, monitor outstanding balances, and ensure accurate financial records, supporting efficient revenue collection and accounting.
Can create a new or select from an existing list.

Contracts
The Contracts submodule handles the creation, storage, and management of agreements between the company and its clients, vendors, or partners. It ensures key terms, durations, and obligations are tracked, enabling compliance, renewals, and efficient relationship management.
Can create a new or select from an existing list.

Products and Services Purchased
The Products and Services Purchased submodule tracks all goods and services acquired by the company. It records purchase details, such as item descriptions, quantities, prices, and purchase dates, helping manage procurement, budgeting, and inventory efficiently.

SMS
The SMS submodule enables the company to track sent messages and communications. It is used for alerts, promotions, reminders, and notifications, supporting direct and timely engagement through mobile messaging.

Bugs
The Bugs submodule is used to log, track, and manage software defects or issues reported by users or by company. It helps ensure timely resolution by assigning priorities, statuses, and responsible team members, improving software quality and project transparency.
Can create a new or select from an existing list.

Projects
The Projects submodule is designed to plan, execute, and monitor company projects. It allows for task assignment, timeline tracking, resource allocation, and progress monitoring, ensuring projects are delivered on time, within scope, and on budget.
Can create a new or select from an existing list.

Security Groups
The Security Groups submodule manages user access and permissions within the system. It allows administrators to group users based on roles and assign specific access rights, ensuring data security, compliance, and controlled access to sensitive information.
When a user is created, a security group creates a default with the user name and it is assigned to the records by default to track which user created the records.
Can select from an existing list.

Note: --Edit view, Detail view and list view form fields and layouts can be customized as per requirement using Administration Settings. Submodules also Customized as per usage.
Opportunities
An Opportunity is a qualified Sales prospect with a likely chance that they will be able to do business with your company. You have established that they have buying power and have entered into the buying cycle. This module allows you to track your Opportunities throughout the Sales Pipeline until the deal is 'Closed Lost or 'Closed Won'.
Opportunities Actions You can access the Opportunities actions from the Opportunities module menu drop down or via the Sidebar. The Opportunities actions are as follows:
- Create Opportunity – A new form is opened in Edit View to allow you to create a new record.
- View Opportunities – Redirects you to the List View for the Opportunities module. This allows you to search and list Opportunity records
- Import Opportunities – Redirects you to the Import Wizard for the Opportunities module. For more information, see Leads Module Import.
- Kanban View – Visual workflow by opportunities sales stage (Prospecting, Qualification, Need Analysis etc.)
Note: Set the filter by changing kanban settings using Settings icon on the top right side

- Use Filter for Search of records - Quick filter and Advanced filters
Note: Refer Quick filter of Leads.
- Recently viewed records displayed in the side nav bar.
-
Saved filters list showing inside nav bar as My Filters
-
Favorite records of Opportunities would be displayed in the side nav bar. (From a detailed view of records, selecting the star beside the title undergoes a record into the favorite's list.)
-
Column Chooser — The Column Chooser allows you to customize which columns are displayed in the list view by showing or hiding specific fields.
Note: Refer Leads module for Colum Chooser.
-
To sort records on the Opportunities List View, click any column title which is sortable. This will sort the column either ascending or descending.
- To search for an Opportunity, Use Search engine on top.
Opportunities Sales Stage
-
Easily identify Sales Stage type with colored labels
Prospecting, Qualification, Needs Analysis, Prospecting etc.

- Clicking on the pencil icon on Opportunities list view page to the display of record edit view.
- ‘i’ icon in the Opportunities list view page gives the additional details of the Opportunity.

Bulk Actions
In Companies list view, there are some groups of actions which can be done by selecting group of records wish are as follows:
- Mass Update: Apply changes to multiple opportunity records at once.
-
Merge: Combine duplicate or similar opportunity records into one.
-
Export: Download the selected opportunity data in a preferred format (.CSV).
-
Map: View the geographical location of opportunities on a map.
-
Delete: Remove selected opportunity from the system.

Detail View Actions
The Opportunities Detail View shows key info about a sales deal, including company, amount, stage, close date, and assigned user. It links to related modules and offers quick actions like edit or delete. Detailed view of a record highlights the sales stage with colored label of sales pipeline.

- Edit – Modify the opportunity's existing information.
-
Duplicate – Create a new opportunity by copying current opportunity details.
-
Delete – Permanently remove the opportunity from the system.
-
Find Duplicate – Scan and identify possible duplicate opportunity entries.
-
View Changelog – Review the history of changes made to this opportunity.
Opportunity’s Activity Management
The Activities tab in the Opportunities module lets users create and manage tasks like meetings, calls, and emails related to a sales opportunity, helping track all interactions in one place. Navigate to a detailed view page to view Activities.

Opportunity’s History Management

Submodules
Click on detailed view of a records to and navigate to submodules:
Documents
The Documents submodule under Opportunities stores and manages all related files, such as proposals, contracts, presentations, and supporting materials. It ensures easy access, version control, and centralized documentation for each sales opportunity.
Can create a new one or select from existing records.

Contacts
The Contacts submodule under Opportunities links key individuals involved in the sales process. It helps track communication, roles, and relationships, ensuring effective engagement and follow-up with decision-makers or influencers.
Can create a new one or select from existing records.

Leads
The Leads submodule under Opportunities connects potential customers to a specific sales opportunity. It helps track lead sources, engagement history, and progress, supporting effective conversion from interest to deal.
Can create a new one or select from existing records.

Projects
The Projects submodule under Opportunities links related projects to a sales deal. It helps track project timelines, tasks, and deliverables, ensuring smooth execution if the opportunity is won and converted into a project.
Can create a new one or select from existing records.

Quotes
The Quotes submodule under Opportunities stores price estimates or proposals related to the sales deal. It allows users to create, manage, and track quotes, helping streamline the transition from opportunity to confirmed sale.
Can create a new one or select from existing records.

Contracts
The Contracts submodule under Opportunities manages agreements linked to the sales deal. It helps track contract terms, statuses, and renewal dates, ensuring smooth handoff and compliance once the opportunity is closed.
Can create a new one or select from existing records.

Security Groups
The Security Groups submodule under Opportunities controls access permissions for users based on their roles. It ensures that only authorized users can view or modify opportunity details, enhancing data security and confidentiality.
Can select from existing records.

Note: --Edit view, Detail view and list view form fields and layouts can be customized as per requirement using Administration Settings. Submodules also Customized as per usage.
Calls
The Calls module in KiyoCRM allows Users to schedule and log a record of inbound and outbound calls that they may be a participant of:
List View Actions
You can access the Calls actions from the Calls module menu drop down or via the Sidebar. The Calls actions are as follows:
- Log Call – A new form is opened in Edit View to allow you to create a new Call record.

Allows users to record details of phone conversations with leads, contacts, or companies, including call purpose, outcome, duration, and follow-up actions for accurate communication tracking.

Using Click to Call Configuration, triggering calls and saving response through API and tracking through status. Call recordings are also saved, and we can view in detail.


- View Calls – Redirects you to the List View for the Calls module. This allows you to search and list Call records.
- Import Calls – Redirects you to the Import Wizard for the Calls module. For more information, see Import of leads module.
- Kanban View, Filters, Column Chooser, Favorites are similar to other modules. Refer Leads module Column Chooser , Filters , Kanban view for reference.
- To sort records on the Meetings List View, click any column title which is sortable. This will sort the column either ascending or descending.
- To search for a Meeting, Use Search engine on top
-
Clicking on the pencil icon Meetings list view page to the display of record edit view.
-
Clicking on the ‘i’ icon calls to the display of Additional Details popup.
-
Clicking on the X icon calls to the closure of the meeting in the list view page.

Bulk Actions
In list view, Select group of records by checking the checkbox, the actions are as follows:
- Mass Update, Export, Delete are similar to the Meetings module. Refer Meetings module Bulk Actions for reference.

Detail View Actions
Click on the Subject to view detail view:
- Edit, Duplicate, Delete, Close and Create New, Close are similar to Meetings module Actions.
- Reschedule: Enables users to update the date and time of a logged call, ensuring accurate scheduling and follow-up.

Submodules
Contacts
Displays and manages the list of attendees linked to a meeting, allowing users to add, search, or create contact records for scheduling.

Users
Allows assignment of CRM users to meetings, enabling collaboration, ownership tracking, and calendar visibility for scheduled events.

Leads
Enables users to link potential customers (leads) to meetings for follow-ups, demos, or discussions, helping track engagement throughout the sales process.

Notes
Allows users to add and view notes related to a meeting, capturing key discussion points, decisions, and follow-up actions for future reference.

Security Groups
Control access to meeting records by assigning them to specific user groups, ensuring only authorized users can view or modify the information.

Note: --Edit view, Detail view and list view form fields and layouts can be customized as per requirement using Administration Settings. Submodules also Customized as per usage.
Tasks
KiyoCRM can assist users with productivity, offering a way to record, relate and assign Tasks and to-do items that require action.
You can access the Tasks actions from the Tasks module menu drop down or via the Sidebar. The Tasks actions are as follows:
List View Actions
- Create Task – A new form is opened in Edit View to allow you to create a new Task record
Used to define and assign work items with details like subject, due dates, status, priority, and related contacts or companies. The assigned user will receive email notifications.

- View Tasks – Redirects you to the List View for the Tasks module. This allows you to search and list Task records
- Import Tasks – Redirects you to the Import Wizard for the Tasks module. For more information, see the Leads Module Import.
- Kanban View, Filters, Column Chooser, Favorites are similar to other modules. Refer Leads module Column Chooser , Filters , Kanban View for reference.

- To sort records on the Meetings List View, click any column title which is sortable. This will sort the column either ascending or descending.
- To search for a Meeting, Use Search engine on top
-
Clicking on the pencil icon Meetings list view page to the display of record edit view.
-
Clicking on the ‘i’ icon tasks to the display of Additional Details popup.
-
Clicking on the X icon tasks to the closure of the meeting in the list view page.
Bulk Actions
In list view, select group of records by checking the checkbox, the actions are as follows:
- Mass Update, Export, Delete are similar to the Meetings module. Refer Meetings module Bulk Actions for reference.

Detail View Actions
Click on the Subject to view detail view:
- Edit, Duplicate, Delete, Close and Create New, Close functionalities similar to Meetings module detail view actions. Refer Meetings module Detail Actions.

Submodules
Notes
Used to add internal comments or updates related to a task for reference or collaboration.

Control user access and permissions for task creation, editing, viewing, and assignment based on roles.

Note: --Edit view, Detail view and list view form fields and layouts can be customized as per requirement using Administration Settings. Submodules also Customized as per usage.
Documents
The Documents module can be used as a repository for Customer issued or internal files. This content can be uploaded, revised and viewed in addition to relating to individual records within KiyoCRM.
List View Actions
You can access the Documents actions from the Documents module menu drop down or via the Sidebar. The Documents actions are as follows:
- Create Document – A new form is opened in Edit View to allow you to create a new Document record.

- View Documents – Redirects you to the List View for the Documents module. This allows you to search and list Document records.
- Filters, Column Chooser, Favorites are similar to other modules. Refer Leads module Column Chooser , Filters , Kanban View for reference.
- To sort records on the Documents, click any column title which is sortable. This will sort the column either ascending or descending.
- To search for a Document, Use Search engine on top
-
Clicking on the pencil icon Documents list view page to the display of record edit view.
Bulk Actions
In list view, select group of records by checking the checkbox, the actions are as follows:
- Mass Update, Export, Delete are similar to the Meetings module. Refer Meetings module Bulk Actions for reference.

Detail View Actions
Click on the Subject to view detail view:
- Edit, Duplicate, Delete functionalities similar to Meetings module detail view actions. Refer Meetings module Detail Actions.

Submodules
Documents Revisions
This submodule allows users to manage document versioning by recording each update with details like revision number, creation date, creator, and change log, ensuring full traceability and accountability.

Companies
This section links documents to specific companies, helping users organize and track files based on associated businesses for easy access and reference.

Contacts
This submodule links documents to individual contacts, allowing users to manage and retrieve documents related to specific people efficiently.

Opportunities
This submodule associates documents with sales opportunities, helping teams track proposals, quotes, and other relevant files throughout the sales pipeline.

Cases
This submodule links documents to customer support cases, allowing users to store and reference related files such as issue logs, screenshots, or resolution documents.

Links documents to reported bugs, allowing users to attach supporting files like error logs, screenshots, or test results for better issue tracking and resolution.

Contracts
Associates documents with contract records, enabling users to store, access, and manage related files such as signed agreements, terms, and amendments in one place.

Security Groups
The "Security Groups" submodule controls user access to documents, defining who can view, edit, or delete based on assigned roles or groups, ensuring data security and integrity.

Note: --Edit view, Detail view and list view form fields and layouts can be customized as per requirement using Administration Settings. Submodules also Customized as per usage.
Emails
The Emails module in KiyoCRM allows Users to view, store, compose, send and receive email from their own personal email account or a shared inbox, for example a Support or Sales inbox. Emails can be imported and associated with a related KiyoCRM record, for example a Contact or a Company. These related emails can then be viewed on the history subpanel of the related record.
You will need to set up and have access to at least one personal or group email account in order to use the Emails module. Please contact the Support Team for SMTP settings.
Emails module can access from side navbar
List View Actions
You can access the Emails actions from the Emails module menu drop down or via the Sidebar. The Emails actions are as follows:
- Filters, Column Chooser, Favorites are similar to other modules. Refer Leads module for reference.
- View Email: Opens and displays the full content of the selected email message.

- To sort records on the Emails, click any column title which is sortable. This will sort the column either ascending or descending.
- To search for Emails, Use Search engine on top
-
Clicking on the pencil icon Emails list view page to the display of record edit view.
Compose Mail
Click the Compose Mail button or select Compose from the Sidebar to open a new compose window.
This will open the compose view in the Emails module. For new emails opened in this way, the To: field will be automatically populated and the email will be related to the relevant record.
- Email Template: Select a template if required. (Refer Email Templates for stored templates). Once you have selected a template, a popup will warn you that the subject line and body of the email will be replaced by the contents of the email template. If you are using a template with variables, these will be populated with the relevant data from the related record when the email is sent. The To: field will also be automatically populated with the email address associated with the related record.
- Related To: To associate the email with a particular record, select the module (e.g. Companies, Contacts, Leads) and then click the Search arrow to search for the record. Alternatively, you can begin typing the name into the field and select the relevant record from the auto-complete list which appears.

- From: If you have more than one email account configured, select the account from which to send the email. The Reply To and From settings for the selected Account are displayed alongside for information.
- To: Selecting a related record in the with a valid email address will automatically populate the To: field. Alternatively, the To:, Cc: and Bcc: fields can be populated manually or via the select buttons which appear when you click inside the fields.
- Body: Selected Email Template body load into the body or else without template body field remains empty.

-
Send Mail: A confirmation message will appear when the message has been sent.
- Attach Files: Use this button to browse for and attach an external file to the email.
- Attach Documents: Use this button to attach a KiyoCRM Document to the email. Search for the required Document in the popup and click Select to attach it.
- Save Draft: Drafts can be viewed by changing the folder in List view.
- Discard : Discards the draft email without sending.
Import Mail
Email can be imported into KiyoCRM and associated with a relevant KiyoCRM record (e.g. a contact or account record). This can be very useful in keeping a history of communication with a client, for example. Emails which have been imported and related to a record in KiyoCRM can be viewed from the record’s history subpanel.
Import Single Mail
An individual email can be imported from a Detail view. Open the email, and then select Import from the Actions dropdown menu.

Detail View Actions
- Reply: Sends a response directly to the original sender of the selected message.
-
Reply All: Sends a response to the original sender and all other recipients included in the message.
-
Forward: Sends a copy of the selected message to a different recipient not originally included.
-
Delete From IMAP: Permanently removes the selected message from the email server via the IMAP protocol.
Bulk Actions
In list view, Select group of records by checking the checkbox, the actions are as follows

-
Import: Allows users to bring selected emails into the system for further processing or recordkeeping.
-
Delete from IMAP: Permanently removes selected emails from the IMAP email server.
-
Mark As Unread: Changes the status of selected emails to unread, indicating they haven’t been reviewed.
-
Mark As Read: Marks selected emails as read, indicating they have been viewed or processed.
-
Mark As Flagged: Flags selected emails for follow-up or attention.
-
Mark As Unflagged: Removes the follow-up flag from selected emails.
Note: --Edit view, Detail view and list view form fields and layouts can be customized as per requirement using Administration Settings. Submodules also Customized as per usage.
Email Templates
Email templates are used to send standardized responses and notifications via email. Adding variables allows you to personalize these communications and include additional relevant information such as order details.
Email templates can be viewed, edited and created from the Email Templates module which can be found on the ALL menu. Alternatively, templates can be created by the user directly from the workflow and campaigns modules.
-
View My Email – Redirects you to your mailbox so that you can view and manage emails displayed/imported to the CRM.
-
View Email Templates - Takes you to the List View page of your existing Email Templates. This allows you to search and list Email Template records.

There are a number of default System templates which are created on install. These are used to send out system notifications such as new passwords or case updates. These can be viewed and edited here alongside user-generated templates. Templates created here can also be used in workflows and Campaigns for example, as well as for system notifications.
Click on a template name to view the template.
To edit an existing template, either open the template and select Edit from the Actions menu, or click the pencil icon to the left of the template name. Once in Edit mode, the template can be edited in the same way as creating a template.
Creating an Email Template
Select Create Email Template from the sidebar. This Create view will also appear if you choose to create a template from within another module such as Workflows, for example.
Select Email, Campaign or System depending on the use for the template. System templates are used to send system generated notifications such as case updates.
.
Body
To add text to the body of the template, click, drag and drop one of the layouts from the selection in the left-hand pane into the onto the body. You can add as many layout sections as required. Overwrite the demo text by first highlighting it.
Adding Variables
To add a variable, select the appropriate module and field name from the drop-down lists. The corresponding variable name will be displayed in the last field.

You can either enter this variable manually or click on insert to insert the variable at the cursor point. Variables can be added to the subject line as well as the body of the email template.

Click Browse to attach an external file or Document to attach a KiyoCRM document to the template. Further items can be attached in the same way. The attached file(s) will be sent to all recipients of the template.
Security Groups
Restrict access to a template by selecting a Security Group.
Notes
The Notes module in KiyoCRM can be used to keep a record of any comments, observations or explanations that a User may have relating internally to their organization or relating to another KiyoCRM record such as a Company, Contact, Lead or many more. Notes are also used to keep record of interactions with Customers regarding Cases and Bugs.
List View Actions
You can access the Notes actions from the Notes module menu drop down or via the Sidebar. The Notes actions are as follows:
-
Create Note or Attachment – A new form is opened in Edit View to allow you to create a new Note record (with attachment).
-
View Notes – Redirects you to the List View for the Notes module. This allows you to search and list Note records.
-
Import Notes – Redirects you will be taken to the Import Wizard for the Notes module. Refer Leads module Import.
- Column Chooser -- Allows users to show or hide specific columns in a data table for customized viewing. Refer Leads Column Chooser.
- Filters -- For Quick and Advanced filter search, refer leads module.
- To sort records on the Meetings List View, click any column title which is sortable. This will sort the column either ascending or descending.
- To search for a Notes, Use Search engine on top
- Clicking on the pencil icon Notes list view page to the display of record edit view.
- Clicking on the ‘i’ icon Notes to the display of Additional Details popup.
- Clicking on the X icon Notes to the closure of the Notes in the list view page.

Bulk Actions
In list view, select group of records by checking the checkbox, the actions are as follows:
- Mass Update: Allows users to update multiple Note records at once with common changes related to, assigned to, contact fields.
-
Export: Enables users to download notes data in various formats for reporting or backup purposes.
-
Map: Displays notes locations on a map for better visualization and route planning.
-
Delete: Lets users remove selected notes records in bulk from the system.

Detail View Actions
Click on the Subject to view detail view:
-
Edit – Open the note record in edit mode to update its details.
-
Duplicate – Create a new note record by copying the details of the current one.
- Delete – Permanently remove the current note record from the system.

Submodules
Security Groups
Control access to notes records by assigning them to specific user groups, ensuring only authorized users can view or modify the information.
Can select from existing records.

Note: --Edit view, Detail view and list view form fields and layouts can be customized as per requirement using Administration Settings. Submodules also Customized as per usage.
Targets
Typically Targets are used as the recipients of a Marketing Campaign, your organization knows very little about these individuals and they may be re-used for new Campaigns or deleted without any impact to the business. Your organization will spend little resources on Targets and will usually be contacted en masse. Targets can be acquired from purchased email lists or gathered from trade shows your organization has been present. The Targets module in KiyoCRM is used to store and manage information about these individuals.
List View Actions
You can access the Targets actions from the Targets module menu drop down or via the Sidebar. The Targets actions are as follows:
-
Create Target – A new form is opened in Edit View to allow you to create a new Target record.
-
View Targets – Redirects you to the List View for the Targets module. This allows you to search and list Target records.
-
Import Targets – Redirects you will be taken to the Import Wizard for the Targets module. Refer Leads Import.
- Recently viewed records displayed in the side nav bar.
- Saved filters list showing inside nav bar as My Filters
- Favorite records of targets would be displayed in the side nav bar. (From a detailed view of records, selecting the star beside the title undergoes a record into the favorites list.)
- Column Chooser — The Column Chooser allows you to customize which columns are displayed in the list view by showing or hiding specific fields. Refer Leads Column Chooser.
- To sort records on the targets List View, click any column title which is sortable. This will sort the column either ascending or descending.
- To search for a target, Use Search engine on top.
-
Clicking on the pencil icon targets list view page to the display of record edit view.

Bulk Actions
In Targets list view, there are some groups of actions which can be done by selecting group of records wishes are as follows:
- Email: Send an email to the selected targets directly.
- Mass Update: Apply changes to multiple target records at once.
- Add to Target List: Add selected target to a marketing or campaign list.
- Export: Download the selected target data in a preferred format (.CSV).
- Map: View the geographical location of targets on a map.
- Delete: Remove selected targets from the system.

Quick Contact Options
In List view – Click to Call Configuration, WhatsApp and SMS icons are available for quick contacting. History should be tracked under a detailed view of every record under the History Submodule.
Note: Call recordings are also tracked and responses updated automatically through API.

Detail View Actions
"Targets Detail View" action displays complete information about a selected target, including name, contact details, status, source, and any associated activities or notes.
-
Edit – Modify the target's existing information.
-
Duplicate – Create a new target by copying current target details.
- Delete – Permanently remove the target from the system.
- Convert Target: Changes a target into a lead or customer for further engagement.
- Manage Subscriptions: Allows updating or modifying the communication preferences for the target.

Target's Activities Management
This Activities tab in the target detail view allows users to manage interactions by creating tasks, scheduling meetings, logging calls, and composing emails related to the target.

Target's History Management
The History section in Targets displays a chronological record of all past interactions and communications with the target, including completed tasks, calls, meetings, and emails, helping users track engagement over time.

Submodules
Click on detailed view of a records to and navigate to submodules:
Campaign Log
The Campaign Log in the Targets submodule records all marketing campaigns the target has been involved in, including email blasts, newsletters, or promotional activities, helping track campaign reach and effectiveness.

Events
The Events section in the Targets submodule logs all calendar-based activities related to the target, such as scheduled meetings, webinars, or conferences, allowing for effective tracking and follow-up.
Can create a new or select from existing one.

Security Groups
The Security Groups section in the Targets submodule defines which users or user roles have permission to view, edit, or manage the target's information, ensuring controlled access and data security.
Can select from existing one.

Note: --Edit view, Detail view and list view form fields and layouts can be customized as per requirement using Administration Settings. Submodules also Customized as per usage.
Target - Lists
The Target Lists module in KiyoCRM is used to separate Targets into groups, these can be groups of individuals that should be excluded from a particular Campaign, test groups or a list of Targets grouped by certain criteria, for example area or market an organization works in.

Target-List List View Actions
You can access the Target Lists actions from the Target Lists module menu drop down or via the Sidebar. The Target Lists actions are as follows:
-
Create Target List – A new form is opened in Edit View to allow you to create a new Target List record.
-
View Target Lists – Redirects you to the List View for the Target Lists module. This allows you to search and list Target List records.

- Filters - Use Filter for Search of records - Quick filter and Advanced filters
Note: Refer Quick filter of Leads.
- Column Chooser — The Column Chooser allows you to customize which columns are displayed in the list view by showing or hiding specific fields. Refer Leads Column Chooser.
- To sort records on the Contacts List View, click any column title which is sortable. This will sort the column either ascending or descending.
- To search for a Contact, Use Search engine on top
-
Clicking on the pencil icon Contacts list view page to the display of record edit view.
Bulk Actions
In Target-list list view, there are some groups of actions which can be done by selecting group of records wishes are as follows:
- Mass Update: Apply changes to multiple target-list records at once.
- Export: Download the selected target-list data in a preferred format (.CSV).
- Delete: Remove selected target-lists from the system.

Detail Actions
Target List & Detail View Actions allow users to perform key functions such as view details, edit target information, delete, convert to lead/customer, manage subscriptions, log activities, and track history—all from the list or individual detail view.
- Edit, Duplicate, Delete, Export functionalities are similar to targets module. Refer targets module.

Submodules
Targets
The Targets submodule under the Target List displays all individual target records, allowing users to view, manage, and take action on each potential lead or contact within a campaign or outreach list.
Can create a new one or select from existing from one

Contacts
The Contacts submodule stores and manages individual contact records, including personal and communication details. It allows users to track interactions, associate contacts with companies or deals, and maintain up-to-date relationship history.
Can create a new one or select from existing from one.

Leads
The Leads submodule captures potential customers who have shown interest in your product or service. It allows users to manage lead details, track communication, qualify opportunities, and convert leads into contacts, accounts, or deals.
Can create a new one or select from existing from one.

Users
The Users submodule manages all CRM user accounts. It allows administrators to create, edit, assign roles, set permissions, and monitor activity for individuals who have access to the system.
Can select from existing from one.

Companies
The Companies submodule stores and manages organizational records, allowing users to track company details, associate contacts and deals, and monitor all related activities and communication history.
Can create a new one or select from existing from one.

Security Groups
The Security Groups submodule is used to define and manage access control within the CRM. It allows administrators to group users and assign specific permissions to control who can view, edit, or manage modules and records.
Can select from existing from one.

Note: --Edit view, Detail view and list view form fields and layouts can be customized as per requirement using Administration Settings. Submodules also Customized as per usage.
Campaigns
The Campaigns module in KiyoCRM can be a very powerful marketing and advertising tool for your organization allowing you to create and track both email and non-email based (e.g. tele sales or radio) marketing campaigns to prospective or existing customers.
With the tracking tools built into the Campaign module you can monitor the response you receive from your campaign in real time, allowing you to view the Return On Investment (ROI) and many other useful metrics. This in turn helps you to plan your strategic marketing and advertising activities effectively by visualizing which campaigns work and which do not.

Create a Campaign
From the Campaigns module, select Create Campaign from the sidebar or the module dropdown menu to start the Campaign Wizard.

Select the campaign you wish to create: Newsletter, Email, Survey or Non-email-based Campaign. Non-email-based campaigns allow you to keep a re

Note: Note that for a Survey campaign you will first need to create the survey to attach to the campaign.
Campaign Header
The first page of the Campaign Wizard is the Campaign Header page.

Enter a name for the campaign here and set the status (Planning, Active, Inactive, Complete).
Add an optional description.
The campaign will be assigned to the currently logged on user by default. Change this here if required.
Survey Campaign
For a Survey campaign, you will also need to relate the campaign to an existing survey. See Surveys module for information on creating a survey.
Non-Email Based Campaign
For a Non-Email Based campaign, you can optionally select the type of campaign.
Campaign Budget
Scroll down to complete optional budget details for the campaign. These figures are used in ROI calculations.
For non-email-based campaigns, this section is on the next page.

Click Next at the top of the screen to continue.
Target Lists
The next step is to specify your Target List(s). Any existing target lists will be listed for you to select under Add Existing Target List.
Click on the target list name to add it to the campaign. Target lists added to the campaign will appear in the right-hand panel.
To remove a target list, click run

Create Target List
If you have not yet created a target list or wish to use a new list, you can create an empty one here and populate it after you have completed the rest of your campaign setup. See Target Lists for more information on the types of lists and how to use them.

Enter a name for the new list and select the type from the list. Note that you will need to have at least one 'default' type target list attached to the campaign.
Click Create
Templates
The template is the message that will be sent out to your target list. You can select or edit an existing email template or create a new one here. See the Email Templates section of the user guide for more information.
Note: The template editor used for creating and editing email templates can be selected in the User Profile Settings. The default setting (Mozaik) is shown in the following screen shots.


-
Select an existing template – You can select from a drop-down list of existing Email Templates
-
Create a brand-new template – Create a new email template from scratch.
-
Copy an existing template – Allows you select an existing template and use this as a base to make amendments.
The email template editor at the foot of the page shows how your template will look. Drag and drop different layout components from the left-hand pane into the right-hand display panel where they can be edited.
Clicking on a component will show the edit menu. This provides you with a multitude of additional options which allows you to customize the layout and appearance of your template. Font type can be selected, formatted, colours changed, text alignment chosen, images and even videos can be inserted.

Email Variables

Track URLs
Tracker URLs can be used to insert a link to your organization’s website or direct link to a new product that you have launched, for example. A unique id is added to the link for each recipient which allows KiyoCRM to track click-thrus. The information gathered can be viewed on the campaign status page.

To add your own tracker URL link, click Create Tracker.

Specify the text to display as the link, and the URL.
Click Create Tracker.
Add your tracker(s) to the template in the same way as for a variable. Click inside the template in the desired location, then select the tracker in the drop down and click Insert Tracker.
opt Out Tracker URLs
An opt Out link allows the recipient to opt out of future marketing emails, and a default opt out link will be added to the template automatically. You can replace this default with your own opt Out link text by adding a custom opt Out Tracker.
Click Create Tracker.

specify the text you require once your email template is complete, click or you opt out link.
Check the Opt-Out Link box. Note that you cannot edit the Tracker URL itself, only the link text.
Add your tracker to the template in the same way as for a variable. Click inside the template in the desired location, then select the tracker in the drop down and click Insert Tracker.
Once your email template is complete, click Save.
Click Next at the top of the page to continue.
Marketing
The Marketing section of the Campaign Wizard is where you need to specify the email settings for the campaign, and set a schedule for emails to be sent out.


|
Marketing Email Name |
Enter a name for the this run of the campaign. This allows you to resend the campaign at a later date to a different target list, or with a modified template. The campaign will store separate status details for each marketing record, and these can be selected on the campaign status page. |
|
Bounce Handling Account |
Select the account set up to handle bounced campaign mail. |
|
Outgoing Email Account |
This will default to the system outbound mail account. If you have other outbound mail a |
|
Schedule Date & Time |
The campaign emails will be queued for sending at the specified time and will be sent when the Run Nightly Mass Email Campaigns scheduled job is next run. |
Once details have been completed, click Next at the top of the screen to continue.
Send Email and Summary
The Summary page includes a checklist which indicates whether or not each section of the Campaign Wizard has been completed satisfactorily.
|
|
If a section is complete then this is shown with green tick icon. |
|
|
Incomplete sections are shown with a red cross. These will need to be resolved before the campaign can be sent. |


In the example above the Choose Targets section has not been completed correctly as indicated by the red cross icon. This would be resolved by specifying a 'default' type target list with at least one entry.
Click on any incomplete entry in the list to navigate to the relevant section.
Once you have ensured all sections are complete you have three options:
-
Send Mail at Scheduled Time – Once you are sure all sections of the campaign are set correctly and your campaign status is set to Active, click to send the campaign emails. Email will be queued at the scheduled time and will send to recipients when the Run Nightly Mass Email Campaigns scheduled job is next run.
-
Send Marketing Email as Test – If you have specified a 'test' type target list, this will send the campaign to the addresses on the test list only. By doing this you can view the campaign as a recipient and double check that it appears as it should do before sending out to real recipients. Test entries (views, click-thrus etc) generated can be removed later from the Campaign Status page.
-
View Details – Shows the Detail View of the campaign you have just created.
Campaign Status and Response Tracking
From the campaign’s Detail view click View Status.
OR, from List view, click the status icon
The campaign status page gives an overview of the campaign details as well as a graphical representation of your campaign response. This includes the number of messages sent, bounced messages, number of views, opt-outs and click-thrus.

Detailed information can be viewed in the subpanels below the graph, where responses are detailed on an individual record level. Here you can see who has viewed your email or clicked on a link, or how they have responded to a survey, for example.

If the campaign includes a Web to Person form you will be able to see the details of any leads which have been created via the webform in the Leads Created subpanel.
These records can be added to a new target list by clicking Add to Target List. This allows you to create new, more focused campaigns based on who has responded.
Campaign ROI Tracking
The built-in campaign ROI tracking can be viewed from the campaign’s detail or status view by clicking View ROI.
This page gives a graphical representation of your campaign’s Return on Investment, allowing you to easily visualize how money spent on the campaign has translated into potential business.


Note: Add or edit budget details for the campaign by clicking Launch Wizard and then navigating to the Campaign Header tab.
Web To Person Form
The Create Person Form feature allows you to create a web-based form which will create a Lead, Contact or Target record in KiyoCRM from the information submitted on the web form. These records can be assigned to a particular user and are linked to a campaign so responses can be tracked.
You will need to relate your Web-to-Person Form to an existing campaign. See the Create a Campaign section for instructions on how to do this. A non-email-based type campaign is suitable for this
Click Create Person Form on the sidebar, or select Create Person Form from the Campaigns dropdown menu to open the wizard.

Create Person form Wizard
Select the type of record you wish to create from the web form information: Lead, Contact or Target, from the dropdown at the top. The list of available fields will update automatically following your selection. Use the scroll bar to see the complete list of available fields.

Drag and drop the fields you wish to include on the form into the empty form columns. You have the option of a one or two column layout. You must include any required fields (these are indicated with an asterisk* and are highlighted in the list).
Click Add Fields to add all available fields to the form. Clicking Reset All Fields will remove all fields from the layout columns.
Once the required fields have been added, click Next to Continue.
Create Person Form – Additional Information

Configure the web form’s appearance by adding a header or footer and changing the label for the form’s submit button if desired.
Redirect URL: Specify a custom link to display once the form has been submitted.
Once complete, click Generate Form.
Create Person Form – Editor
The final step of the Create Person Form Wizard allows you to format the web form you have setup using the editor. Font type can be selected, colours changed, text alignment chosen and images can be inserted. View and edit the HTML directly by clicking the HTML link on the toolbar.

Once you are happy with the appearance of your web form click Save Webform.
Save Form
To save the web form you have just generated either:
-
Click on the Web to Person Form link to download the web form into your download folder OR
-
Copy and paste the HTML into an existing web page. Note the line to include in the <head> section of the web page.

Note: Please note that the web form will not be stored anywhere else in KiyoCRM. To ensure the form is saved please carry out one of the two steps above.
Surveys
The Surveys module allows you to create a web-based survey with a variety of question-type options. The responses received are stored in KiyoCRM and can be viewed on a per-respondent basis or as a detailed summary report using charts where appropriate.
Surveys can be sent as part of a Campaign.

Create Survey
To create a new survey, select Create Survey from the sidebar or the dropdown menu in the Surveys module.


Name: Enter the title of the survey to be displayed to users.
Status:
-
Draft: Survey in preparation, not yet ready to publish and seek responses.
-
Public: Once ready, setting the survey status to Public will generate a URL link for the survey. The survey can be viewed and completed and any responses submitted will be recorded. Note that once responses have been received, the survey questions cannot be edited.
-
Closed: A Closed survey will not accept any further responses. Users navigating to the survey link will see a message informing them that the survey is now closed.
Description: Note that this description is internal only - it will not be displayed to users as part of the survey.
Add Questions
Click New Question to add a question to the survey.
Enter the question text and select the question type from the dropdown list.

The available question types are as follows:
|
Text |
A standard text input |
|
Textbox |
A larger text input area |
|
Checkbox |
Displays a single checkbox alongside the question. |
|
Radio |
Specify a number of answer options to choose from, with radio buttons. Only one answer can be selected. |
|
Dropdown |
Specify a number of answer options to choose from, in a dropdown list. Only one answer can be selected. |
|
Multiselect |
Similar to a dropdown list, but one or more answers can be selected. |
|
Matrix |
For each option specified, the user will be able to answer "Satisfied", "Neither Satisfied nor Dissatisfied" or "Dissatisfied". These responses can also be customized -see below. |
|
Date Time |
A Date/Time picker will be displayed for the user to select a date. |
|
Date |
A Date/Time picker will be displayed for the user to select a date and time. |
|
Scale |
A 1-10 scale will be displayed. Users can select one number on the scale in response to the question. |
|
Rating |
A five-star rating widget will be displayed. Users can select 0 to 5 stars in response to the question. |
Radio Button Example
Click on Add Option to add answer options to the question.
Remove Unwanted Option by clicking X icon.

Click New Question to add more questions.
Further Options
Submit: Edit the text for the survey’s Submit button here, if desired.
Customize the responses for Matrix type questions by editing the default matrix response text here:

Click Save to Save the Survey.
Detail View
The Detail View for the draft survey will be displayed. This overview shows all the survey questions and question types included in the survey.

View Survey
Once completed, you can view the survey as it will be shown to participants. Select Edit from the Actions menu and then set the survey status to Public.
Click Save.
The Detail View for the survey will be displayed, now showing the URL for the survey.
Click on the URL to view the survey in your browser.
Responses can be submitted by clicking Submit.
Users will be redirected to a thank you page and the responses will be recorded. Responses can be viewed in the Survey Responses subpanel or the Survey Report.
Edit Survey
From List view, click the pencil icon beside the survey name to open the survey in Edit mode.
From Detail view, select Edit from the Actions menu.
Survey Responses
The Survey Responses subpanel shows the individual responses received from each respondent. The subpanel can be found in Detail View for the survey. The Survey Responses subpanel can also be accessed from the Campaign Status page for a Campaign.
Click on a respondent’s name to view their responses.
Survey Reports
The survey responses can also be viewed as a Survey Report, showing a summary of all the responses by question. Charts are used where appropriate to display the data.
Individual responses cannot be viewed from the Survey Report. If you wish to view a particular respondent’s answers, these can be viewed from the survey’s Survey Responses subpanel, as shown above.
|
Select View Survey Reports from the Actions menu |

The Survey Report will open showing a summary of all the responses for each question.
As an example, the Survey Report for the Demo Survey above might contain the following summary for question 2:

Survey Campaign
Surveys can be sent out as part of a campaign which will track and record the survey responses received from each recipient.
From the Campaigns module, select Create Campaign from the sidebar. Select Survey to launch the Survey Campaign Wizard.

Campaign Header
The survey is attached to the campaign on the Campaign Header tab.

Click Select to select the survey from the popup.
Survey Email Template
Create or edit an existing template for the survey. Survey variables are available from the dropdown list.
You will need to include the Surveys URL variable $surveys_survey_url_display in your template. This will include a unique link to the survey so that individual responses can be tracked.


Click Save to retain your template settings.
Campaign Status
On the Campaign Status page, the Survey Responses subpanel can be expanded to view survey responses from individual respondents. Click on a respondent’s name to view the responses.
Bugs
Use this module to describe and track Bugs. When creating a Bug record, you can describe in more detail the problem that caused cases and describe possible ways to fix it in Knowledge Base.

The described Bugs can be absolutely anything: they can be tied to both the version (model) of a tangible product, and the release of the next version of the software. A user with administrative access has the ability to change the list of available versions. After describing the Bug, you can associate it with the request (in the form of viewing using the subpanel of the Application), and with the available version of the product (directly in the Bug editing form).
Note: By default, this module is hidden; to display it you need to contact you're a user with administrative access.
You can create a description of the Bug either directly in the system or import the description from a text file.
Bug Description
-
In the module menu, select Report Bug.
-
On the Bug description page, complete the following fields.:
- Subject: Enter the name (short description) of the Bug.
-
- Priority: From the drop-down list, select a priority that reflects the urgency of solving the problem.
-
- Status: From the drop-down list, select the status option.
-
- Type: From the drop-down list, select the type: Bug or feature.
-
- Source: From the drop-down list, select the source of Bug detection.
-
- Category: From the drop-down list, select the category to which this Bug may be related.
-


Report a bug
Bugs List View Actions
You Can access bugs module from side navbar.
- View Bugs: Provides a detailed list of all reported bugs, allowing users to track their status, severity, assigned team members, and related project information for efficient issue resolution.
- Import Bugs: Allows users to bring in bug records from external sources (like Excel or CSV files) into the system, helping streamline the tracking and management of issues in one centralized location. Refer Leads Import.
-
Use Filter for Search of records - Quick filter and Advanced filters
Note: Refer Quick filter of Leads.
-
Recently viewed records displayed in the side nav bar.
-
Saved filters list showing inside nav bar as My Filters
-
Favorite records of bugs would be displayed in the side nav bar. (From a detailed view of records, selecting the star beside the title undergoes a record into the favorites list.)
-
Column Chooser — The Column Chooser allows you to customize which columns are displayed in the list view by showing or hiding specific fields.
Note: Refer Leads module Column Chooser.
-
To sort records on the bugs List View, click any column title which is sortable. This will sort the column either ascending or descending.
- To search for a bug, Use Search engine on top (module should be enabled for search engine)
-
Clicking on the pencil icon bug list view page to the display of record edit view.
- Clicking on i icon of the bug leads to the display of additional details popup.

Bulk Actions
In list view, there are some groups of actions which can be done by selecting group of records are as follows:
- Mass Update: Apply changes to multiple bug records at once.
- Merge: Combine duplicate or similar bugs records into one.
- Export: Download the selected bugs data in a preferred format (.CSV).

Detail View Actions
Click on the bug subject to view a detailed view of the record.
-
Edit – Modify the bug's existing information.
-
Duplicate – Create a new bug by copying current company details.
-
Delete – Permanently remove the bug from the system.
-
Find Duplicate – Scan and identify possible duplicate bug entries.
- View Changelog – Review the history of changes made to this bug.

Bug's Activities Management
Tracks and manages all interactions and tasks related to a bug or issue, helping ensure timely follow-ups and accountability.
-
Schedule Meeting: Allows users to set up meetings with relevant contacts, specifying time, date, and participants to coordinate discussions.
-
Log Call: Records details of phone calls made or received, including the subject, summary, and contact involved, for reference and tracking.
-
Compose Email: Enables users to send emails directly from the system, maintaining communication history within the bug or issue context.

Bug's History Management
Tracks and stores all past interactions, notes, emails, and changes related to a bug, providing a complete audit trail for better traceability and decision-making.
-
Create Note or Attachment: Add internal notes or upload files related to the bug for documentation and collaboration.
-
Archive Email: Save a copy of relevant email correspondence to keep a record of communications within the bug history.
-
View Summary: Display a summarized view of the bug's activity history for quick reference and analysis.
Submodules
Documents
Allows users to upload, store, and manage files related to a bug, such as screenshots, logs, or reports, ensuring all relevant documentation is easily accessible in one place.
Can create a new one or select from existing one.

Contacts
Displays and manages individuals or stakeholders associated with the bug, enabling effective communication and coordination throughout the issue resolution process.
Can create a new one or select from existing one.

Companies
Can create a new one or select from existing one.

Cases
Associates customer service or support cases with the bug, providing context on how the issue impacts users and ensuring alignment between technical teams and customer support.
Can create a new one or select from existing one.

Bugs
Lists and manages reported software defects or issues, allowing users to track their status, assign responsibility, set priorities, and monitor resolution progress throughout the development lifecycle.
Can create a new one or select from existing one.

Security Groups
Controls access permissions by assigning user groups to the bug, ensuring that only authorized users can view or modify bug details based on their roles and responsibilities.
Can select from existing one.

Cases
In KiyoCRM Cases are used to record interactions with Customers when they ask for help or advice, for example in a Sales or Support function. A Case can be created, updated when a User is working on it, assigned to a colleague and closed when resolved. At each stage of the Case the User can track and update the incoming and outgoing conversation thread so a clear record of what has occurred is registered in the CRM. Cases can be related to individual records such as Companies, Contacts and Bugs.

List View Actions
You can access the Cases actions from the Cases module menu drop down or via the Sidebar. The Cases actions are as follows:
-
Create Case – A new form is opened in Edit View to allow you to create a new Company each and list Case records.
-
Import Cases – Redirects you will be taken to the Import Wizard for the Cases module. Refer Leads module for import functionality. Click here to view Import functionality.
- Use Filter for Search of records - Quick filter and Advanced filters
Note: Refer Quick filter of Leads
- Recently viewed records displayed in the side nav bar.
-
Saved filters list showing inside nav bar as My Filters.
-
Favorite records of cases would be displayed in the side nav bar. (From a detailed view of records, selecting the star beside the title undergoes a record into the favorites list.)
-
Column Chooser — The Column Chooser allows you to customize which columns are displayed in the list view by showing or hiding specific fields.
Note: Refer Leads module for Colum Chooser.
-
To sort records on the Cases List View, click any column title which is sortable. This will sort the column either ascending or descending.
- To search for a Case, Use Search engine on top
- Clicking on i icon leads to the display of additional details popup of the case

Bulk Actions
In list view, there are some groups of actions which can be done by selecting group of records wish are as follows:
-
Mass Update: Apply changes to multiple company records at once.
-
Merge: Combine duplicate or similar opportunity records into one.
-
Export: Download the selected opportunity data in a preferred format (.CSV).
-
Map: View the geographical location of opportunities on a map.
- Delete: Remove selected opportunity from the system.

Detail View Actions
Click on the case subject to view a detailed view of the record.
-
Edit – Modify the case's existing information.
-
Duplicate – Create a new case by copying current company details.
-
Delete – Permanently remove the case from the system.
-
Find Duplicate – Scan and identify possible duplicate case entries.
- View Changelog – Review the history of changes made to this case.

Case's Activity Management
Assign and track specific actions required to resolve a case. Tasks include due dates, priorities, and responsible team members.
- Schedule Meeting: Plan and record meetings with customers or internal teams related to the case. Includes date, time, participants, and agenda.
- Log Call: Document details of inbound or outbound calls regarding the case, including discussion points, duration, and outcomes.
- Compose Email: Send and record case-related emails directly from the system, maintaining full communication history for reference.

Case's History Management
Add internal notes or upload relevant documents to maintain a complete case history.
- Archive Email: Store important email communications related to the case for future reference.
- View Summary: Quickly review key case details, recent activities, and status in a consolidated view.
- Filter: Narrow down case history by date, activity type, or keyword for easier tracking and analysis.

Submodules
Documents
Store, manage, and access all files related to a case, including reports, screenshots, contracts, and reference materials, ensuring centralized and organized documentation.
Can create a new one or select from existing one.

Contacts
Manage and view all individuals linked to a case, including customers, stakeholders, or internal team members, with full contact details for easy communication.
Can create a new one or select from existing one.

Bugs
Track and manage software bugs or technical issues reported within a case, including status, severity, and resolution progress for effective issue handling.
Can create a new one or select from existing one.

SLA Log
Monitor service level agreement (SLA) performance for each case, including response and resolution times, breaches, and compliance history.
Can create a new one or select from existing one.

Projects
Can create a new one or select from existing one.

Security Groups
Control access to case information by assigning users to security groups, ensuring only authorized personnel can view or modify sensitive case data.
Can select from existing one.

Projects
In KiyoCRM the Projects module allows the User to arrange their organization’s projects by tracking a number of Tasks and allocating resources. Once set up, a project can be visualized in the form of a Gantt chart or using the project grid.

List View Actions
You can access the Projects actions from the Projects module menu drop down or via the Sidebar once you have clicked to view the module. The Projects actions are as follows:
-
Create Project – A new form is opened in Edit View to allow you to create a new Project record.
-
View Project – Redirects you to the List View for the Projects module. This allows you to search and list Project records.
-
View Project Tasks – Allows you to list Project Tasks, which are related to a parent Project.
-
Import Project – Redirects you to the Import Wizard for the Projects module.
- Resource Calendar -- Plan and manage resource availability by scheduling team members, tracking workloads, and aligning tasks with project timelines.

-
Kanban View – Visual workflow by Priority (High, Medium, Low)
Note: Set the filter by changing kanban settings using Settings icon on the top right side

-
Use Filter for Search of records - Quick filter and Advanced filters
Note: Refer Quick filter of Leads
-
Recently viewed records displayed in the side nav bar.
-
Saved filters list showing inside nav bar as My Filters
-
Favorite records of projects would be displayed in the side nav bar. (From a detailed view of records, selecting the star beside the title undergoes a record into the favorites list.)
-
Column Chooser — The Column Chooser allows you to customize which columns are displayed in the list view by showing or hiding specific fields.
Note: Refer Leads module Column Chooser.
-
To sort records on the projects List View, click any column title which is sortable. This will sort the column either ascending or descending.
- To search for a project, Use Search engine on top
-
Clicking on the pencil icon projects list view page to the display of record edit view.
Creating Projects
In the Projects module, you can create, manage, and duplicate Projects and Project Tasks.
You can define multiple Project Tasks for each Project. When you create a Project Task, you must associate it with a Project. You can associate a Project with multiple activities, Companies, Opportunities, and Cases. You can also create Projects and Project Tasks from an Email’s detail page.
-
In the Actions bar, click Create Project.
-
On the Projects page, enter information for the following fields:
-
Name. Enter a name for the Project.
-
Status. From the drop-down list, select the Project status such as Draft, In Review, or Published.
-
Start Date. Click the Calendar icon and select the Project start date.
-
End Date. Click the Calendar icon and select the Project end date.
-
Assigned to. Enter the name of you who has ownership of the Project. By default, it is assigned to you.
-
Priority. From the drop-down list, select the importance of the Project such as Low, Medium, or High.
-
Description. Enter a brief description of the Project.
-
-
Click Save to create the Project; click Cancel to exit the page without creating the Project.
When you save the Project, the Project’s detail page displays on the page.
From this page, you can relate the Project to records such as Contacts and Opportunities.

Creating Project Tasks
-
In the Project Tasks sub-panel, click Create.
-
On the Project Tasks page, enter information for the following fields:
-
Name. Enter a name for the task.
-
Task ID. Enter a numerical value as the task identification number.
-
Start Date. Click the Calendar icon and select the date when the task is due to begin.
-
Finish Date. Click the Calendar icon and select a date when the task is due to be completed; enter the start time in the adjoining field.
-
Percentage Complete. Enter a numerical value to indicate what percentage of the task has been completed.
-
Priority. From the drop-down list, select a priority level that reflects the importance of completing this task.
-
Milestone. Check this box if the completion on this task is considered a milestone for project completion.
-
Project Name. Click Select and choose the project associated with the task.
-
Description. Enter a brief description of the task.
-
-
Add timelines and Click Save to create the task; click Cancel to return to the project detail page without creating the task.


Bulk Actions
In list view, there are some groups of actions which can be done by selecting group of records wish are as follows:
- Mass Update: Apply changes to multiple project records at once.
- Export: Download the selected Projects data in a preferred format (.CSV).
-
Delete: Remove selected Project from the system.

Detail View Actions
Clicking on the Name leads to the display of detail view of a record.
- Edit: Modify the selected record's details.
- Delete: Permanently remove the selected record.
- Duplicate: Create a copy of the selected record with the same information.
- View Gantt: Display the record in a Gantt chart view to visualize timelines and dependencies.
- View Detail: Open the full details of the selected record for review or analysis.

Project's Activities Management
- Create Task: Assign and track project-related work items with due dates and responsible team members.
- Schedule Meeting: Plan meetings linked to the project, including participants, time, and agenda.
- Log Call: Record details of project-related phone conversations for tracking and follow-up.
- Compose Email: Send and log emails related to the project to maintain clear communication records.

Project's History Management
- Create Note or Attachment: Add notes or upload files to document important project information and updates.
- Archive Email: Save relevant project emails to maintain a complete communication history.
- View Summary: Get a quick overview of key project details, recent activities, and status.
- Filter: Sort and narrow down project history by date, type, or keywords for easy review.

Submodules
Contacts
Manage and view all individuals associated with the project, including clients, team members, and stakeholders, along with their contact details.

Companies
Link and manage organizations involved in the project, such as clients, vendors, or partners, with access to their profiles and contact information.

Opportunities
Track potential business opportunities related to the project, including status, value, and progress through the sales pipeline.

Quotes
Manage and track sales quotations related to the project, including pricing, terms, and approval status.

Resources
Allocate and manage personnel, equipment, and materials assigned to the project, ensuring optimal utilization and availability.

Cases
Cases in the Projects submodule are records of specific issues or tasks related to a project, used to track and manage their resolution efficiently.

Bugs
Bugs are defects or errors identified within a project that require tracking and resolution to ensure project quality and stability.

Security groups
Security Groups define sets of users with specific permissions and access rights, controlling their ability to view or modify project-related data and functions.
`
Spots
This module allows you to quickly present these systems in the form of summary tables or graphs.
Create a Spot
Example:
Suppose you need to view a summary of all contractors entered into the system, taking into account their types and countries of location. For this:
-
In the analysis area, select Companies.
-
In the configuration, select the field Company type and move it to the header of the future table.
-
In the configuration, select the Country field and move it to the left of the first column of the future table.
-
In the first combo box, specify the method of data presentation, for example, the heat map.
-
In the second combo box, select the function Quantity.

The same data can be presented in the form of a graph; the same summary is shown in the form of a histogram with accumulation:
Displaying Dashboard Spots
As well as Spots, Spots can be displayed on the main page in the corresponding dashlet.
The following options are available when configuring the Summary dashlet:
-
Title: You can enter your dashlet title or leave the default one. Summary: Select the Summary that will be displayed in the dashlet.
- Custom Summary: Specify this option if you want to modify the Summary parameters directly from the dashlet.
List View Actions
You can access Spots module from 2nd side navbar.
- Create Spot: Enables users to add new spots with relevant details to the system.
- View Spots: Allows users to browse and review existing spots and their information.
- Filters, Column Chooser, Favorites functionalities similar to other modules. Refer Leads module.
- To sort records on the Payments List View, click any column title which is sortable. This will sort the column either ascending or descending. Refer Leads module.
-
To search for a Payment, Use Search engine on top.
-
Clicking on the pencil icon Payments list view page to the display of record edit view.

Bulk Actions
In list view, select group of records by checking the checkbox, the actions are as follows:
-
Mass Update, Merge, Export, Delete are similar to the Leads module. Refer Leads module Bulk Actions for reference.

Employees
This module is used to manage information about employees in your organization. Access to the module is through the user menu, which is displayed at the top right of each page:

All users added to the system through the Administrator panel are automatically registered in it and as employees.

Employees originally added to the system through the module Employees: they will be displayed in the list of employees, but they cannot register in the system until the necessary login and password are assigned to them. Thus, in this module the entire list of employees of your organization can be presented, including employees who are not employed in KiyoCRM.
Enter Employee Information
You can do the following with employee records:
- Employee Search:
-
Use Filters and Advanced Filters in the module list form. Viewing employee details: To do this, click on the employee’s name in the general list.
- Export records:
-
To do this, select the necessary entries in the list form and select the item Export in the menu above the selected entries.
- Delete employee records:
-
To do this, click on the button Delete in the form view. Updating information about several employees at once: To do this, use Mass Update Panel.
Advanced Modules
Advanced Modules
Sales
AOS (Advanced Open Sales) is the first set of advanced modules. It helps manage everything after a sales opportunity, like sending quotes, creating invoices, and handling ongoing contracts. These features are available through modules like:
- Product Categories
- Products
- PDF Templates
- Quotations
- Invoices
- Contracts
- Payments
-
Product Categories
The Product Categories module allows Users to structure Products into a hierarchical category structure. To create a Product Category record, navigate to the Product Categories module and click the 'Create Product Categories' button in the action bar.

The Parent Category field is a relationship field to another Product Categories record. If you check the 'Is Parent Category' field then this signifies that the category is the highest level. Once selected you will not be able to select a Parent Category using the related field

Note: Other features like Import, Filters, Column Chooser, Bulk Actions and Detail view Actions are similar to other modules. Refer Leads.
-
Products
You can create Product records using the Products module. Creating products allows users to select product lines when preparing Quotes using AOS. The products module allows users to specify the Products Name, Part Number, Category and Type. Additional fields for Products can be added using Admin settings.

The module also allows users to define a Cost and Price for the product. Price is the selling price which will be used in the quoting process. A related Contact can be associated with the product. This is the point of contact with the supplier concerning this product. If you have an Image of the product then this can be uploaded within the products record. A URL to the products page on your website can also be specified.
Note: Other features like Import, Filters, Column Chooser, Bulk Actions and Detail view Actions are similar to other modules. Refer Leads.
-
PDF Templates
The PDF Templates module in CRM allows users to create and manage customized templates for generating PDF documents, such as quotes, invoices, contracts, and reports. These templates can include company branding, predefined layouts, and dynamic fields that pull data directly from CRM records, ensuring consistent, professional, and automated document generation. Please contact the support team for PDF template creation or updates.

-
Quotations
Creating a Quote
You can create a Quote by going to the Quotes module and clicking 'Create Quote' from within the actions bar. The first panel allows you to specify details concerning the quote such as the Title, related Opportunity, Stage and Payment Terms. The Quote Number field is calculated automatically.

The second panel allows you to specify who the Quote is for by relating a Company and Contact to the Quote. When you select the Company, the Billing Address and Shipping Address are dynamically pulled from the Company and populated into the fields on the Quote record.

The third panel allows users to specify Line Items and the Currency. A Line Item can be a Product Line or a Service Line, each with its own details such as quantity, price, and description. The panel helps organize and calculate the total amount for the quote.
To add a Product Line, click on Add Product Line button and to add Service line click on Add Service Line button.
To select a Product, you can start typing in the Product or Part Number field which will provide a list of results similar to any related field. Alternatively click the arrow button next to the Part Number field. This will display a pop-up window allowing you to select from a list of Products.

Once you have selected a Product, the List, Sale Price and Total will populate automatically. You can change the Quality, add Discounts (Percentage or Amount) and increase the Tax percentage. These will alter the Sale Price, Total Price and Total fields.
For Service Lines, you must specify the List price. This will populate the Sale Price. Tax and Discounts can be added similarly to the Product Line.
The Shipping field allows you to add a shipping cost. The Shipping Tax field allows you to add tax to this value. Once the Quote has been compiled, Click on Save to save the quote.

Sending Quotations / Detail View Actions
To output a Quote, you can select one of the following three buttons from the Quote Detail View.

AOS provides users with three methods of sending Quotes:
- Print as PDF – Allows you to select a template and download or save a PDF of the Quote.
- Email PDF – Allows you to select a template then directs you to the KiyoCRM email client 'Compose' screen. The Quote PDF will be attached to email and the email will be addressed to the related Contact of the Quote. This allows you to fill out the email body.
- Email Quotation – This directs you to the KiyoCRM email client 'Compose' screen. The email will be addressed to the related Contact of the Quote. There will be no attachment, and the Quote will be displayed within the body of the email.
- Create Opportunity -- Create Opportunity from Quotation allows users to generate a new sales opportunity directly based on the details of a quote, ensuring a smooth transition into the sales pipeline.
- Edit, Duplicate, Delete, Find Duplicates, View Changelog are similar to other modules (Refere leads detail view actions for reference)
- Convert to Invoice – With AOS you can convert Quotes to Invoices. This can be achieved by clicking the 'Convert to Invoice' button on the Quote Detail View.
This functionality will redirect users to the Edit View of an Invoice record. Fields will be populated based on your Quote counterparts and Line Items will be copied over. When you are ready to create the Invoice, click the Save button. Converting a Quote to an Invoice will set the Invoice Status of the quote to 'Invoiced'.
- Create Contract: As well as converting to an Invoice, AOS allows users to create a Contract based on a Quote. This can be done by clicking the 'Create Contract' button on the Quote Detail View.
This will redirect you to the Edit View of a Contract record, pulling through any appropriate fields from the Quote. This includes any Line Items on the Quote.

Bulk Actions
In list view, select group of records by checking the checkbox, the actions are as follows:

-
Mass Update: Allows users to update multiple quote records at once, saving time on repetitive changes.
-
Export: Enables users to download quote data in a structured format for reporting or offline use.
-
Delete: Lets users remove one or more quote records from the system as needed.
List View Page Actions

-
Import, Filter, Column Chooser functionalities are similar to other modules. Refer Leads module Column Chooser, Filter and Import features.
-
Import Line Items:-- Import Line Items feature in Quotes allows users to quickly add multiple products to a quote by uploading them from a file, streamlining the quote creation process.
Download sample file using Download Import File Template. Add data and upload file (.csv)

- To sort records on the Quotes List View, click any column title which is sortable. This will sort the column either ascending or descending.
- To search for a Quotes, Use Search engine on top
-
Clicking on the pencil icon Quotes list view page to the display of record edit view.
Quotes Submodules
Click on the detailed view of a Quote to view Submodules.
Contracts
The Contracts submodule under Quotes links approved quotes to contract generation, allowing seamless transfer of terms, products, and pricing into a formal agreement.
Can Create a new one or select from existing records.

Invoices
The Invoices submodule under Quotes allows users to generate invoices directly from approved quotes, carrying over all relevant billing details to streamline the payment process.
Can Create a new one or select from existing records.

Projects
The Projects submodule under Quotes links quotes to related projects, helping track the delivery of quoted products or services once the quote is accepted.
Can Create a new one or select from existing records.

Invoices
Creating Invoice
Creating an Invoice record is very similar to creating a Quote record. You can create an Invoice by going to the Invoices module and clicking 'Create Invoice' from within the actions bar. The first panel allows you to specify details about the Invoice such as Status and Due Date.

The second panel allows you to specify who the Invoice is for by relating a Company and Contact to the Invoice. When you select the Company, the Billing Address and Shipping Address are dynamically pulled from the Account and populated into the fields on the Invoice record.

The third panel allows users to specify Line Items and the Currency. A Line Item can be a Product Line or a Service Line, each with its own details such as quantity, price, and description. The panel helps organize and calculate the total amount for the quote.
To add a Product Line, click on Add Product Line button and to add Service line click on Add Service Line button.
To select a Product, you can start typing in the Product or Part Number field which will provide a list of results similar to any related field. Alternatively click the arrow button next to the Part Number field. This will display a pop-up window allowing you to select from a list of Products.


Once you have selected a Product, the List, Sale Price and Total will populate automatically. You can change the Quality, add Discounts (Percentage or Amount) and increase the Tax percentage. These will alter the Sale Price, Total Price and Total fields.
Sending Invoices / Detail View Actions
To output an Invoice you can select one of the following three buttons from the Invoice Detail View.

AOS provides users with three methods of sending Invoices:
- Print as PDF – Allows users to select a template and download or save a PDF of the Invoice.
- Email PDF – Allows users to select a template then directs you to the KiyoCRM email client 'Compose' screen. The Invoice PDF will be attached to email and the email will be addressed to the related Contact of the Invoice. This allows the user to fill out the email body.
- Email Invoice – This directs you to the KiyoCRM email client 'Compose' screen. The email will be addressed to the related Contact of the Invoice. There will be no attachment, and the Invoice will be displayed within the body of the email.
- Edit, Duplicate, Delete, Find Duplicates, View Changelog are similar to other modules (Refer leads detail view actions for reference)
Bulk Actions
In list view, select group of records by checking the checkbox, the actions are as follows:
- Mass Update: Allows users to update multiple invoice records at once, saving time on repetitive changes.
-
Export: Enables users to download invoice data in a structured format for reporting or offline use.
-
Delete: Lets users remove one or more invoice records from the system as needed.

List View Page Actions

- Import, Filter, Column Chooser functionalities are similar to other modules. (Refer Leads module Actions)
- Import Line Items:-- Import Line Items feature in Quotes allows users to quickly add multiple products to a quote by uploading them from a file, streamlining the quote creation process.
- Download sample file using Download Import File Template. Add data and upload file (.csv)
- To sort records on the Invoices List View, click any column title which is sortable. This will sort the column either ascending or descending.
- To search for a Invoice, Use Search engine on top
-
Clicking on the pencil icon Invoices list view page to the display of record edit view.
Invoice Submodules
Click on the detailed view of an Invoice to view Submodules.
Quotes
The Quotes submodule under Invoices links each invoice to its original quote, ensuring accurate billing based on agreed items, pricing, and terms.
Can create a new or select from existing records.

Payments
The Payments submodule under Invoices manages and tracks payment details like amount, date, and method. In KiyoCRM, whenever an invoice is created or updated, a corresponding payment record is automatically generated or refreshed. A Razor pay payment link is sent to the customer via SMS. For every partial payment, the system creates a new payment record for the remaining amount and sends an updated Razor pay link to the customer, ensuring accurate tracking until full payment is received.
Can create a new or select from existing records.

Contracts
AOS allows users to create Contracts using the Contracts module.
When the Contract is created the Renewal Reminder Date will populate automatically based on the amount of days specified in the AOS Settings in Admin. A Call will be scheduled and assigned to the Contract Manager for this date.

AOS allows users to add Line Items for Contracts. This is completed in the same way as Quotes. Please refer to the Quotes section for details on how to create Line Items.
The Second panel shows the Line items section.

Contracts List View Actions
Import, Column Chooser, Filter, My Filters, Favorites are Similar to other modules actions. Refer Leads module.

- To sort records on the Contracts List View, click any column title which is sortable. This will sort the column either ascending or descending.
- To search for a Contracts, Use Search engine on top
-
Clicking on the pencil icon Contracts list view page to the display of record edit view.
Bulk Actions
In list view, select group of records by checking the checkbox, the actions are as follows:
- Mass Update: Allows users to update multiple invoice records at once, saving time on repetitive changes.
-
Export: Enables users to download invoice data in a structured format for reporting or offline use.
-
Delete: Lets users remove one or more invoice records from the system as needed.

Detail View Actions
Refer Quotes module for Edit, Duplicate, Delete, Find Duplicates, Print as PDF, Email PDF, View Changelog Log functionalities similar to quotes.

Contracts Submodules
Click on the detailed view of a Contract to view Submodules.
Documents
Allows users to upload, manage, and associate relevant documents with contract records for easy reference and compliance.
Can create a new one or select from existing records.

Quotes
Enables users to create, manage, and link sales quotes to contracts, supporting pricing, product details, and customer terms for streamlined contract generation.
Can create a new one or select from existing records.

Payments
The Payments module in CRM enables users to record, track, and manage customer payment transactions efficiently. It links payments to related invoices, contracts, and customer records, ensuring transparency and accuracy in financial tracking. The module supports multiple payment methods, partial or full payments, and provides a clear overview of outstanding balances and payment history based on Invoice. This helps sales and finance teams monitor cash flow, follow up on overdue payments, and maintain strong customer relationships through timely financial interactions.
List View Page Actions
- View Payments: Displays a list of all recorded payments with details like amount, status, payment method, and linked invoices for easy tracking and management.
- Import Payments: Allows users to bulk upload payment records using a CSV file, streamlining data entry and ensuring efficient payment tracking.
- Filters, Column Chooser, Favorites functionalities similar to other modules. Refer Leads module.
- To sort records on the Payments List View, click any column title which is sortable. This will sort the column either ascending or descending.
- To search for a Payment, Use Search engine on top
- Clicking on the pencil icon Payments list view page to the display of record edit view.

Creating Payments
When Invoice is created, a payment record is generated initially and later updated manually. Initial payment record will be created, later on need to update manually.
Note: Name filed will generate automatically or we can mention manually.

Enables users to record and manage customer payments, link them to invoices, and track status, amount, and method for accurate financial reporting.

When Razor pay is selected as the payment gateway, the Razor pay details panel is enabled. Upon saving, a Razorpay payment link is automatically sent to the contact associated with the linked invoice.
If customer paid through the link and response will be updated in payment as well as in Invoice record.
Detail View Actions
- Edit, Duplicate, Delete, Find Duplicates, View Changelog functionalities are similar to other modules. Refer Leads module Detail view actions.

Payments Submodules
Click on the detailed view of a Contract to view Submodules
Security groups
Control access to payment records by assigning user roles and permissions, ensuring data security and proper authorization.

PDF Templates
This module allows you to create document templates. In the future, based on these templates, PDF documents or emails can be created, in which the necessary data from KiyoCRM will automatically be added during the merge process.
Creating a PDF Template
- PDF Template:
-
Specify the name of the template being created.
- Assigned to:
-
Please enter/ select the name of the Assigned to user of this template.
- Type:
-
Here you should select the type of document to be created based on this template. By default, the system suggests creating templates for the following documents: Quotes, Invoices, Contracts, Contacts or a Lead.
Note: When adding a new item to the combo box list pdf_template_type_dom, the name of the key to be added must match the module name. In the following example, the item Prospects is added to the list.
Detailed information on adding a new element to the combo box is described in the Developer Tools page.
- Load Sample
-
The system Quotes several options for ready-made templates, if necessary.
- Active
-
An option that determines whether the current template will be offered in the list of templates when creating a document (see the section below, Creating PDF Documents Based on a Template),
- Page Size/ Orientation
-
If necessary, select the size and orientation of the template page. Then default is A4 size and portrait page orientation.
- Inserting into a Field
-
This option allows you to add the necessary variable to the template, which later (in the process of creating a document-based template) will be replaced with the necessary data from the KiyoCRM+
- To insert a variable:
-
-
In the left combo box, select the module from which you want to get information.
-
In the middle combo box, select the name of the field of the selected module, then the name of the necessary variable corresponding to the selected field, so it appears in the right field.
-
In the text of the template, specify the place where the selected variable should be added and click the button Insert.
The following picture shows an example of adding the variable $aos_invoices_number, which, when creating the document based on the current template, will be automatically replaced with the account number.

If it is necessary to add data in the template, for example, listing positions in the Offer or Invoice, then such data should be arranged in a table:

Creating Headers and Footers
At the bottom of the Template Editing Form are two fields that allow you to customize the header and footer for the current template:

Footers are able to use special variables:
-
{PAGENO}, Showing the current page number.
-
{DATE D.m.Y}, Showing the current date in the required format
Setting Page Parameters:
Under the header and footer there are several fields that allow you to customize different page parameters, such as the size of the indents from the page edges of the header and footer fields:

Creating PDF documents based on a Template
-
When creating a PDF document for modules Companies, Contacts and Leads use the menu item Print as PDF from the action menu of the View module of the corresponding module:
-

If several templates were created for the current module, they will be presented in the form of a list, from which you need to select the desired position:
If only one template was created for the current module, then the necessary document will be immediately created on its basis.
If you need to create several similar documents for several module entries at once, select the necessary entries in the List Form and then use the Create Letter (PDF) from the action menu:
Contacts:

-
When creating a PDF document for Quotes, Invoices or Contracts, use the items Print as PDF, Email PDF and Email Invoice from the action menu of the View module of the corresponding.

For a detailed description of this functionality, see the relevant sections of the Sales Modules.
Manage PDF Templates:
-
Search Templates - utilize Filters and Advanced Filters in the module list form.
-
Export templates, for this, select the necessary records in the form.
-
Editing or deleting information about several templates at once, use this Mass Update in list form.
-
View detailed information about the template, to do this, click on the name of the template in the general list.
-
Data editing, for the purpose or in the Form of viewing click on the button Edit or directly in the List Form, click the button to the left of the record being edited. You can also perform Quick Edit.
-
To duplicate a template, in the action menu select Duplicate. Duplication is a convenient way to quickly create similar records; you can change the duplicated information to create a new template.
-
To delete a template, click on the button Delete.
-
You can track changes to the entered information; to do this select the button View Changelog in the form of viewing.


Knowledge Base
The knowledge base can be used as a structured repository of solutions coming Appeals. When a new treatment is entered into the system, the system compares the topic of the new treatment with the topics and contents of the existing Knowledge Base articles and automatically suggests options for suitable articles, which makes it possible to speed up the search for an answer to the received treatment.
Adding an Article to the Knowlege Base

- Status:
-
From the drop-down list, select the article status option: Draft, Expired, Pending, Not Published, Published.
- Article text:
-
Enter a detailed description of the solution. If further when entering the topic of a new appeal, matches are found with the topic or text of the Knowledge Base article, then this article will be automatically offered as a possible solution.
- Version of the article:
-
Specify the version of the article.
- Resolution:
-
Indicate a brief solution to the question under discussion. In the future, the text of the resolution can be specified as decision incoming treatment.
- Author of the Article:
-
Specify the author of the text.
- Approved by:
-
Select a user of the system that approved the text of the article.
Categories of Knowlege Base Articles
With a large number of articles, they can be grouped into different categories. Categories are created in a separate module Knowledge Base Categories.
When creating a category, fill in the following fields.:
- Category
-
Enter a category name.
- Description
-
Enter a description of the category.
- Created
-
If necessary, change the user who created the category description category.

After creating a category, a list of articles can be added to it. To do this, use the sub-panel Knowledge Base Article in the Category View Form.
Managing Articles and Knowledge Base Article Categories
-
Sorting the list of records. To do this, click on the icon in the header of the column to be sorted. To reverse sort, click on the icon again.
-
Editing or deleting information in several records at once, for this use Mass Update Panel. (Refer Leads module List view Actions)
-
View detailed information on the entry, to do this, click on the name of the article or category in the general list.
-
Data editing, for this purpose or in the Form of viewing, click on the button Correct or directly in the List Form, click the button to the left of the record being edited. You can also perform Quick Edit using icon in list form.
-
Duplication of information, for this in the action menu, select Duplicate. Duplication is a convenient way to quickly create similar records; you can change the duplicated information to create a new record.
-
Merge Duplicates, to do this, select the necessary entries in the List Form and in the action menu select the Combine item.
-
Delete a record, to do this, click on the button Delete.
-
Tracking changes to the entered information, to do this, click on the button View Changelog in the form of viewing.
-
Search for information - use Filters or Advanced Filters in the module list form.
-

WorkFlows
Workflows is a module for KiyoCRM allowing users to create custom workflow processes. Historically this module was called Advanced Open Workflow (AOW). It allows users to trigger various system actions based on conditions from any KiyoCRM module.
Creating a Workflow Process
You can create workflow processes by navigating to the 'Workflow' module within KiyoCRM. Click the 'Create Workflow' button within the action bar to start creating the process. The first panel allows users to set up the workflow process.

This allows you to specify the following:
-
Name – Any name you want to give to the Workflow.
-
Assigned To - The assigned user of the Workflow process.
-
Workflow Module – A drop down list of all the modules found within the KiyoCRM instance. This is the module the Workflow is run against. For example, when an Company is created/edited.
-
Status – Active or Inactive. Only active processes will run, so you can use this field to deactivate a Workflow without having to delete it.
-
Run – This controls the way the Workflow is triggered.
On Save
The Workflow will run immediately for a given record when a save action occurs in the module specified.
On Scheduler
The Workflow will be started from the Scheduler Job Process Workflow Tasks, the next time the job runs, and will apply to every record in the module, restricted by the Run on property and by the Workflow’s conditions.
Always
The Workflow will run on both the situations described above.
-
Run On – This specifies the selection of records for which the Workflow will be executed.
New Records
The Workflow will run only for new records being created.
Modified Records
The Workflow will run only for records that were already created and are being changed.
All Records
-
For On Save workflows, this means the Workflow will run for both new and modified records.
-
For On Scheduler Workflows, this means the Workflow will go through every record in the module, even old ones that weren’t changed.
When setting On Scheduler, All Records Workflows, consider that they might cause very long operations if your module has many records. These operations will run in the background, but will still consume server resources, so it’s a good idea to run them after work hours.
-
-
Repeated Runs – Workflows keep track of each individual record that they have been applied to in the past. This allows you to control whether you want the Workflow actions to run only once for each record, or repeatedly, as the Workflow is triggered again.
Unchecked
The Workflow will be blocked from running against any record that has already been handled by the current Workflow in the past.
Checked
The Workflow will run against every record, regardless of whether that record has already been handled by the current Workflow in the past.
It is wise to consider whether there are enough restrictions in place so that this will not create excessive runs.
For example, if one of the specified Actions negates (or will lead to the negation) of one of the specified Conditions; or if the Workflow is set to target individual records (On Save, New Records, Modified Records). -
Description – useful to include a description of the process, its intended goals, and other notes to clarify what the current Workflow is all about.
Conditions
Adding Conditions
Once set up, you can add conditions to a workflow process using the conditions panel. This allows you to specify restrictive criteria so that only the records matching all these conditions will be affected by the Workflow’s Actions.

To add a Condition Line, you must click Add Condition.
Note: You must select your Workflow Module on the first panel before adding a Condition Line.

You can have an unlimited amount of Condition Lines. To add another line click Add Condition again and it will appear. On the line you will have four fields: Field, Operator, Type and Value.
Field and Operator
Field is a drop down which automatically populates with all the fields found in the Workflow Module.

The Field selected will determine the options available for Operator and Type. If the field type is not a number or date then the operators available will be 'Equal To' or 'Not Equal To'. For number and date fields you can also choose from additional logical operators; 'Less Than', 'Greater Than' 'Less Than or Equal To' or 'Greater Than or Equal To'.

Condition Types
You can specify workflow processes to trigger on different condition types. These are as follows:
-
Value – This is used to directly compare the Field to a value. The value type offered is dynamic to the field type of the Field selected. For example, if the field type is a drop down then the value field type will be the same drop-down list.

-
Field – This is used to action a workflow process when one field is compared to another field in the record.

-
Multiple – This can be selected if the Field is a drop down/multiselect. This allows users to specify multiple values to action the workflow from.

-
Date – This allows you to specify the record to be selected for the Workflow after/before an amount of time from either another date field or 'Now'. For example, when the start date of a call is 'Now + 10 minutes'. This can only be used when the Field is a date field. The amount of time before or after the date can be specified in Minutes, Hours, Days, Weeks or Months.

Removing Conditions
You can remove Condition Lines by clicking '-' on the left-hand side of the condition.

Actions
Adding Actions
Actions are defined in the third panel. These specify what events should occur when the conditions have been met. You can add an Action by clicking the Add Action button.

This will cause the Action Line to appear.

From the Action Line you can Select Action and give it a Name. The actions available are; 'Create Record', 'Modify Record' and 'Send Email'. You can specify an unlimited number of actions for each workflow process.
Create Record
If you select 'Create Record' you will be prompted to select a Record Type. This is the module type of the record you are looking to create.

Once selected you can add fields or relationships to this record using the Add Field and Add Relationship buttons.

When Adding fields the first drop down in the line will populate with all the fields from that module. The second drop down allows you to specify how the value for that field is going to be derived. For most cases the options are as follows:
-
Value – This will allow you to input the value directly using the same field type as the field selected.
-
Field – This will make the field the same value as a field found in the Workflow Module.
-
Date – Only selectable if the field is a date field. This will allow you to specify the value as an amount of time after/before another date field or 'Now'.

Selecting the 'Assigned-To' field also gives you more options. As well as by value and field you can assign a user by:
-
Round Robin – This will select each user in turn.
-
Least Busy – This will select you with the least amount of records assigned to you for that module.
-
Random – This will select a random user.
For each of the above options you can choose if you want you to be selected from all users or users from a specific role. If you have the Security Suite module installed, you can additionally choose if you want you to be selected from all users from a particular Security Group or all users from a particular security group with a particular role.

When adding relationships, you must select the related module from the drop-down list then select the record that the new record should be related to.

Note: You must select the related module using the arrow button – The auto completion on the text field is not currently developed.
Modify Record
This provides the same functionality as 'Create Record' but instead of creating a new record you are modifying the record which met the conditions of the workflow process. With this action you can modify any field found within the record or you can add a relationship to another record. This is completed in the same way as 'Create Record' except you are not required to specify the Record Type.
Send Email
The 'Send Email' action allows users to create workflow processes which will send an email based on an template to individuals.
Note: The Email will be sent from the System Email Account. It is not possible to send from emails specified in the User Profile, because Workflows sometimes run from a Scheduler job, without any user being logged on.
Using this action there are four different types of recipients.
- Email – This will send an email to a specific email address. You must specify the email address and the email template.

-
Record Email – This will send an email to the primary email address specified on the record which actioned the workflow process. This can only be used if the record has an email field such as Companies and Contacts. For this option you only need to specify the template.

-
User – This will send the email to a specified Users email address. You must specify the recipient user and the template of the email.


Calculate fields
If you select 'Calculate Fields' from the Action dropdown the Calculate Fields user interface will be loaded after a second and looks like the picture below.

There is a separate page with detailed documentation of the many possibilities of Calculated Fields in Workflows. Refer that.
Process Audit
Advanced OpenWorkflow allows users to audit your processes. In the Detail View of each Workflow record there is a sub-panel called 'Processed Flows'.

This lists all the workflow processes which have been actioned including details on the record which actioned the flow, its status and the date it was created.
You can view this information at a higher level by clicking the 'View Process Audit' button within the module action bar. This will show all the processes that have run for all the Workflow records.
Examples
Customers To Target List
This tutorial will show you how to create a workflow process to add companies who are customers to a Target-List when the record is created or modified. Set Up
Conditions
-
Create a new Condition Line by clicking Add Condition.
-
Select 'Type' from the Field drop down.
-
Keep the Operator as 'Equals To' and the Type as 'Value'.
-
From the Value drop down select 'Customer'.
Once these steps have been completed the Conditions panel should look like this:

Actions
Create a new Action by clicking Add Action.
-
Select 'Modify Record from the Select Action drop down list.
-
Using the Name field, give the action a name such as 'Add to Target List'
-
Add a Relationship Line by clicking the Add Relationship button.
-
A drop down will appear above the 'Add Relationship' button. Select the relationship from this drop down box. In this case we are looking for 'Target Lists: Prospect List'
-
This will populate the rest of the line. Click the arrow button next to the relate field to select your target list.
Once these steps have been completed your Actions panel should look like this:

Cases Remainder
This tutorial will show you how to create a workflow process to notify the assigned user and then a particular manger user when an open Case has not been updated/modified within two days. Set Up
Once these steps have been completed the first panel should look like this:

Conditions
Create a new Condition Line by clicking Add Condition.
Select 'Date Modified' from the Field drop down.
Change the Operator to 'Less Than or Equal To' and the Type to 'Date'
From the Value fields select 'Now', '-', '2', 'Days' in order.
Once these steps have been completed the Conditions panel should look like this:

Repeat step 1.
This time select 'Status' from the Field drop down.
Keep the Operator as 'Equals To' and change the Type to 'Multiple'.
From the Value multi-select field select any values which signify an open case
Once these steps have been completed the Conditions panel should look like this:

Actions
-
Create a new Action by clicking Add Action button.
-
Select 'Send Email' from the Select Action down-down list.
-
Give the action a Name such as 'Assigned User Reminder'
-
On the Email Line select 'Related Field' from the first drop down, 'Users: Assigned To' from the second drop down and a email template from the third drop down.
Once these steps have been completed the Actions panel should look like this:

Repeat steps 1, 2 and 3 but change the name of this action to 'Manager Escalation Email'. 2. On the Email Line select 'User' and then select you who should receive the email. Select an email template from the third drop down. 3. When you are finished click Save to create your workflow. Once these steps have been completed the Actions panel should look like this:


Follow-up Web Leads
This tutorial will show you how to create a workflow process to assign web Leads to a particular user from a particular role within KiyoCRM. This user will be chosen by round robin. The workflow process will also set a follow up call for one day after the Lead is created.
Note: You can change the Sales role to any role found in your own system.
Set Up
Once these steps have been completed the first panel should look like this:

Conditions
-
Create a new Condition Line by clicking Add Condition.
-
Select 'Lead Source' from the Field drop down.
-
Keep the Operator as 'Equals To' and the Type as 'Value'
-
From the Value drop down select our condition, 'Web Site'
Once these steps have been completed the Conditions panel should look like this:

Actions
-
Create a new Action by clicking Add Action.
-
Select 'Modify Record' from the Select Action down-down list.
-
Using the Name field, give the action a name such as 'Assign to Sales'
-
Add a Field Line by clicking Add Field.
-
Select 'Assigned-To' from the new drop-down box that has appeared above the Add Field button.
-
Change the middle drop-down box from 'Value' to 'Round Robin'
-
Change the third drop down box from 'ALL Users' to 'ALL Users in Role'
Once these steps have been completed the Actions panel should look like this:

-
Now create a new Action by repeating step 1.
-
This time select 'Create Record' from the Select Action down-down list.
-
Using the Name field, give the action a name such as 'Create Follow Up Call'.
-
From the Record Type drop down select 'Calls'.
-
Click the Add Field button to add a new field:
-
Select 'Subject' from the first drop down box. Leave the second drop down box as 'Value' then type the desired subject into the text field at the end.
-
Add another field, this time selecting the 'Start Date' from the first drop down box.
-
Change the second drop down box from 'Value' to 'Date'.
-
In the third drop down box select 'Now'. In the fourth drop down box on the line select '+'.
-
In the text box type '1' and in the drop down next to it select 'Days'.
-
Add another field, this time select 'Assigned-To', 'Field', 'Assigned-To' – This will relate the assigned User of the Lead to the Call.
-
You can add any other fields that you wish to include in the call at this stage. To finish click Save.
Once these steps have been completed the Actions panel should look like this:

Workflow Calculated Fields
In Workflows, there is a particularly powerful and complex Action called Calculated Fields which allows you to do operations on the values in the records you’re handling.

Adding Parameters
It is possible to add parameters to the formulas by using the dropdown in the Parameters section of the Calculate Fields’s user interface. The dropdown contains all of the (basic and custom) fields which belongs to the module selected in the basic fields section.
To add a parameter, select the field from the dropdown and click Add Parameters After this action, a new line appears in the parameter table with the name of the field and the given identifier.
For some fields (dropdowns and multi-selects) an additional dropdown shown up where the user can select if the raw or the formatted value should be used in Calculated Fields. The raw format means the value which is stored in the database and the formatted value means the label for that database value.
To remove a parameter from the table, simply click the '-' in the row of the parameter. Be aware, that if you remove a parameter, all of the identifiers are recalculated, so the identifiers could change for fields!

The identifier is used to reference this field when the user creates the formula. For example, all appearances of the {P0} identifier will be replaced with the Company’s name in the formula. All parameters are like {Px} where x is the sequential order of the parameter. The amount of the parameters is not limited.
Adding Relation Parameters
Relation parameters are very similar to the regular parameters; the only difference is that the user first selects an entity which is in a one-to-one or one-to-many relationship with the actual entity.
To add a relation parameter, select the relation first, and then select the field from the connected entity and push the Add relation parameter button. After this action, a new line appears in the relation parameter table with the name of the relationship, the name of the field and the given identifier.
As for parameters for some relation parameter fields (dropdowns and multi-selects) an additional dropdown shown up where the user can select if the raw or the formatted value should be used in Calculate Fields.
To remove a relation parameter from the table, simply click on the '-' button in the row of the relation parameter. Be aware, that if you remove a relation parameter, all of the identifiers are recalculated, so the identifiers could change for fields!

The identifier is used to reference this field when the user creates the formula. For example, all appearances of the {R0} identifier will be replaced with the creator user‘s username in the formula. All relation parameters are like {Rx} where x is the sequential order of the relation parameter. The amount of the relation parameters is not limited.
Creating Formula for a Field
In the Formulas part of the user interface the user can add formulas for fields of the actual entity.
To add a formula, select a field from the dropdown first and then push the Add formula button. After this action, a new line appears in the formula table with the name of the field and with the place for the formula.
To remove a formula from the table, simply click on the '-' in the row of the formula.

The formula is a textbox where the user can write the formulas. The module evaluates the formula on the given time (on save, on scheduler run or both) and fills the selected field with the evaluated value.
The formula can contain any text (with full UTF-8 support), but only the function parts (functions with parameters between ‘{‘and ‘}’) are evaluated. For example, and with the parameters added in the previous sections, if we fill the formula like: Company {P0} created by username {R0}, then the description field will have the following value after save: Company My Company created by username My User (implying the Company’s name is My Company and the creator user’s username is My User).
The Calculate Fields has many built-in functions which allows the user to build complex formulas to achieve various goals. These functions are described in the next section.
Available Functions
As it is mentioned above, all of the functions are wrapped between {and} signs, and they look like {function Name (parameter1; parameter2; …)}. The count of the parameters is different for the different functions. The module evaluates the functions and changes them with their result in the formula.
The functions can be embedded into each other (using a result of a function as a parameter for another function) like in this example:
{power({subtract({divide({add({multiply(10; 2)}; 12)}; 8)}; 1)}; 2)}
This function is the formalized look of the following mathematical expression:
((((10 * 2) + 12) / 8) – 1)2
The functions are divided to six groups. These groups are described in the next section of the document.
Logical Functions
Logical functions are returning true or false in the form of 1 and 0 so checkboxes typed fields can be filled with these functions. They can be also used as the logical condition for the ifThenElse function.
equal
|
Signature |
{equal(parameter1;parameter2)} |
|
Parameters |
parameter1: can be any value of any type |
|
parameter2: can be any value of any type |
|
|
Description |
Determines if parameter1 equals with parameter2 |
|
Returns |
1 if the two parameters are equal or 0 if not |
|
Example call |
{equal(1; 2)} returns 0 |
notEqual
|
Signature |
{not Equal(parameter1; parameter2)} |
|
Parameters |
parameter1: can be any value of any type |
|
parameter2: can be any value of any type |
|
|
Description |
Determines if parameter1 not equals with parameter2 |
|
Returns |
0 if the two parameters are equal or 1 if not |
|
Example calls |
{not Equal(1; 2)} returns 1 |
greaterThan
|
Signature |
{greater Than(parameter1; parameter2)} |
|
Parameters |
parameter1: can be any value of any type |
|
parameter2: can be any value of any type |
|
|
Description |
Determines if parameter1 greater than parameter2 |
|
Returns |
1 if parameter1 greater than parameter2, 0 if not |
|
Example call |
{greaterThan(3; 3)} returns 0 |
greaterThanOrEqual
|
Signature |
{greaterThanOrEqual(parameter1; parameter2)} |
|
Parameters |
parameter1: can be any value of any type |
|
parameter2: can be any value of any type |
|
|
Description |
Determines if parameter1 greater than or equal parameter2 |
|
Returns |
1 if parameter1 greater than or equal parameter2, 0 if not |
|
Example call |
{greaterThanOrEqual(3; 3)} returns 1 |
lessThan
|
Signature |
{lessThan(parameter1; parameter2)} |
|
Parameters |
parameter1: can be any value of any type |
|
parameter2: can be any value of any type |
|
|
Description |
Determines if parameter1 less than parameter2 |
|
Returns |
1 if parameter1 less than parameter2, 0 if not |
|
Example call |
{lessThan(3; 3)} returns 0 |
lessThanOrEqual
|
Signature |
{lessThanOrEqual(parameter1; parameter2)} |
|
Parameters |
parameter1: can be any value of any type |
|
parameter2: can be any value of any type |
|
|
Description |
Determines if parameter1 less than or equal parameter2 |
|
Returns |
1 if parameter1 less than or equal parameter2, 0 if not |
|
Example call |
{lessThanOrEqual(3; 3)} returns 1 |
empty
|
Signature |
{empty(parameter)} |
|
Parameters |
parameter: text value |
|
Description |
Determines if parameter is empty |
|
Returns |
1 if parameter is empty, 0 if not |
|
Example call |
{empty(any text)} returns 0 |
notEmpty
|
Signature |
{notEmpty(parameter)} |
|
Parameters |
parameter: text value |
|
Description |
Determines if parameter is not empty |
|
Returns |
1 if parameter is not empty, 0 if empty |
|
Example call |
{notEmpty(any text)} returns 1 |
not
|
Signature |
{not(parameter)} |
|
Parameters |
parameter: logical value |
|
Description |
Negates the logical value of the parameter |
|
Returns |
1 if parameter is 0, 0 if parameter is 1 |
|
Example call |
{not(0)} returns 1 |
and
|
Signature |
{and(parameter1; parameter2)} |
|
Parameters |
parameter1: logical value |
|
parameter2: logical value |
|
|
Description |
Applies the AND logical operator to two logical values |
|
Returns |
1 if parameter1 and parameter2 is 1, 0 if any parameters are 0 |
|
Example call |
{and(1; 0)} returns 0 |
or
|
Signature |
{or(parameter1; parameter2)} |
|
Parameters |
parameter1: logical value |
|
parameter2: logical value |
|
|
Description |
Applies the OR logical operator to two logical values |
|
Returns |
1 if parameter1 or parameter2 is 1, 0 if both parameters are 0 |
|
Example call |
{or(1; 0)} returns 1 |
Text Functions
Text functions are used to manipulate text in various ways. All the functions listed here are fully supports UTF-8 texts, so special characters should not raise any problems.
substring
|
Signature |
{substring(text; start; length)} |
|
Parameters |
text: text value |
|
start: decimal value |
|
|
length [optional parameter]: decimal value |
|
|
Description |
Cuts the substring of a text field from start. If the length optional parameter is not set, then it cuts all characters until the end of the string, otherwise cuts the provided length. Indexing of a text’s characters starting from 0. |
|
Returns |
Substring of the given text |
|
Example call |
{substring(This is my text; 5)} returns is my text |
|
{substring(This is my text; 5; 5)} returns is my |
length
|
Signature |
{length(parameter)} |
|
Parameters |
parameter: text value |
|
Description |
Count the characters in a text. |
|
Returns |
The count of the characters in a text. |
|
Example call |
{length(sample text)} returns 11 |
replace
|
Signature |
{replace(search; replace; subject)} |
|
Parameters |
search: text value |
|
replace: text value |
|
|
subject: text value |
|
|
Description |
Replace all occurrences of search to replace in the text subject. |
|
Returns |
subject with replaced values. |
|
Example call |
{replace(apple; orange; This is an apple tree)} returns This is an orange tree |
position
|
Signature |
{position(subject; search)} |
|
Parameters |
subject: text value |
|
search: text value |
|
|
Description |
Find position of first occurrence of search in a subject |
|
Returns |
Numeric position of search in subject or -1 if search not present in subject |
|
Example call |
{position(Where is my text?; text)} returns 12 |
lowercase
|
Signature |
{lowercase(parameter)} |
|
Parameters |
parameter: text value |
|
Description |
Make text lowercase |
|
Returns |
The lowercased text. |
|
Example call |
{lowercase(ThIs iS a sAmPlE tExT)} returns this is a sample text |
uppercase
|
Signature |
{uppercase(parameter)} |
|
Parameters |
parameter: text value |
|
Description |
Make text uppercase |
|
Returns |
The uppercased text. |
|
Example call |
{uppercase(ThIs iS a sAmPlE tExT)} returns THIS IS A SAMPLE TEXT |
Mathematical Functions
Mathematical functions are used to manipulate numbers in various ways. Several mathematical operators are implemented as functions in Calculate Fields.
add
|
Signature |
{add(parameter1; parameter2)} |
|
Parameters |
parameter1: number value |
|
parameter2: number value |
|
|
Description |
Adds parameter1 and parameter2 |
|
Returns |
The sum of parameter1 and parameter2 |
|
Example call |
{add(3.12; 4.83)} returns 7.95 |
subtract
|
Signature |
{subtract(parameter1; parameter2)} |
|
Parameters |
parameter1: number value |
|
parameter2: number value |
|
|
Description |
Subtracts parameter2 from parameter1 |
|
Returns |
The distinction of parameter2 and parameter1 |
|
Example call |
{subtract(8; 3)} returns 5 |
multiply
|
Signature |
{multiply(parameter1; parameter2)} |
|
Parameters |
parameter1: number value |
|
parameter2: number value |
|
|
Description |
Multiplies parameter1 and parameter2 |
|
Returns |
The product of parameter1 and parameter2 |
|
Example call |
{multiply(2; 4)} returns 8 |
divide
|
Signature |
{divide(parameter1; parameter2)} |
|
Parameters |
parameter1: number value |
|
parameter2: number value |
|
|
Description |
Divides parameter2 with parameter1 |
|
Returns |
The division of parameter2 and parameter1 |
|
Example call |
{divide(8; 2)} returns 4 |
power
|
Signature |
{power(parameter1; parameter2)} |
|
Parameters |
parameter1: number value |
|
parameter2: number value |
|
|
Description |
Raises parameter1 to the power of parameter2 |
|
Returns |
parameter1 raised to the power of parameter2 |
|
Example call |
{power(2; 7)} returns 128 |
squareRoot
|
Signature |
{squareRoot(parameter)} |
|
Parameters |
parameter: number value |
|
Description |
Calculates the square root of parameter |
|
Returns |
The square root of parameter |
|
Example call |
{squareRoot(4)} returns 2 |
absolute
|
Signature |
{absolute(parameter)} |
|
Parameters |
parameter: number value |
|
Description |
Calculates the absolute value of parameter |
|
Returns |
The absolute value of parameter |
|
Example call |
{absolute(-4)} returns 4 |
Date functions
There are several date functions implemented in Calculate Fields, so the user can manipulate dates in many ways. Most of the functions uses a format parameter, which is used to set the result of the functions formatted as the user wants to. The options for these formats are equivalent with the PHP format parameters:
| Format character | Description | Example returned values |
|---|---|---|
|
For day |
||
|
d |
Day of the month, 2 digits with leading zeros |
01 to 31 |
|
D |
A textual representation of a day, three letters |
Mon through Sun |
|
j |
Day of the month without leading zeros |
1 to 31 |
|
l |
A full textual representation of the day of the week |
Sunday through Saturday |
|
N |
ISO-8601 numeric representation of the day of the week |
1 (for Monday) through 7 (for Sunday) |
|
S |
English ordinal suffix for the day of the month, 2 characters |
st, nd, rd or th. Works well with j |
|
w |
Numeric representation of the day of the week |
0 (for Sunday) through 6 (for Saturday) |
|
z |
The day of the year (starting from 0) |
0 through 365 |
|
For week |
||
|
W |
ISO-8601 week number of year, weeks starting on Monday |
42 (the 42nd week in the year) |
|
For month |
||
|
F |
A full textual representation of a month, such as January or March |
January through December |
|
m |
Numeric representation of a month, with leading zeros |
01 through 12 |
|
M |
A short textual representation of a month, three letters |
Jan through Dec |
|
n |
Numeric representation of a month, without leading zeros |
1 through 12 |
|
t |
Number of days in the given month |
28 through 31 |
|
For year |
||
|
L |
Whether it’s a leap year |
1 if it is a leap year, 0 otherwise |
|
o |
ISO-8601 year number. This has the same value as Y, except that if the ISO week number (W) belongs to the previous or next year, that year is used instead |
1999 or 2003 |
|
Y |
A full numeric representation of a year, 4 digits |
1999 or 2003 |
|
y |
A two digit representation of a year |
99 or 03 |
|
For time |
||
|
a |
Lowercase Ante meridiem and Post meridiem |
am or pm |
|
A |
Uppercase Ante meridiem and Post meridiem |
AM or PM |
|
B |
Swatch Internet time |
000 through 999 |
|
g |
12-hour format of an hour without leading zeros |
1 through 12 |
|
G |
24-hour format of an hour without leading zeros |
0 through 23 |
|
h |
12-hour format of an hour with leading zeros |
01 through 12 |
|
H |
24-hour format of an hour with leading zeros |
00 through 23 |
|
i |
Minutes with leading zeros |
00 to 59 |
|
s |
Seconds, with leading zeros |
00 through 59 |
|
For timezone |
||
|
e |
Timezone identifier |
UTC, GMT, Atlantic/Azores |
|
l |
Whether or not the date is in daylight saving time |
1 if Daylight Saving Time, 0 otherwise |
|
O |
Difference to Greenwich time (GMT) in hours |
+0200 |
|
P |
Difference to Greenwich time (GMT) with colon between hours and minutes |
+02:00 |
|
T |
Timezone abbreviation |
EST, MDT |
|
Z |
Timezone offset in seconds. The offset for timezones west of UTC is always negative, and for those east of UTC is always positive. |
-43200 through 50400 |
|
For full date/time |
||
|
c |
ISO 8601 date |
2004-02-12T15:19:21+00:00 |
|
r |
RFC 2822 formatted date |
Thu, 21 Dec 2000 16:01:07 +0200 |
|
U |
Seconds since the Unix Epoch (January 1 1970 00:00:00 GMT) |
|
For all functions without timestamp parameter, we assume that the current date/time is 2016.04.29. 15:08:03
date
|
Signature |
{date(format; timestamp)} |
|
Parameters |
format: format text |
|
timestamp: date/time value |
|
|
Description |
Creates a date in the given format |
|
Returns |
timestamp in the given format |
|
Example call |
{date(ymd; 2016-02-11)} returns 160211 |
now
|
Signature |
{now(format)} |
|
Parameters |
format: format text |
|
Description |
Creates the actual date/time in the given format |
|
Returns |
Current date/time in the given format |
|
Example call |
{now(Y-m-d H:i:s)} returns 2016-04-29 15:08:03 |
yesterday
|
Signature |
{yesterday(format)} |
|
Parameters |
format: format text |
|
Description |
Creates yesterday’s date/time in the given format |
|
Returns |
Yesterday’s date/time in the given format |
|
Example call |
{yesterday(Y-m-d H:i:s)} returns 2016-04-28 15:08:03 |
tomorrow
|
Signature |
{tomorrow(format)} |
|
Parameters |
format: format text |
|
Description |
Creates tomorrow’s date/time in the given format |
|
Returns |
Tomorrow’s date/time in the given format |
|
Example call |
{tomorrow(Y-m-d H:i:s)} returns 2016-04-30 15:08:03 |
datediff
|
Signature |
{datediff(timestamp1; timestamp2; unit)} |
|
Parameters |
timestamp1: date/time value |
|
timestamp2: date/time value |
|
|
unit: years/months/days/hours/minutes/seconds; default: days |
|
|
Description |
Subtracts timestamp2 from timestamp1 |
|
Returns |
The difference between the two dates returned in unit |
|
Example call |
{datediff(2016-02-01; 2016-04-22; days)} returns 81 |
addYears
|
Signature |
{addYears(format; timestamp; amount)} |
|
Parameters |
format: format text |
|
timestamp: date/time value |
|
|
amount: decimal number |
|
|
Description |
Adds amount years to timestamp |
|
Returns |
Incremented date in format |
|
Example call |
{addYears(Ymd; 2016-04-22; 1)} returns 20170422 |
addMonths
|
Signature |
{addMonths(format; timestamp; amount)} |
|
Parameters |
format: format text |
|
timestamp: date/time value |
|
|
amount: decimal number |
|
|
Description |
Adds amount months to timestamp |
|
Returns |
Incremented date in format |
|
Example call |
{addMonths(Ymd; 2016-04-22; 1)} returns 20160522 |
addDays
|
Signature |
{addDays(format; timestamp; amount)} |
|
Parameters |
format: format text |
|
timestamp: date/time value |
|
|
amount: decimal number |
|
|
Description |
Adds amount days to timestamp |
|
Returns |
Incremented date in format |
|
Example call |
{addDays(Ymd; 2016-04-22; 1)} returns 20160423 |
addHours
|
Signature |
{addHours(format; timestamp; amount)} |
|
Parameters |
format: format text |
|
timestamp: date/time value |
|
|
amount: decimal number |
|
|
Description |
Adds amount hours to timestamp |
|
Returns |
Incremented date in format |
|
Example call |
{addHours(Ymd H:i:s; 2016-04-22 23:30; 5)} returns 20160423 04:30:00 |
addMinutes
|
Signature |
{addMinutes(format; timestamp; amount)} |
|
Parameters |
format: format text |
|
timestamp: date/time value |
amount: decimal number |
|
Description |
Adds amount minutes to timestamp |
|
Returns |
Incremented date in format |
|
Example call |
{addMinutes(Ymd H:i:s; 2016-04-22 22:58; 5)} returns 20160422 23:03:00 |
addSeconds
|
Signature |
{addSeconds(format; timestamp; amount)} |
|
Parameters |
format: format text |
|
timestamp: date/time value |
|
|
amount: decimal number |
|
|
Description |
Adds amount seconds to timestamp |
|
Returns |
Incremented date in format |
|
Example call |
{addSeconds(Ymd H:i:s; 2016-04-22 22:58; 5)} returns 20160422 22:58:05 |
subtractYears
|
Signature |
{subtractYears(format; timestamp; amount)} |
|
Parameters |
format: format text |
|
timestamp: date/time value |
|
|
amount: decimal number |
|
|
Description |
Subtracts amount years from timestamp |
|
Returns |
Decremented date in format |
|
Example call |
{subtractYears(Ymd; 2016-04-22; 5)} returns 20110422 |
subtractMonths
|
Signature |
{subtractMonths(format; timestamp; amount)} |
|
Parameters |
format: format text |
|
timestamp: date/time value |
|
|
amount: decimal number |
|
|
Description |
Subtracts amount months from timestamp |
|
Returns |
Decremented date in format |
|
Example call |
{subtractMonths(Ymd; 2016-04-22; 5)} returns 20151122 |
subtractDays
|
Signature |
{subtractDays(format; timestamp; amount)} |
|
Parameters |
format: format text |
|
timestamp: date/time value |
|
|
amount: decimal number |
|
|
Description |
Subtracts amount days from timestamp |
|
Returns |
Decremented date in format |
|
Example call |
{subtractDays(Ymd; 2016-04-22; 5)} returns 20160417 |
subtractHours
|
Signature |
{subtractHours(format; timestamp; amount)} |
|
Parameters |
format: format text |
|
timestamp: date/time value |
|
|
amount: decimal number |
|
|
Description |
Subtracts mount hours from timestamp |
|
Returns |
Decremented date in format |
|
Example call |
{subtractHours(Ymd H:i:s; 2016-04-22 12:37; 5)} returns 20160422 07:37:00 |
subtractMinutes
|
Signature |
{subtractMinutes(format; timestamp; amount)} |
|
Parameters |
format: format text |
|
timestamp: date/time value |
|
|
amount: decimal number |
|
|
Description |
Subtracts amount minutes from timestamp |
|
Returns |
Decremented date in format |
|
Example call |
{subtractMinutes(Ymd H:i:s; 2016-04-22 12:37; 5)} returns 20160422 12:32:00 |
subtractSeconds
|
Signature |
{subtractSeconds(format; timestamp; amount)} |
|
Parameters |
format: format text |
|
timestamp: date/time value |
amount: decimal number |
|
Description |
Subtracts amount minutes from timestamp |
|
Returns |
Decremented date in format |
|
Example call |
{subtractSeconds(Ymd H:i:s; 2016-04-22 12:37; 5)} returns 20160422 12:36:55 |
Control Functions
There is only one control function implemented in Calculate Fields so far, but this function ensures that the user can write very complex formulas with conditions. Since the functions can be embedded in each other, the user can write junctions with many branches.
ifThenElse
|
Signature |
{ifThenElse(condition; trueBranch; falseBranch)} |
|
Parameters |
condition: logical value |
|
trueBranch: any expression |
|
|
falseBranch: any expression |
|
|
Description |
Selects one of the two branches depending on condition |
|
Returns |
trueBranch if condition is true, falseBranch otherwise |
|
Example call |
{ifThenElse(\{equal(1; 1)}; 1 equals 1; 1 not equals 1)} returns 1 equals 1 |
Counters
There are several counters implemented in Calculate Fields which can be used in various scenarios.
The counters sorted into two groups:
-
Global counters: Counters which are incremented every time an affected formula is evaluated
-
Daily counters: Counters which resets every day. (Starting from 1)
In this chapter we assume that the counters current value is 4, so the incremented value will be 5 with the given format.
GlobalCounter
|
Signature |
{GlobalCounter(name; numberLength)} |
|
Parameters |
name: any text |
|
numberLength: decimal number |
|
|
Description |
Increments and returns the counter for name with length numberLength |
|
Returns |
Counter with length numberLength |
|
Example call |
{GlobalCounter(myName; 4)} returns 0005 |
GlobalCounterPerUser
|
Signature |
{GlobalCounterPerUser(name; numberLength)} |
|
Parameters |
name: any text |
|
numberLength: decimal number |
|
|
Description |
Increments and returns the counter for name for the user who creates the entity with length numberLength |
|
Returns |
Counter with length numberLength |
|
Example call |
{GlobalCounterPerUser(myName; 3)} returns 005 |
GlobalCounterPerModule
|
Signature |
{GlobalCounterPerModule(name; numberLength)} |
|
Parameters |
name: any text |
|
numberLength: decimal number |
|
|
Description |
Increments and returns the counter for name for the module of the entity with length numberLength |
|
Returns |
Counter with length numberLength |
|
Example call |
{GlobalCounterPerModule(myName; 2)} returns 05 |
GlobalCounterPerUserPerModule
|
Signature |
{GlobalCounterPerUserPerModule(name; numberLength)} |
|
Parameters |
name: any text |
|
numberLength: decimal number |
|
|
Description |
Increments and returns the counter for name for the user who creates the entity and for the module of the entity with length numberLength |
|
Returns |
Counter with length numberLength |
|
Example call |
{GlobalCounterPerUserPerModule(myName; 1)} returns 5 |
DailyCounter
|
Signature |
{DailyCounter(name; numberLength)} |
|
Parameters |
name: any text |
|
numberLength: decimal number |
|
|
Description |
Increments and returns the counter for name with length numberLength |
|
Returns |
Counter with length numberLength, or if the counter is not incremented this day then 1 with length numberLength |
|
Example call |
{DailyCounter(myName; 1)} returns 5 |
DailyCounterPerUser
|
Signature |
{DailyCounterPerUser(name; numberLength)} |
|
Parameters |
name: any text |
|
numberLength: decimal number |
Description |
|
Increments and returns the counter for name for the user who creates the entity with length numberLength |
Returns |
|
Counter with length numberLength, or if the counter is not incremented this day for this user then 1 with length numberLength |
Example call |
DailyCounterPerModule
|
Signature |
{DailyCounterPerModule(name; numberLength)} |
|
Parameters |
name: any text |
|
numberLength: decimal number |
|
|
Description |
Increments and returns the counter for name for the module of the entity with length numberLength |
|
Returns |
Counter with length numberLength, or if the counter is not incremented this day for this module then 1 with length numberLength |
|
Example call |
{DailyCounterPerModule(myName; 1)} returns 5 |
DailyCounterPerModule
|
Signature |
{DailyCounterPerUserPerModule(name; numberLength)} |
|
Parameters |
name: any text |
|
numberLength: decimal number |
|
|
Description |
Increments and returns the counter for name for the user who creates the entity and for the module of the entity with length numberLength |
|
Returns |
Counter with length numberLength, or if the counter is not incremented this day for the user who creates the entity and for this module then 1 with length numberLength |
|
Example call |
{DailyCounterPerUserPerModule(myName; 1)} returns 5 |
Example - Calculate monthly fee for an Opportunity
Use Case
The user would like to calculate a monthly fee of an opportunity to a custom field by dividing the amount of the opportunity by the duration.
Setup
Our opportunities module has a dropdown field called Duration with values: (database value in brackets) 6 months [6], 1 year [12], 2 years [24]. There is also a currency field called Monthly.
Workflow
Go to Workflow module and create a new Workflow. Set the base options like the following:
|
Name: as you wish |
Workflow Module: Opportunities |
|
Status: Active |
Run: Only on save |
|
Run on: All records |
Repeated runs: checked |

We do not create any conditions, since we would like the Workflow to run on all opportunities.
Now, add an action and select Calculate Fields from the dropdown.
Then, add two fields from Opportunities as parameters. First, select Opportunity amount (amount) and add it as a parameter (it will be {P0}) then select Duration and the raw value option from the data type dropdown and add it as parameter two (it will be {P1}). There is no need to add any relational parameters for this formula.
Now, add a formula for the monthly field and fill the textbox with the following formula:
{divide({P0}; {P1})}
So the whole action should look like this:
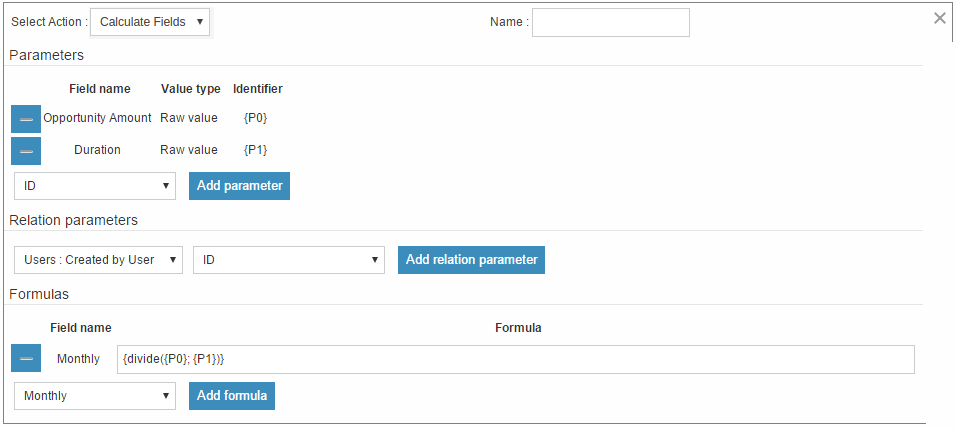
Save the Workflow and create a new Opportunity:
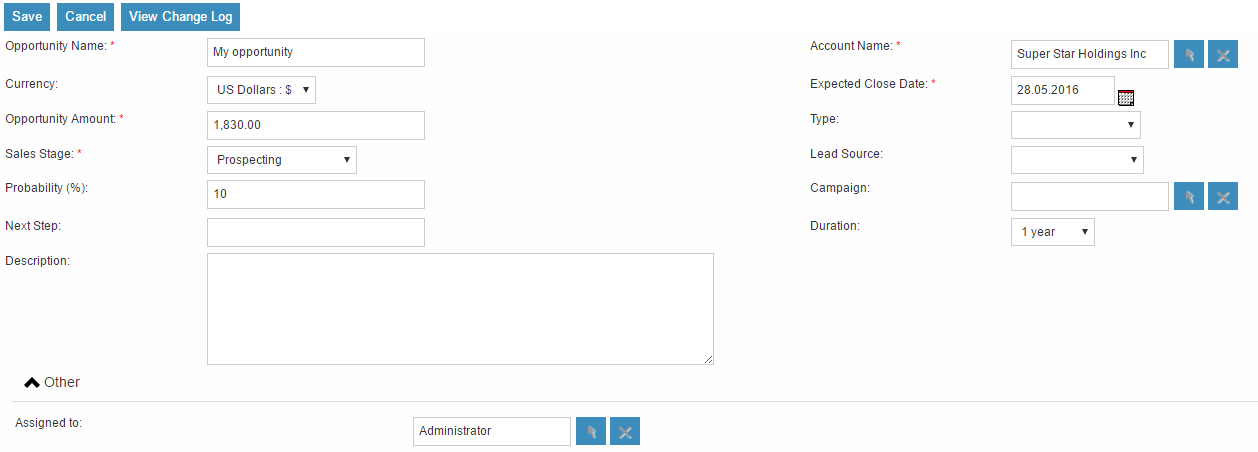
As you can see, we did not even add the monthly field to the EditView, because we don’t want to force the user to make calculations. Save the Opportunity and check the results on the DetailView:

AOW Calculated Fields was contributed by diligent technology & business consulting GmbH
Removing Actions
You can remove Action Lines by clicking the 'X' on the top right-hand side of the Action.

Removing Fields and Relationship Lines
You can remove Field and Relationship Lines by clicking the '-' on the left-hand side of the Action.

Events
Event Locations
The Locations module is used to capture the venue/site information where events are held.
Creating Locations
1. Access locations module from second side nav bar and select 'Create Location'.

2. This will take you to the Edit View. Enter information into the appropriate fields, all required fields are marked with a red asterisk and must be completed prior to saving.


3. Once the necessary information is entered, click Save.
Events
The Events module is used to capture information an particular event and send out invites to delegates. To view the Events held within the system click the 'Events' tab on the navigation bar. This will take you to the Events List View.
Creating Events
1. You can access the Events module on the side navigation bar and select 'Create Event'.

2. This will take you to the Edit View. Enter information into the appropriate fields, all required fields are marked with a red asterisk and must be completed prior to saving.

The following fields are found on the Events module:
-
Name – The name of the event
-
Start Date – The date and time of when the event starts
-
End Date – The date and time of when the event ends
-
Duration – The duration of the event. This will automatically change the end date or be altered automatically if the end date is changed.
-
Location – This is a relationship to the Event Locations module.
-
Budget – The budget for the event.
-
Email Invite Template – The Email Template that will be sent to associated Delegates.
-
Accept Redirect URL – The web page invitees should be redirected to after you accept an invite using the link provided in the Email Template.
-
Decline Redirect URL – The web page invitees should be redirected to after you decline an invite using the link provided in the Email Template.
-
Description – More information about the Event.
-
Assigned-To – Who the assigned user is for this event. This defaults to you who creates the event.
-
Created By – Which user created the event.
3. Once the necessary information is entered, click Save
Adding Delegates

3. Click 'Select Delegates'. A list of options will appear.

4. Select the appropriate option depending on who should be added to the Event.
-
Target List – Select a Target List of individuals to be associated to the event. All Targets, Leads and Contacts on this '''Target List '''will be added to the Event.
-
Targets – Select Targets to be associated to this Event.
-
Contacts – Select Contacts to be associated to this Event.
-
Leads – Select Leads to be associated to this Event.
-
Events – Select an Event to associate that Event’s delegates to this Event.
5. Once an option has been chosen a new pop-up box will appear to search and select records from the module type that was chosen.
6. The Delegates sub-panel will populate with the records selected.
Sending Invites To Delegates
2. Choose action 'Send Invites'.

3. This will send the email template selected in the 'Email Invite Template' to all Delegates who have the status 'Not Invited'
4. Once selected the Delegate status will automatically update to 'Invited'.
5. Choosing 'Resend Invites' will send invites out to all Delegates associated to the Event who have yet to respond.
Managing Delegates Acceptance Manually
2. Select the Delegates that require your 'Accept Status' to be updated.
3. Choose action 'Manage Acceptances'

4. A list of options will appear. Select appropriate statuses:
5. This will update the Delegates 'Accept Status' accordingly.
Acceptance will my automatically updated if the Delegate chooses to accept using the link provided in the email template.
Updating Delegates Status Manually
2. Select the Delegates that require your attendance to be updated.
3. Choose action 'Manage Delegates'

4. A list of options will appear. Select the appropriate status; Invited, Not Invited, Attended or Not Attended.
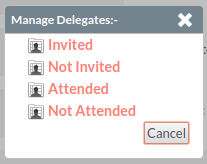
5. This will update the Delegates 'Status' accordingly.
Acceptance will be automatically updated if the Delegate chooses to accept using the link provided in the email template.
List view Actions, Detail View Actions and Bulk actions are similar to Leads module. Refer Leads module.
Reports
Advanced Open Reports (AOR) is the reporting module within KiyoCRM. AOR can be accessed by clicking the 'Reports' link within the navigation menu. The reporting module allows users to report on CRM data from any module and has many features to display key information quickly.
Creating Reports
You can access the reports module from the side nav bar and select 'Reports', then click on 'Create Report'.


You will be presented with the report Edit View. To obtain a list of fields to add to the report, you have to select a module from the Report Module drop down.

Adding Fields
Once you have selected a Report Module, the list of fields available will display on the left panel. You can add fields to the 'Fields' section of the report by expanding the module you wish to select fields from and then drag and drop those fields into the field section.

Once you have added fields to a Report, there are multiple options to configure for those fields:
-
Display – True or false option. Allows you to specify whether this field should be displayed on the report, or hidden. Users may wish to add fields to perform a function/sort/group/total but may not wish to show this on the Report.
-
Link – True or false option. Allows you to make the field a link. Setting this option to true will hyperlink the field on the Detail View of the report, allowing you to click on the record. This will navigate you to the appropriate record. For example, linking the Opportunity Name will take you to the Detail View of that Opportunity.
-
Label – This is the label that will be displayed for the Column/Field on the Report. You can change the label from the default to any alphanumerical value.
-
Function - Provides five options: Count, Minimum, Maximum, Sum and Average. Allows you to perform functions on alphanumerical fields. Users may wish to calculate the average Opportunity Amount, or Count total Opportunities at a given Sales Stage.
-
Sort – Ascending or Descending. Allows you to select whether to sort the field/column descending or ascending. This can be done for all fields.
-
Group – True or false option. Allows you to group by this field. For example, you may wish to group by Sales Stage when reporting on an Opportunity.
-
Total – Provides three options: Count, Sum and Average. This allows users to perform total calculations on numerical fields. This is useful for financial reporting such as the total value of all Opportunities at a given Sales Stage.
Adding Conditions
Once you have added the fields to your Report, you can add condition lines to the Report. You can add conditions with the same procedure as adding fields. Using the drag and drop functionality, you can drag fields into the 'Conditions' area which will add the field and allow you to specify the condition for that field.
Charts
You can add charts to Reports. Charts provide a visual representation of the Report data to you. In some scenarios, or for particular users, visual aids such as charts can assist quicker analysis and better understanding.
Chart Types
There are six types of charts that the user can select to display Report data. These are:
-
Pie Chart
-
Bar Chart
-
Line Chart
-
Radar Chart
-
Stacked Bar
-
Grouped Bar
To add a chart, you can click the 'Add Chart' button, below the Conditions section within the Report Edit View.

Once you click add chart, you will be presented with the option to specify the following information:
-
Title – Allows the user to specify the title for the chart. This will show on the Detail View of the Report and also on the dashlet chart.
-
Type – This allows the user to select from one of the six chart types detailed above.
-
X Axis – Allows the user to select the column that should be used for the X Axis.
-
Y Axis – Allows the user to select the column that should be used for the Y Axis.

Once you have specified the chart details, save the Report. This will display the chart on the Detail View of the Report, below the list of records returned.
Reports Dashlets
You can display a Report within a dashlet. It is possible to view multiple Report results as you can add multiple Report dashlets and select different Reports within each dashlet. To do this, add the Reports dash let to your homepage.


Once you have added the dashlet, you need to select the Report you wish to display within the dashlet. To do this, click the pencil icon to edit the dashlet.

This allows the user to select the Report they wish to display within the dashlet.

Once you have selected the Report, click Save. This will update your Reports dashlet to show the results of the Report.
For full details on adding and managing dashlets, see the Dashboard section of this user guide.
Reports Charts Dashlets
You can specify to only select to display a chart for Report dashlets. To do this, edit your Report dashlet and select the 'Only use charts' option. This will then list all charts you have created for this Report.

Select a chart or multiple charts and click Save. This will display the results in the chart selected.

Scheduled Reports
You can schedule reports to be automatically run and emailed to the required Contact(s). This allows users to schedule reports to be sent to Managers or Team Leads either Daily, Weekly or Monthly. To create a Scheduled Report, you can click the 'Create' option within the Scheduled Reports Sub-panel on the Detail View of the Report. You can also select existing Scheduled Reports to relate to the Report.

Once you have clicked 'Create', there are options to set for the Scheduled Report. Give the Scheduled Report a relevant name. In this example, we will use 'Daily Opportunities Report for Managers'.

You can select the 'Advanced' option for report scheduling. This will provide a cron notation style option. This is best suited for System Administrators or advanced users.

Once you have entered a name and selected a schedule, click Save.

Once you save the Scheduled Report record, this will display in the Scheduled Reports subpanel within the Detail View of the Report.

You can view when the Scheduled Report last ran by viewing the 'Last Run' column/field on the sub-panel. This shows in a date/time format.
Reschedule
Rescheduling a Call
To reschedule a Call, you can click the 'Reschedule' button on the Detail View of a Call which has been defined as Outbound and Planned.

Defining the Details
Clicking the Reschedule button will produce a pop up or dialogue box up. This enables users to set the date and time for the rescheduled Call.

You can also select a reason for the incomplete/unsuccessful Call from the drop-down list. Once the details have been defined, click the 'Save' button to save the Call.

Tracking History
Once Saved, the Call is rescheduled for the new date and time. you can view all Call Reschedule history by clicking the 'Reschedule' tab on the Calls Detail View.

Altering Reasons Dropdown
System Administrator users can edit the reasons available in the Reschedule pop-up using the drop-down editor. The drop-down list used is called 'call_reschedule_dom'.
Summary
In this chapter we have covered the functionality of the advanced modules. These modules have a very specific purpose - enabling users to improve processes and efficiently report on and manage data.
In the next chapter, we will cover some third-party modules which are part of the KiyoCRM product. These third-party modules provide additional functionality to you such as teams and location mapping.
Administration
Emails
Mail Accounts Overview
Configuring email for KiyoCRM provides a wide range of features, including sending personal emails to contacts, automatic creation of cases, sending notifications for events using Workflows and sending email marketing Campaigns.
This document explains the different types of mail accounts and how to set them up. For information on reading and sending email in KiyoCRM using the Emails module, see the Email Module guide.
Several different types of account can be configured within KiyoCRM for different purposes. These are:
Outgoing Mail
The outgoing mail server is used to send automatic email notifications (such as record assignment notifications) and emails sent as workflows actions.
The outgoing mail configuration will need to be set up by an Administrator.
See Outgoing Mail Configuration for instructions on setting up the default outgoing mail configuration.
Other outbound accounts can be configured in addition to the default account for specific purposes, such as sending Campaigns. These can be set up from the admin panel, under outbound accounts. If no other outbound accounts are configured, the default outgoing mail server account will be used.
Personal Accounts
A personal account is used to view and send email from a personal email account within the Emails module. This account can be an internal or an external email account. Emails from personal accounts are not stored in KiyoCRM unless manually imported.
Personal accounts can be configured by the user from their user profile. Administrators can configure personal accounts for other users.
See Managing User Accounts for instructions on setting up a personal account.
Group Accounts
Group accounts are used when you need several users to be able to view and send email from one mail account, for example a support or sales mailbox. Group accounts can be set up to automatically import emails and create Cases from incoming email.
Group accounts must be set up by an Administrator. Access to a group account must be granted by an Administrator.
Set up a group account from the Inbound Email page.
Bounce Handling Accounts
A Bounce Handling account is used with Campaigns to handle bounced mail notifications when emails are undelivered. You will need to set up a Bounce Handling account in order to send a Campaign.
Bounce Handling accounts must be set up by an Administrator. Once set up, users can select the bounce handling account when setting up a campaign.
Set up a Bounce Handling account from the Inbound Email page.
Email Settings
Outgoing Mail Configuration
The outgoing mail configuration settings are used to send system notification emails such as password reset emails, record assignment notifications and workflow email notifications.


Select the mail provider by clicking the appropriate button and then enter the required configuration information for your system. Verify that any default port/protocol settings are valid for your setup.
|
Allow users to use this account for outgoing mail |
When this option selected, all users will be able to send emails using this outgoing mail account, which is the same as that used to send system notifications and alerts. If the option is not selected, users can still use the outgoing mail server after providing their own account information. |
|
Users may send as themselves |
When this option selected, all users will be able to send emails using the same outgoing mail account used to send system notifications and alerts. If the option is not selected, users can still use the outgoing mail server after providing their own account information. |
Click Send Test Email to check your settings. You will be asked to enter an email address for the test message to be sent to.

A verification message will be displayed if the email was sent successfully. Check that you have received this test message.
Once the settings have been verified, click Save to that these settings are retained before leaving the settings page.
Troubleshooting
If the test message was not sent successfully, check the log file for any further error messages which may assist with resolving the issue.
Verify that all port/protocol settings are correct and that the username/password entered is correct and has the correct permissions to send mail.
Email Options

|
Assignment Notifications |
When selected, users will be emailed when a record is assigned to them. |
|
Send notification from the email address of the assigning user |
When enabled, the assigning user’s name and email address will be included in the From field of the email. This feature might not work with SMTP servers that do not allow sending from a different email account than the server account. |
OptInSettings
KiyoCRM 7.10 introduces a new Confirmed opt In feature which provides two opt in settings for email addresses: Opt In and Confirmed opt In.
See the Confirmed Opt in documentation for further information on these settings.
Email Security Settings

|
Email Security Settings |
Tags selected here will be stripped from inbound email and will not be displayed in the Emails module. |
Click Save retain your settings.
Inbound Email
Set up group mail accounts for monitoring inbound email and bounce handling accounts for campaigns by visiting your profile. You can also manage personal inbound mail account information for users from this panel.

Personal Email Account
A personal email account is an internal or external email account used to view and send personal emails from the Emails Module.
Group Email Account
A group email account allows more than one user to access a particular mail account. This can be useful for sales or support email accounts for example. In addition, group accounts are also used for sending email campaigns. See the Campaigns documentation for more information.
KiyoCRM can also be configured to automatically import emails and to automatically create cases from email.
Inbound Email Settings
The mail protocol supported by KiyoCRM is IMAP.
Basic Auth

When setting up with Basic Auth all you will need is the username(email) and password of the account you are adding as well as the mail server address.
Monitored Folders are the folders which are checked for new (unread) mail. Inbox and Trash folder names must be specified here. Click Select to connect to the mail server and select the relevant folder(s) from the popup dialog.
OAuth Configuration

When setting up with OAuth, you will need the username(email), password and mail server address for the account.
The other required field is External OAuth Connection, you can see how to configure this How to Configure Inbound Email with OAuth.
Email Handling Options

Import Emails Automatically
Check this box to import emails automatically, which means that records will be created in KiyoCRM for all incoming emails. These associated emails can then be viewed via the History subpanel of the relevant record. This setting is selected by default in KiyoCRM.
Create Case from Email
Check this box to set up KiyoCRM to create a Case record from an incoming email.

Select a Distribution Method to specify how cases created from incoming email are assigned to users.
|
System default |
This will use the default settings, configurable via the admin panel. |
|
Single User |
Enter a username or click the select arrow to search for a user. Every automatically created case will be assigned to the specified user. |
|
Round Robin |
Select All Users or an existing security group or role. Cases will be assigned to the next member of the specified group or role. |
|
Least Busy |
Select All Users or an existing security group or role. Cases will be assigned to the member of the specified group or role with the least case assignments. |
|
Random |
Select All Users or an existing security group or role. Cases will be assigned randomly to members of the specified group or role. |
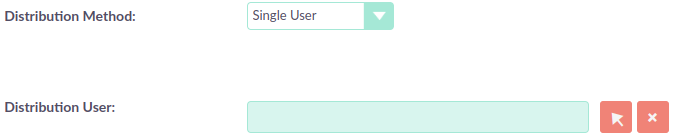
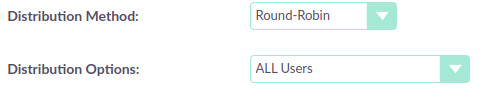
Auto-Reply configuration
If KiyoCRM has been configured to auto-create cases, you can select or create an email template to use as an automated response to notify the sender that a case has been created. If no template is specified here, this automated response will not be sent.
|
No Auto_Reply to this Domain |
No auto-responses will be sent to the specified domain. Use this for example to exclude your company domain, so your users do not receive auto-reply messages. |
|
Number of Auto-responses |
This setting specifies the maximum number of replies to send to a particular email address in a 24hr period. |
Outbound Configuration

|
From Address: |
Used as the from address where supported, otherwise the system outbound account will be used. |
|
Allow users to send emails using the From name and Address as the reply to address: |
When checked, the From Name and From Address for this account will appear as a From option when composing an email for all users that have access to this group account. |
Once configured, all inbound accounts are listed under Inbound Accounts on the Admin panel, from where they can be edited or removed.
Bounce Handling Account
A Bounce Handling Account is used to manage bounce notifications for an email campaign. Bounced email addresses are recorded in the campaign status.
Once created, the bounce handling account can be selected by users when setting up a campaign.
Select New Bounce Handling Account from the Sidebar.

Enter the configuration details for the bounce account you are configuring. You will need the username and password for the account, plus the mail server address. Your system administrator will be able to supply these settings.
The mail protocol supported by KiyoCRM is IMAP.

Monitored Folders are the folders which are checked for new (unread) mail. Inbox and Trash folder names must be specified here.
Click Select to connect to the mail server and select the relevant folder(s) from the popup dialog.
Outbound Email
Set up system outbound mail accounts for monitoring outbound email. You can also manage personal outbound mail account information for users from this panel.
System Email Account
System email allows users inside your business to send emails to recipients outside of the associated domains for your business. This can be useful because it means users can email customers and give them support.
When you install KiyoCRM, an account for system outbound email will be automatically created but you can create your own account with different configurations.
Select New System Outbound Email Account from the sidebar

You will need the username for the account you are adding, plus the mail server address, the port number of the account. You can also check if you want to use SMTP authentication. If you do, you will need the password of the account you are adding. The mail protocols supported by KiyoCRM is SMTP and SSL.

Once this account has been created, click Send Test Email and a popup will appear to enter the address of the email address that a test notification will be sent to.

Personal Outbound Email Account
Personal accounts will allow users to send emails to clients outside of associated domains of your business. When you install KiyoCRM, it is recommended an outbound account is made and this can be configured with different configurations
You will need the username for the account you are adding, plus the mail server address, the port number of the account. You can also check if you want to use SMTP authentication. If you do, you will need the password of the account you are adding. The mail protocols supported by KiyoCRM is SMTP and SSL.
Once this account has been created, click and a popup will appear to enter the address of the email address that a test notification will be sent to.

Campaign Email Settings
Configure the following additional settings for Campaigns here:
-
The batch size for sending campaign emails
-
Where campaign tracking files are located
-
Whether or not copies of campaign messages are kept

Email Queue
Scheduled campaign emails are queued here until the scheduled job runs to send them out. By default, this is the Run Nightly Mass Email Campaigns scheduled job.
See the Scheduler section for further information on scheduled jobs.
Click Send Queued Emails to send them immediately without waiting for the scheduler to do so.
1. How to configure a Microsoft OAuth Provider
1. Intro
This guide will explain how to configure a client on Microsoft Azure and then use the information from Microsoft Azure to configure an OAuth Provider in KiyoCRM.
2. Register KiyoCRM App in Microsoft Store
The following steps assume that you are configuring a provider for a company account that will be shared among many users.
2.1 Go to App Registrations
Go to https://portal.azure.com/ and login
On the home page you should see a screen like the following
Check if there is a link to App Registrations on the home page, should look something like the following
Otherwise, go to More services and then search for the App Registrations link

The Azure App Registrations page looks like the following
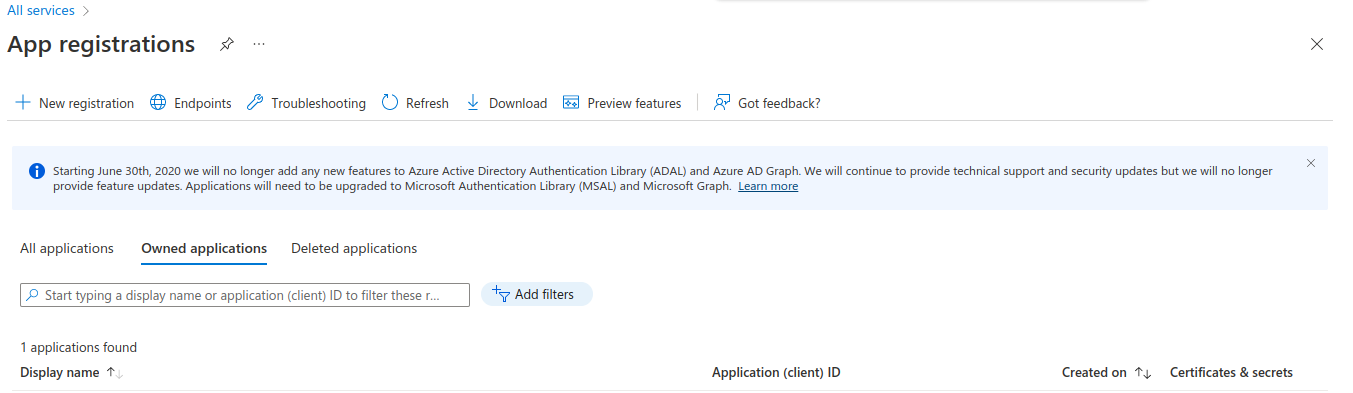
2.2 Create a New App Registration
On the App Registrations page click on the "New Registration" link
You should then see the App registration creation page
On the registration page complete the following:
-
Add a name for the registration like "KiyoCRM"
-
Select one of the "Supported account types" depending on your needs
-
Note In this example we are going to use "Single tenant", that does not mean it is the one to be used for every scenario.
-
You should select the option that is appropriate for your use case
-
-
Set a "Redirect URI". This should be similar to:
https://<your-kiyocrm-instance-host>/index.php?entryPoint=setExternalOAuthToken-
Note Azure only allows https connections to host that aren’t the localhost. (the azure interface will alert you to it)
-
A host like
http://my-kiyocrm.com/index.php?entryPoint=setExternalOAuthTokenis not valid -
A host like
https://my-kiyocrm.com/index.php?entryPoint=setExternalOAuthTokenis valid -
A host like
http://localhost/index.php?entryPoint=setExternalOAuthTokenis valid
-
-

After filling in the information proceed with the registration
After the registration you should be re-directed to the "detail view" of the registration.
There you will find Application (client) ID that is the Client Id that will need to be configured later on KiyoCRM.

2.3. Create a client secret
The next step to take is to generate a "client secret" that will be used by KiyoCRM to communicate with Microsoft.
On your App Registration main page click "Add a certificate or secret".

This should take you to the "Certificates & secrets" page
Here you can generate a new secret by clicking "New Client Secret"
A sidebar should open where you can place the name of the secret you want to give to you secret and its duration. After setting the name and the duration click "Add".

This should generate a new line on the "Certificates & secrets" page table

You should copy the "Value" by (clicking the icon next to it) for your new secret and store it in some safe place. You won’t be able to access this value again from the Microsoft Azure interface. The secret will be required on the KiyoCRM documentation.
We recommend noting the expiry date for your Client Secret and replacing the secret on a regular basis. Once the secret expires, your email connections will fail with an error message in the logs similar to OAuthAuthorizationService::hasConnectionTokenExpired | Access token has expired If you see this error, generate a new secret in Azure and update it within KiyoCRM to ensure continued access.
Now go back to your App Registration main page, by clicking "Overview" on the sidebar.
2.4. Define the authorized scopes
Our next step is to configure the scopes that KiyoCRM will be able to access.
Back on your App Registration main page
Click on "View API" permissions
This should take you to the "Api Permissions" page
Now lets add the scopes that we allow. Click "Add a permission"
This should open a sidebar
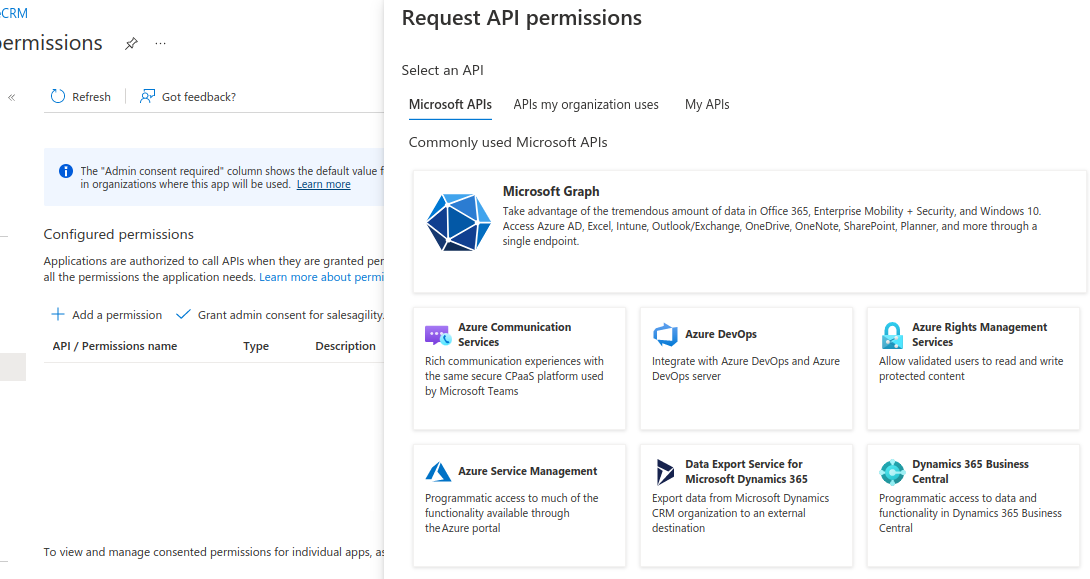
The permissions we want are under the Microsoft Graph. So click on "Microsoft Graph".
After clicking you should be prompted with which kind of permission you want to use.
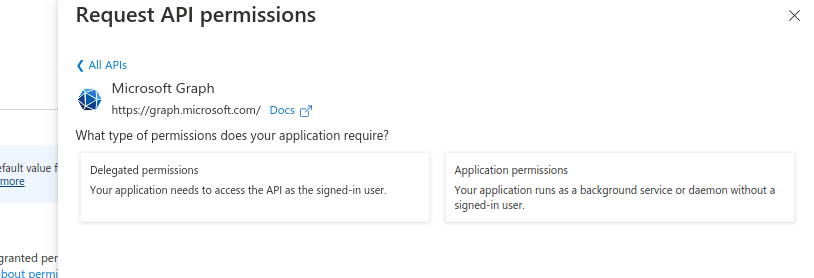
Go ahead and click "Delegate permissions"
You should now see a new "Select permissions" section.
In the search bar type offline_access, that should show the offline_access permission. Select it add then click "Add permissions"
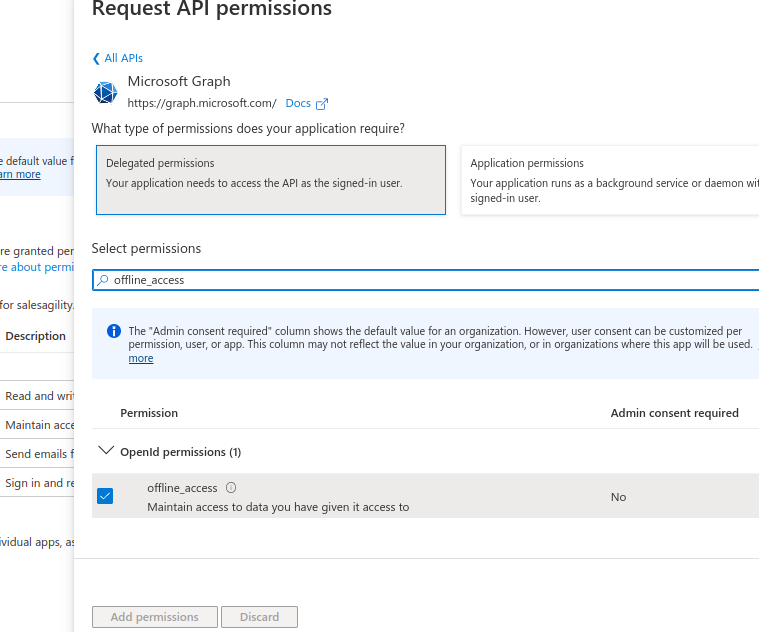
Repeat the process for the following permissions: . IMAP.AccessAsUser.All . User.Read
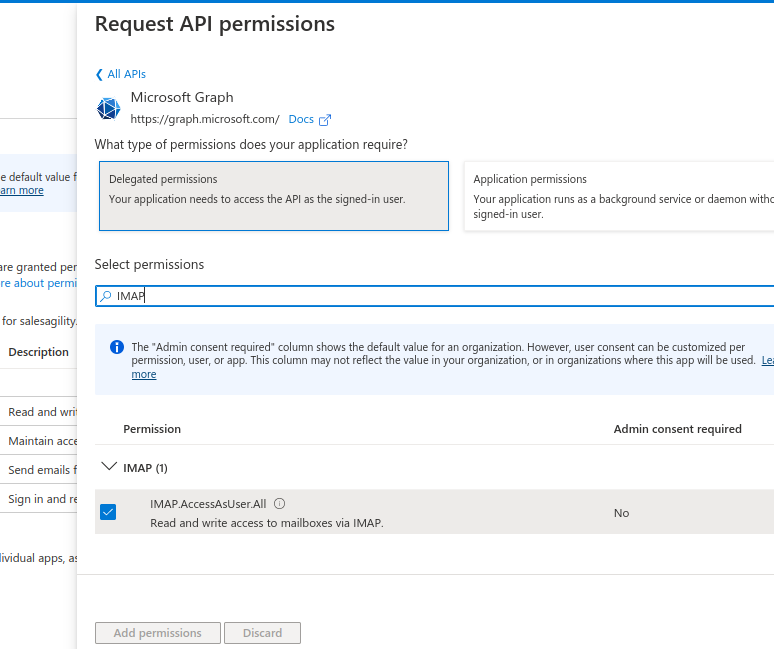
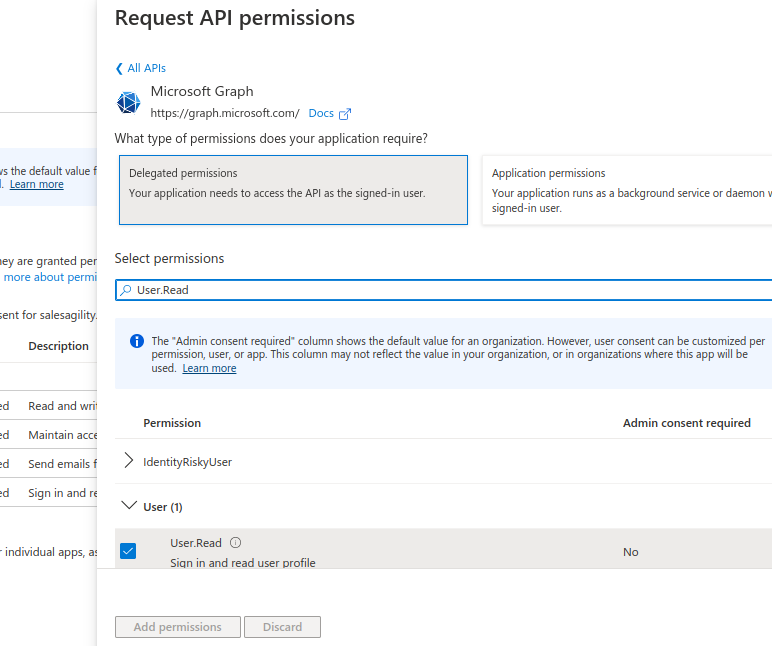
After you add all the above permissions, your permissions table should look something like the following:
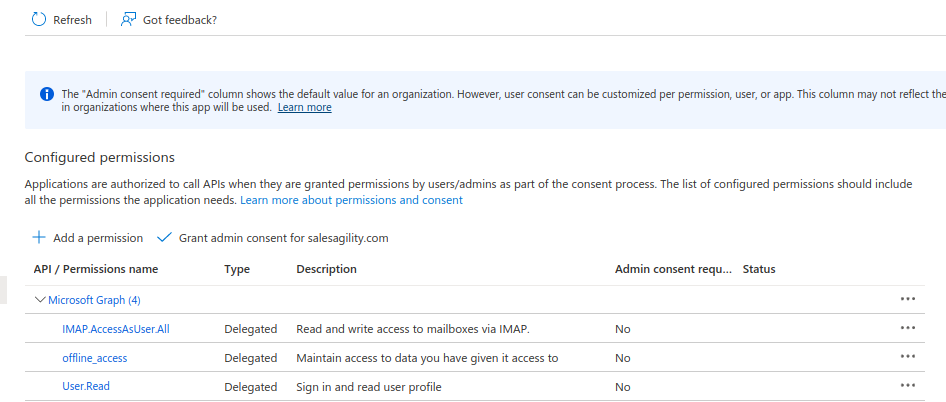
Now go back to your App Registration main page, by clicking "Overview" on the sidebar.
2.5. Define the Return URI
Our next step is to set the configurations on the "Authentication" like the Return URI and others.
Back on your App Registration main page
Click the "Redirect URIs" link

This should have taken you to the "Authentication" page.
Here you should see the Return URI that you previously configured
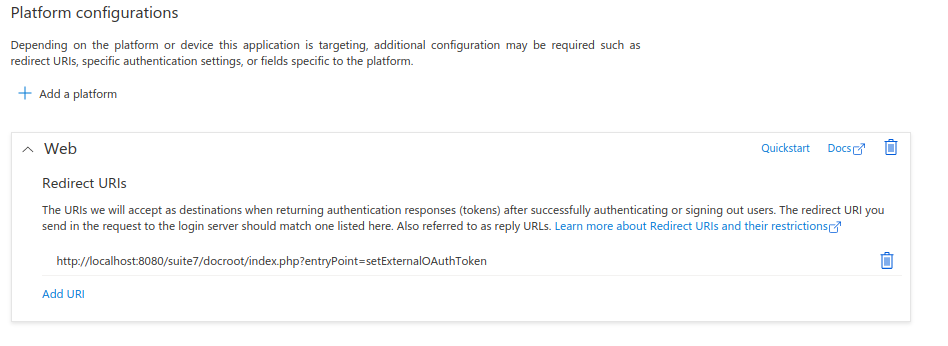
After that enable the "Access tokens (used for implicit flows)" option on the Implicit grant and hybrid flows section
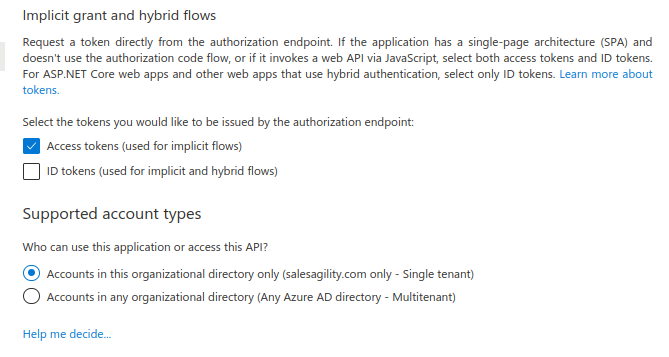
Now go back to your App Registration main page, by clicking "Overview" on the sidebar.
2.6. Retrieve the endpoint information
The last step you need to take is to retrieve the following endpoints:
-
OAuth 2.0 authorization endpoint
-
OAuth 2.0 authorization endpoint (v2)
Back on your App Registration main page
Click in the "Endpoints" link.

This should open a sidebar like the following
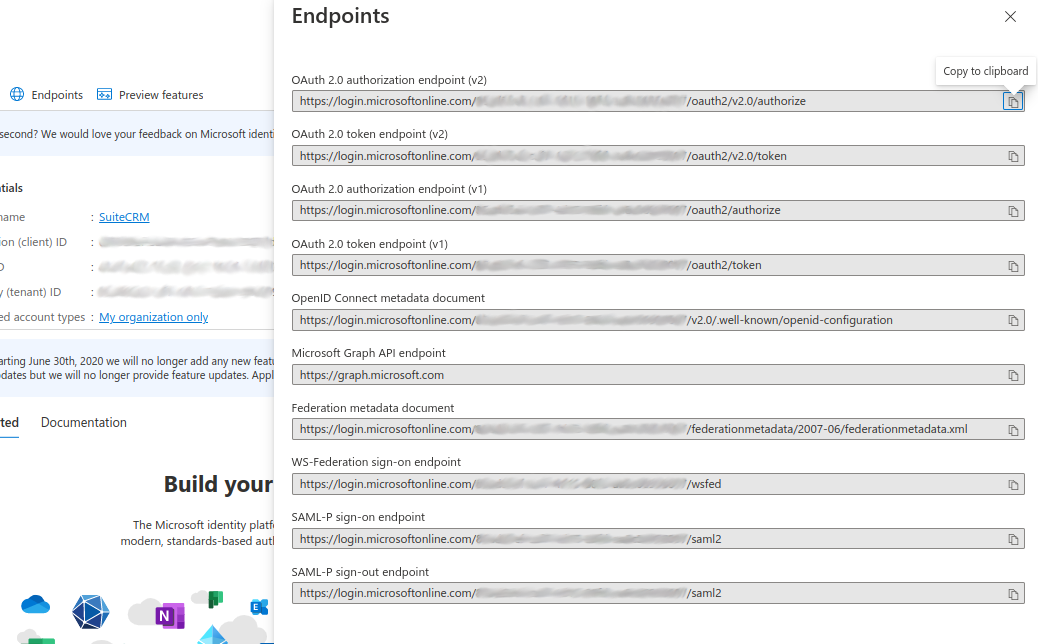
From the sidebar copy and take note of the following endpoints, that will be required to configure KiyoCRM

3. Configure the Microsoft Provider in KiyoCRM
In the following steps we are going to configure a provider that can be used by multiple users within KiyoCRM. This scenario only makes sense when you have registered an app in azure for accounts that share the same domain, usually accounts that are not @outlook accounts or similar.
Since we are going to configure a Group OAuth provider, the following steps are needed to be done by an admin user
Login into KiyoCRM as an admin user and go to the admin panel

On the admin panel search for "External OAuth Providers"

Click on the "External OAuth Providers", that should take you to the module list view
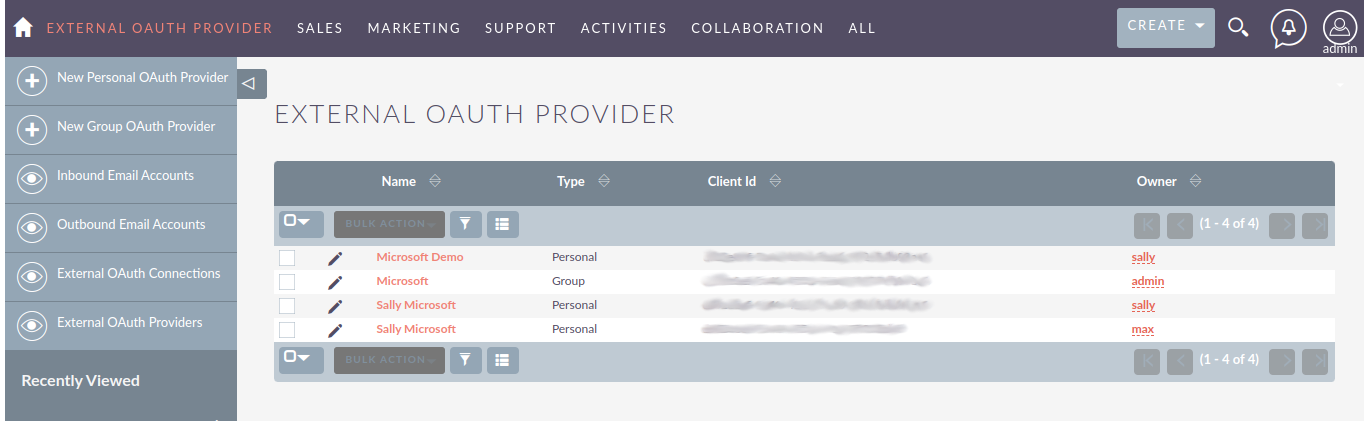
As an admin you can create two types of records:
-
Personal
-
These are only accessible by the user that created them
-
Personal records are meant to be used when configuring access to personal accounts in exiting providers, without a custom domain. I.e. when for instance configuring access to your
@gmailor@outlookaccounts. These can have a shared group configuration as for each used the "Client Id", "Client Secret" and other fields are going to be unique per account.
-
-
Group
-
Records that will be used by many users
-
Group records are meant to be use by everyone that have accounts that share the same domain, lie
@example-inc.onmicrosoft.com. The "Client ID", "Client Secret" and the other fields are going to be the same for all accounts that use this domain.
-
As mentioned before in this guide we are going to configure a provider that will be used by multiple users, so we are going to create a group record.
Click on the "New Group OAuth Provider" which should take you to the create view.
Add a meaningful name to your provider, it can be just "Microsoft", the name of your domain, or something that helps you identify and differentiate the provider from other possible providers.
Then select the "Microsoft" on "Connector" field
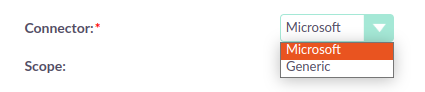
The Microsoft connector type works in the same way as the "Generic" connector type. The difference is that it has several built in defaults. This spares you some configuration steps and makes the process of configuring an External OAuth provider easier.
Add the "Scopes" that you want to access, the same ones you’ve configured on Azure’s API Permissions page.
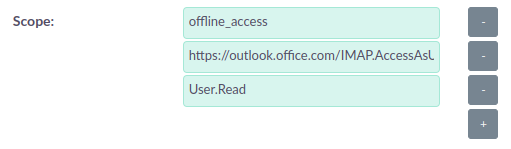
Set the "Client Id" that was generated in Azure

Set the "Client Secret" that was generated in Azure

Set the "Authorize URL" that you’ve copied from the Azure endpoints ( OAuth 2.0 authorization endpoint (v2) )


Set the "Access Token URL" that you’ve copied from the Azure endpoints ( OAuth 2.0 token endpoint (v2) )


Your record should now look something like the following:
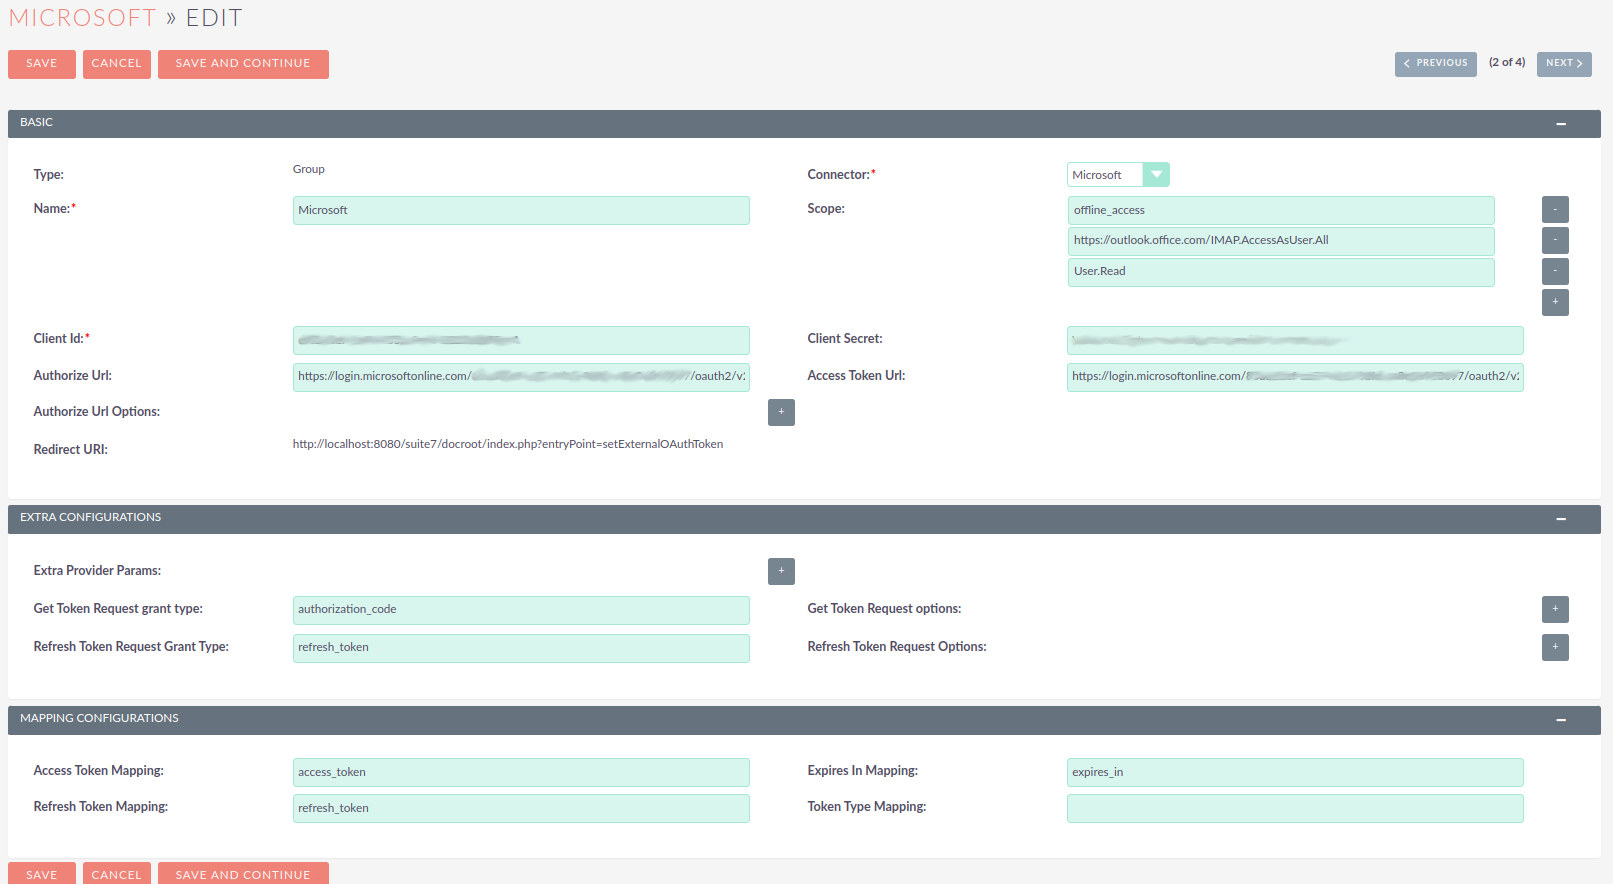
Since many of the other fields have defaults and the Microsoft connector adds other defaults, these are all the field that you should need to configure.
You can now save the record
4. Configure User Inbound emails
Now users should be able to use the OAuth Provider you have created for authenticating with Microsoft.
Check the How to configure Inbound Email with OAuth guide for the steps users need to take to configure their inbound emails using an OAuth connection.
2. Compose Email 'From' Dropdown Behavior Compose Email 'From' Dropdown Behavior
1. Intro
On KiyoCRM 7.13.1 and 8.2.3 versions, the “From” dropdown list, depicted on the following image, has been updated.

As well as the new styling, the field behaves differently.
By default, it now shows the list of all Outbound Email Accounts the user has access to, which includes the personal accounts and group accounts.
In addition to the above it will also show the System Email if the Users may send as this account’s identity option is enabled in the Administration > Email Settings page.
2. Legacy Email behavior config option
2.1 Option description
A new legacy_email_behaviour config option has been added, which allows you to keep some of the legacy Compose “From” behavior.
It will get the list of 'from email addresses' that was generated in previous versions of KiyoCRM and add it to the new list that is generated based on the Outbound Email Accounts.
As you might know, the previous behaviour was to generate the list from addresses based on the Inbound Email Accounts.
2.2 Note on Upgraded Versions
Newly installed instances will have the legacy_email_behaviour option disabled by default.
Instances that have been upgraded from a previous KiyoCRM version will have the newly added legacy_email_behaviour config.php option enabled in order to keep legacy behaviour.
3. Email Signatures
The Outbound Email Account configuration has been updated to allow configuring an email signature per outbound email account, as depicted in the image below. This signature can be defined both for Personal and Group Outbound Email Accounts.
The group signatures will be accessible by any user that has access to the Outbound Email Account record.
Please note that signatures do not support embedded images, only images that are available in a public url.

3. How to configure Inbound Email with OAuth
1. Intro
This guide will explain how to configure an inbound email connection using a previously configured OAuth Provider.
As example we will use a Microsoft account, however the steps should be similar for other providers
In this guide we will be configuring a personal account using a group OAuth Provider. Group OAuth providers are meant to be used by many users in the system.
As an admin you can create three types of records:
-
Personal
-
These are only accessible by the user that created them
-
Personal records are meant to be used when configuring access to personal accounts, like 'john.doe@example-inc.onmicrosoft.com'.
-
These accounts configuration is only accessible by the account owner and system administrators
-
-
Group
-
Records that will be used by many users
-
Group records are meant to be use by accounts in a domain that are meant to be used by several users, e.g. all members of the support team would have access to
support@example-inc.onmicrosoft.com.
-
-
Bounce
-
Records meant to be used just for reading Campaigns bounce emails
-
If you haven’t yet configured the OAuth Provider or don’t know how to, please have a look at How to configure a Microsoft OAuth Provider Guide
2. Create an OAuth connection
Login into you KiyoCRM instance
Go to Admin page and Select "External OAuth Connectors" under email.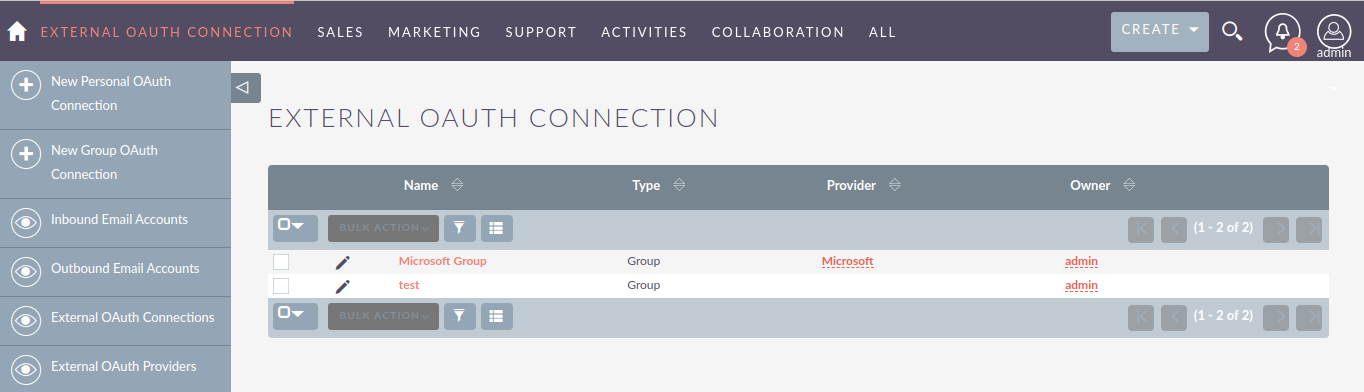
This module is the one that will keep the reference of all the existing OAuth Connections. It stores the tokens generated after the authentication.
Let's create a new Personal OAuth Connection. click on "Personal OAuth Connection"
This should take you to the creation view.
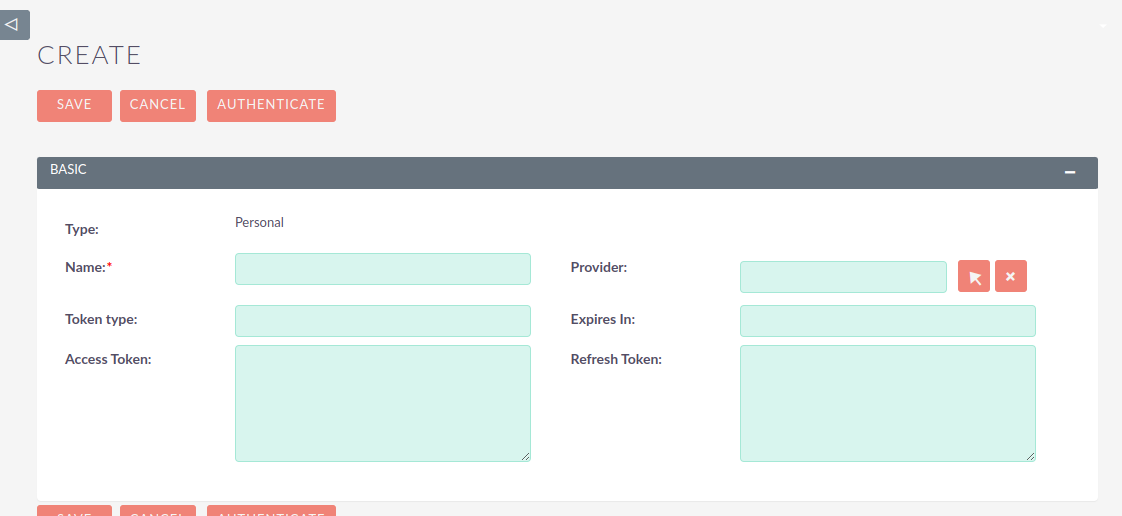
Add a meaningful name to your connection, it can be the username of your account, or something that helps you identify and differentiate the connection from other existing connections.

Now select on the "Provider" field, select the Microsoft OAuth Provider that you previously created.

After selecting the provider, it is time to authenticate, click on the "Authenticate" button.
When clicking the button, a popup window should display with the Microsoft page for Authentication.
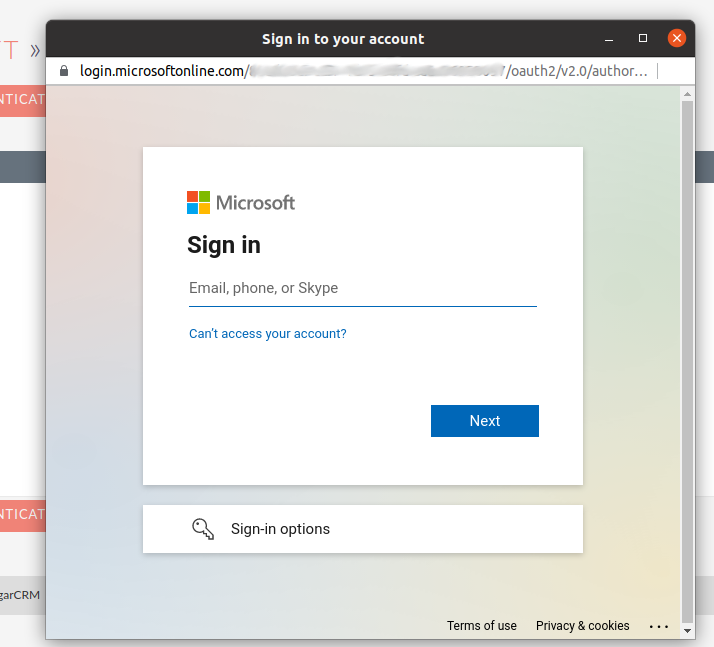
After going through all the authentication popup steps, the popup should close and the fields on the External OAuth Connection record should be populated.
Do not store or share any of the tokens. These work almost as passwords. They are sensitive information.
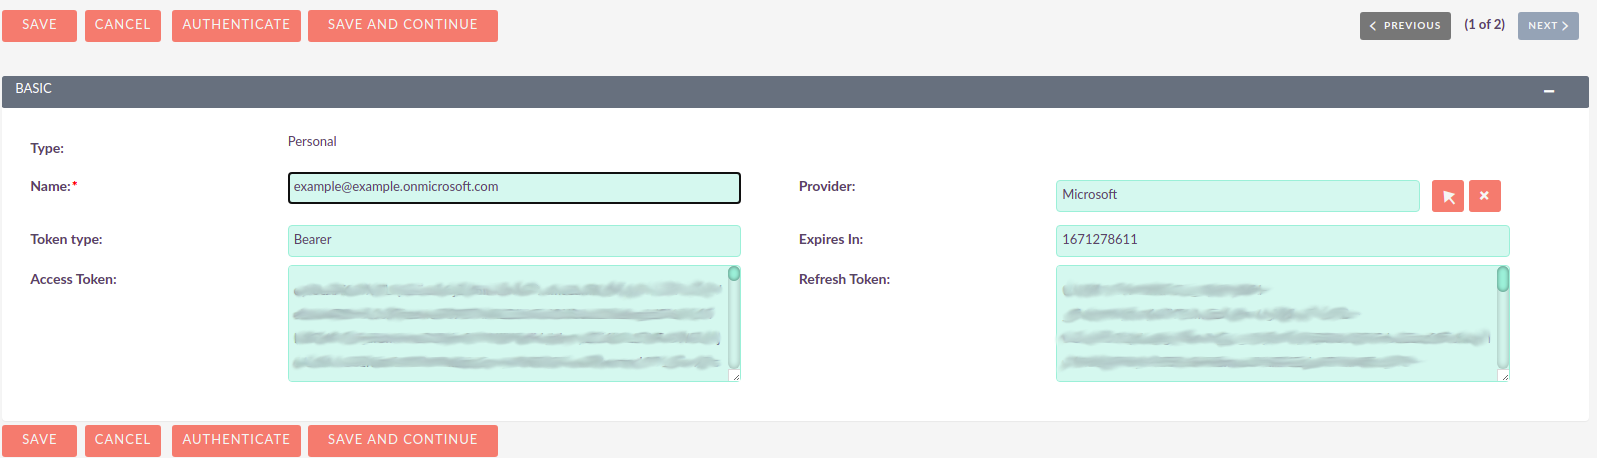
Go ahead and save your record.

3. Configure an Inbound Email Account
Now it is time to create an Inbound Email Account. Click on the "Inbound Email Accounts" in Admin page

This should take you to the Inbound Emails module list view.
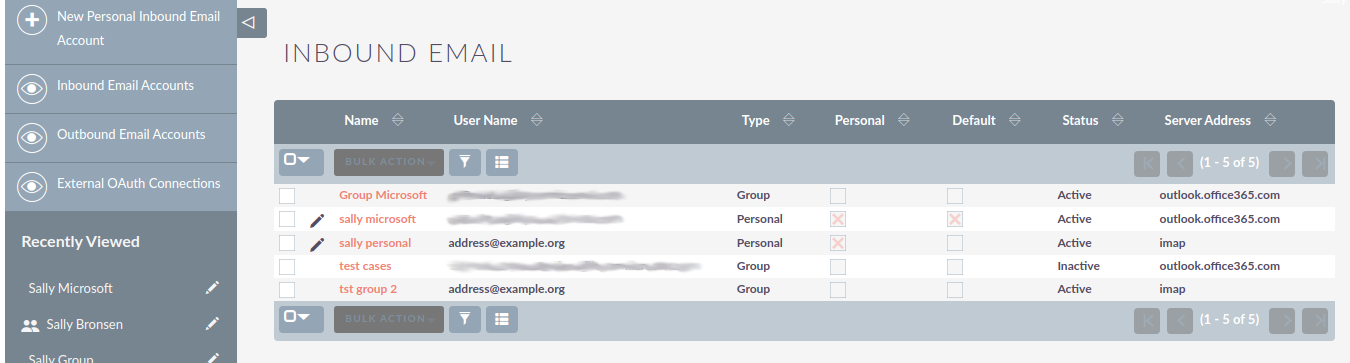
Lets create a new Personal Inbound Email Account. click on "New Personal Inbound Email Account"
This should take you to the create view


Add a meaningful name to your inbound, it can be the username of your account, or something that helps you identify and differentiate this inbound email account from other existing accounts.

Select the "OAuth" type on the Auth Type field.

By selecting the OAuth type, the "External OAuth Connection" field should now display. Click on the arrow to select the OAuth Connection you created before.
Group Inbound Emails should be linked to Group External OAuth Connection records. If they are linked Personal External OAuth Connection records errors may occur

Click on the arrow button should open a popup where you can select the OAuth Connection we’ve created before.
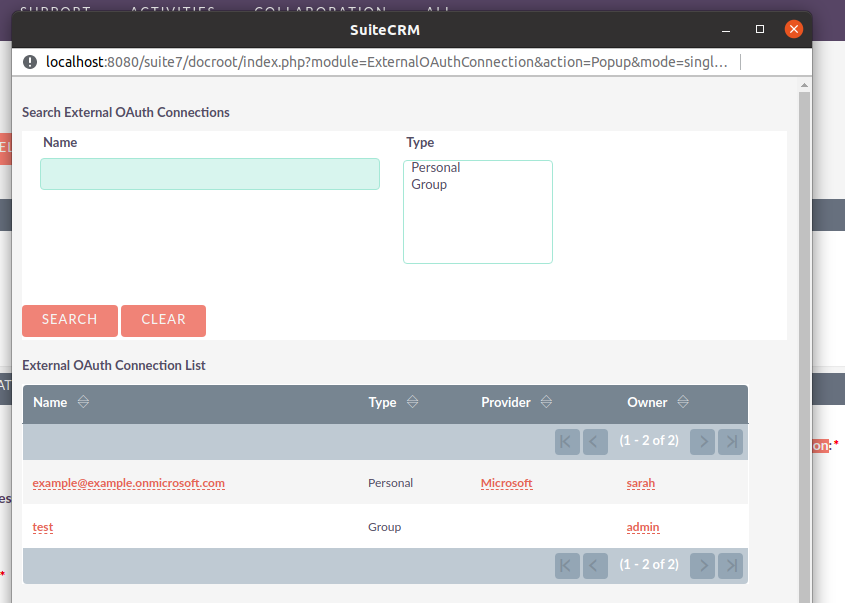
Enter the username for your account. It should be the same you’ve used to create the OAuth Connection.

Enter server address for your account. E.g. for Microsoft it would be outlook.office365.com.
Here we are using a Microsoft account as example. Though you should set the address of the server you are using

Depending on your server configurations enable the ssl and set the port. E.g. for Microsoft you should enable the "Use SSL" checkbox which is going to change the port to "993" which is the default.
Here we are using a Microsoft account as example. Though you should set the port of the server you are using

The Email Body Filtering Search Type allows the user to choose to search using 1 word or a multiword search.

Now set the values for the folders. Click the "Select" button next to each folder to open the popup that will show you the available values.
Do not try to fill these fields before setting the following fields: External OAuth Connection, Username, Mail Server Address, Mail Server Port, Use SSL. Otherwise, you will just see an empty dropdown on the popup.

For Microsoft: the following is an example of how the fields should look after being configured:

Next, set the value for the other fields. The following is an example of a fully configure account, except for the "Outbound Email Account" field which is not in the scope of this guide to explain how to configure

Go ahead and save your record.
4. Configure the Inbound Email to display on the Emails module
For the configured account to show on the email's module, you need must go to your profile and select it as one of the accounts to show.
On the navbar global menu click on "Profile"

This should take you to the profile page.

Scroll to the end of the page a click on the "Settings" button

This should open a modal with a "Folder Management" section at the end. On this section select the accounts that should display on your Emails module.
It is possible to select multiple accounts.

Click "Done"
Go ahead and save your profile.

That should be your Inbound Email account configured.
5. Access the Configured account on emails module
On the menu click on the "Emails" module link

On the menu click on the "Emails" module link.

Depending on the number of Inbound Emails you have configured, the inbound you have just configured may not be the one to display by default.
To change to the Inbound Email account you have just configured click on the current inbox button, located on the top right.
A modal should show with the Inbound Email accounts you have configured on the Folder Management within your profile

Within the modal, click on the Inbound Email Account you have just configured. That should reload the page and show the Inbound Email that you configured
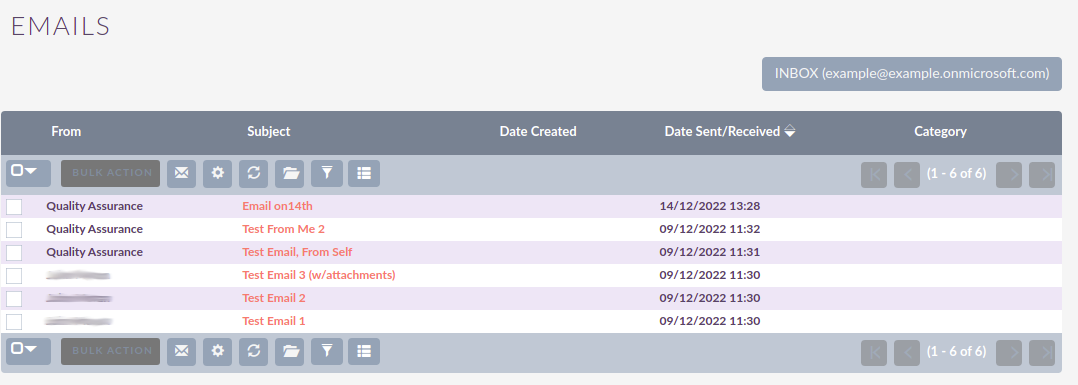
4. External OAuth Provider Overview
1. Intro
This guide tries to provide a more in-depth description of the configurations in the External OAuth Provider module
2. Types Of records
As an admin you can create two types of records:
-
Personal
-
These are only accessible by the user that created them
-
Personal records are meant to be used when configuring access to personal accounts in exiting providers, without a custom domain. I.e. when for intance configuring access to your
@gmailor@outlookaccounts. These can have a shared group configuration as for each used the "Client Id", "Client Secret" and other fields are going to be unique per account.
-
-
Group
-
Records that will be used by many users
-
Group records are meant to be use by everyone that have accounts that share the same domain, lie
@example-inc.onmicrosoft.com. The "Client ID", "Client Secret" and the other fields are going to be the same for all accounts that use this domain.
-
Please check the Configuring Security Groups for Inbound Email on more information in the differences between the two and how to use them properly.
3. OAuth2 Client lib
KiyoCRM is using the OAuth 2.0 Client from The PHP League. It uses the Generic Provider for all the providers.
4. Base Config_
On the base configuration, depicted below, you can find all the fields that are essential for the OAuth Provider to work. This may vary depending on the provider that you will be using, but most of these field are common for most providers.
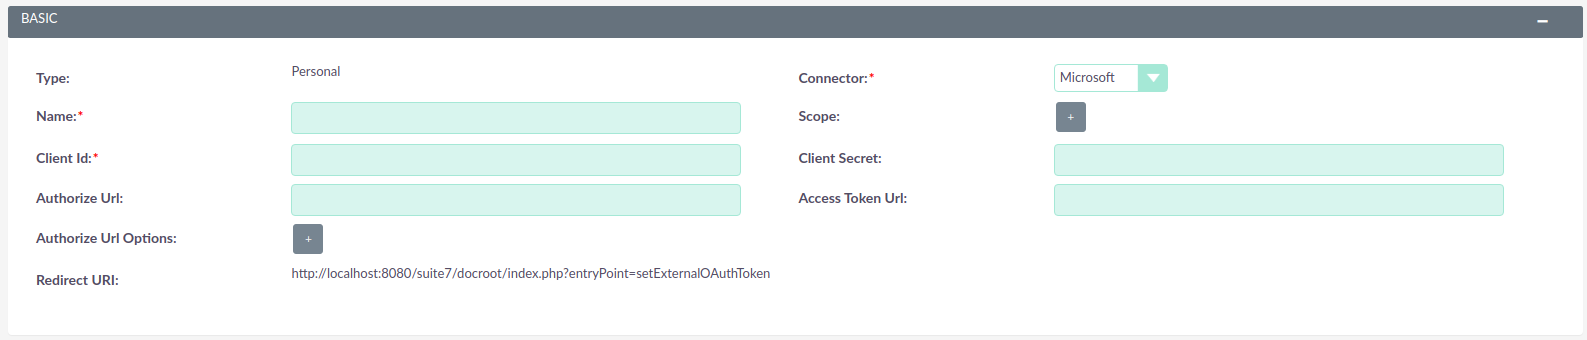
5. Extra Configurations
These are extra configurations that you may need to add depending on the provider. All the below are merged with any existing defaults.
-
Extra Provider Params: are parameters to inject to the provider when initializing. These may be used on all requests
-
Get Token Request grant type: the type of grant to use in the request to retrieve the token
-
Get Token Request options: Extra options that can be sent on the request to retrieve the token
-
Refresh Token Request Grant Type: the type of grant to use in the request to refresh the token
-
Refresh Token Request Options: Extra options that can be sent on the request to refresh the token

6. Mapping Configurations
These define how to map the fields received on the token, to the fields where they are store in KiyoCRM. All the except for token type have defaults.
In this configuration it is possible to retrieve values nested within an array. For that you can define the path to the field using the key names and using . to join them. E.g. Microsoft connector uses the following mapping to get the token type values.token_type

7. Connectors
Connectors are the part of the code that is responsible for managing the requests to the provider to do the authentication
The Microsoft connector type works in the same way as the "Generic" connector type. The difference is that it has several built in defaults. This spares you some configuration steps and makes the process of configuring an External OAuth provider easier.
8. Internal Configuration Format
In order to understand how/when the fields from the External OAuth Providers module are used, it may help to understand the internal structure.
The following code snippet is an example of the configurations without the shortcuts from the frontend.
[
    'type' => 'Generic',
    'client_id' => '...',
    'client_secret' => '....',
    'redirect_uri' => '....',
    'authorize_url_options' => [
        'scope' => '...',
    ],
    'extra_provider_params' => [
        'scopes' => '...',
        'urlAuthorize' => '...',
        'urlAccessToken' => '...',
    ],
    'get_token_request_grant' => 'authorization_code', // optional
    'get_token_request_options' => [], // optional
    'refresh_token_request_grant' => 'refresh_token', // optional
    'refresh_token_request_options' => [], // optional
    'token_mapping' => [ // optional
        'access_token' => '...',
        'expires_in' => '...',
        'refresh_token' => '...',
        'token_type' => ''
    ]
]
From the above example you can see that:
-
scopeis injected into both theauthorize_url_optionsand theextra_provider_params -
urlAuthorizeis injected intoextra_provider_params -
urlAccessTokenis injected intoextra_provider_params
5. Configuring Security Groups for Inbound Email
1. Intro
This guide will explain how to configure the visibility defaults that are applied to Inbound Email and related records, as well as the way you can configure Security Groups.
2. Personal Records Default Visibility
Inbound Emails, External OAuth Connection and External OAuth Provider allow to create personal records.
These types of records are only visible to the owner of the record and to admin users.
3. Group Records Default Visibility
3.1 Inbound Emails and External OAuth Connection
Like on personal records, administrator users are able to see all group records.
Non-admin users, by default, cannot see any group record. They will only be able to see the records if:
-
They have a Role with ACLs defined for the module, i.e. Inbound Emails or External OAuth Connection
-
They belong to the Security Group that the Group record is also assigned to.
This behavior differs from the default KiyoCRM behavior for Security Groups, in the sense that by default KiyoCRM records are visible to everyone, and the admin needs to add Security Groups to restrain record visibility. These two modules work the other way around, because their records are hidden by default.
3.2 External OAuth Provider
Unlike Inbound Emails and External OAuth Connection, External OAuth Provider group records are visible by default. To restrict visibility you need to define Security Groups and Roles.
External OAuth Provider is using an "open" visibility because the group provider configurations are meant to be used by all users that have an account for the same domain. E.g. when configuring a Microsoft Provider for @exampleinc.onmicrosoft.com any user that has an account on this domain can use the same provider.
In the Inbound Emails and External OAuth Connection the same does not happen. These are email account specific configurations, like for sales@exampleinc.onmicrosoft.com. Where we just want to give access to reading emails from this account to users that should have access to it.
4. Security Group Role Configuration
From a Role perspective, the Security Groups records are visible and changeable by default.
On Inbound Emails, External OAuth Connection record detail view, there is a subpanel for the Security Groups. Where a user can change the groups the record belongs to.
Since Inbound Emails, External OAuth Connection are hidden by default and they depend on the Security Group they belong to. It may be a good idea to restrain the visibility on Security Group so that the subpanel only shows for admin users.
Users
Overview
This guide documents the settings on the Users section of the Administration panel.
A user represents someone who can log in to your KiyoCRM system. In addition to the basic information (name, title, address, phone number etc) contained in the Employees module, a user has a username and password to enable them to log in to the system, and an email address. When a new User is created in KiyoCRM, a matching Employee record is created. Similarly, when a new Employee record is created, a new User record is also created. This new user record will need to be edited (if required) to add a username/password and email address before it can be used to log in to KiyoCRM.
The Users section of the Administration Panel holds settings for KiyoCRM user accounts and security access settings.
You must have Administrator access to add new user accounts and edit access settings. Regular users have access to their own user account details and can edit address details, set preferences, set up personal email and change their password.
Open the Administration panel by selecting Admin from the dropdown at the top right-hand of the KiyoCRM screen.

User Management
Select User Management to view, edit and add new user accounts.


Add New User
Select Create New User from the sidebar to add a new user account.

User Profile Tab

On the default User Profile tab, enter the new username, user’s first and last names and the account status (Active or Inactive).
Only Active accounts can be used to log in to KiyoCRM. In addition, Inactive account usernames are not included in dropdown username lists (e.g. assigned to or modified by lists) used for record searching.
Select the User Type from the drop down. A System Administrator User can access the Administration panel and all records in KiyoCRM. A regular user has access to modules and records based on the role(s) assigned to them. See Roles and Security Groups for further information.
An optional photograph can be attached to the user record. Browse for the required file using the Choose File button. The photo will be displayed on the detail view of the user record once the record has been saved.
Two Factor Authentication
Two Factor Authentication is available in KiyoCRM version 7.10 onwards
Two Factor Authentication can be enabled on a per-user basis. Once enabled, a user will be required to enter a code received via email each time they log on to KiyoCRM.
Check the Two Factor Authentication box to enable.

Click Save to retain the settings.
When the user logs on, after entering their username and password, they will be asked to enter the code which will have been sent to them via email.

Once they have entered the correct code and clicked Verify, they will be logged into KiyoCRM.
The template for the Two Factor Authentication code email which is sent to users can be set in Password Management
Employee Information
Optional further information about the user can be added in the Employee Information panel. Changes made here will be reflected in the corresponding Employee record.
Email Settings
An email address is also required for a user account. This address is used to send system generated emails such as workflow notifications and record assignments. Further accounts can be added using the '+'button. Where there is more than one account, select the account to be used as the primary account.
For further information regarding user email settings, see user profile email settings.
Password Tab
Set the password for a new user here or reset the password for an existing user.
The Password tab will not be visible on the user record if you have the System-Generated Passwords Feature enabled. To enable/disable system-generated passwords, please see the Password Management section of this document.

Enter the new password details and click Save
Advanced Tab
User settings (including notification and reminder settings and import settings), Locale settings (date/time, currency etc) and Calendar options for iCal integration can be set here. These are all user configurable.
Layout Options
The Layout Options tab appears in KiyoCRM version 7.10 onwards
The Layout Options tab allows you to set color choices for the KiyoP theme. These settings can be configured by the user. Please see the User Themes documentation for more information on these settings.
Password Management
From the Admin panel, select Password Management to open the settings page.
System-Generated Passwords
If this feature is enabled, passwords for new user accounts will be generated automatically and emailed to the address on the user’s account.
This requires both an outbound email server to be configured and a valid email address on the user’s record
Password Security Settings
These are optional password security settings for user passwords. Once set, user passwords must meet the selected criteria.

Check the boxes to select the required password features.
Note that special characters are #$%^&*()+=-[]';,./{}|:<>?~
Click Save to retain the settings.
User
When this feature is enabled, users will be able to reset their passwords from a link on the KiyoCRM login page.
This requires both an outbound email server to be configured and a valid email address on the user’s record

Email Templates
The templates for password-related system-generated emails can be edited here. Please see the Email Templates documentation for further information regarding creating and editing email templates.

LDAP Support
If LDAP Authentication is enabled, none of the KiyoCRM Password Management settings will apply. Passwords will be managed by LDAP settings.
SAML Authentication
If SAML Authentication is enabled, none of the KiyoCRM Password Management settings will apply. Passwords will be managed by SAML settings.
Roles and Security Groups
Roles and Security Group settings are managed from the Users section of the Administration Panel.
The settings allow you to restrict access to sensitive data in KiyoCRM to specific teams (groups). There are many options to allow you to configure it to your exact needs, and a number of automatic assignment options to ensure that your users can always access the data that they need.
Security Groups allow you to define groups of users with particular access rights defined by the roles attached to the group. Groups can also be used to assign records to teams of users.
Roles are used to define access rights to modules and determine what a user can do with a record once they have access to it.
There are 3 key steps to setting up Groups so that you work correctly.
-
Create a group for each team of users and add the appropriate users to the group.
-
Create a role and select the appropriate access levels. Assign that role to each group.
-
Add the groups to records in your KiyoCRM instance. You can use the Mass Assign on the List View to do this. Going forward the groups will automatically inherit based on your Security Suite Settings. You can also use logic hooks, workflow, or do a direct database insert into the security groups records table if doing a one-time initial setup.
Further advanced security group settings and functionality are available with the purchase of the Security Suite add-on
Role Management
Create a role to define access to modules and the functions users will be able to perform on records within these modules. The role can then be assigned to security groups or to individual users where appropriate.
Create Role
Select Role Management and then Create Role from the Role Management sidebar.

Enter a name and a description for the role you are creating and click Save.

Once the role has been created, the role matrix will be displayed, showing all the configurable access options for each module.

Click on a cell to change the access setting. Note that you can change the setting for an entire column by clicking on the column heading.

Use the Access column to determine whether users can access each module:
|
Enabled |
Users have access to this module |
|
Disabled |
Users will not be able to view records for this module. |
Use the Delete, Edit, Export , Import, List, Mass Update and View columns to determine available record functions for users:
|
Group |
Gives users access to all records assigned to members of the same group. |
|
Owner |
Gives users access only to their own records. |
|
None |
Users will not have access to this function for this module. |
Click Save Once saved, access rights are color coded for ease of reading.
If your users should only typically see their own records, then the role you would assign to their group would be configured to have Owner rights. A manager who is a part of the same group, but who should be able to see all records in the group should have a role directly assigned to their user record that gives Group access.
Add User or Group
Assign the role to a group or an individual user as appropriate, using the subpanels below the matrix.
List Roles
Select List Roles from the sidebar to view all roles and their descriptions.

Click on the role name to view and edit the access settings.
Click on the pencil icon to edit the role name and/or description.
List Roles by User
Select a username from the list to display the access matrix for the user as defined by all roles applied to the user.

Security Suite Management
Select Security Suite Management from the Admin panel to view any existing groups or create a new group.
Create Group
Create a group to define groups of users with particular access rights which are defined by the roles attached to the group. Groups can also be used to assign records in the CRM.
Select Security Suite Management, and then Create a Security Group from the sidebar.


Enter a name and an optional description for the group.
Not Inheritable If this field is checked then the group will not automatically be attached to any record. This can be useful for cases such as creating groups to assign roles to.
Click Save.
The Detail view for the newly created group will appear.
Add Users and Roles
Add users and roles to the group as required, using the subpanels.


Here, Chris and Sarah are members of the group and the Owner Only role has been applied, so the Owner Only role settings will apply to both Chris and Sarah.
View Security Groups
Select Security Groups from the sidebar to view all security groups.
Click the group name to edit the users and roles attached to the group, and the pencil icon to edit the group name and/or description.

Security Suite Settings
KiyoCRM System Administrators can configure many advanced options for Security Suite. This allows you to control various access rights, inheriting of records, filters and more.

Additive Rights
User gets greatest rights of all roles assigned to the user or the user’s group(s)
Strict Rights
If a user is a member of several groups only the respective rights from the group assigned to the current record are used.
New User Group Popup
If this is checked, a Security Groups popup will open when a new user is created, allowing you to add the user to a security group(s)
User Role Precedence
If any role is assigned directly to a user that role should take precedence over any group roles.
Filter User List
With this selected, non-admin users can only assign records to users who are in the same group(s)
Use Creator Group Select
Adds a panel to a record creation screen if a user is a member of more than one inheritable group that allows a user to select one or more groups (that the user belongs to) that should be associated with the newly created record. If a user is in just one group the normal inheritance rules will instead be applied.
The new record will still inherit from the Assigned To user or Parent record if these options are set. This setting only overrides the Created By setting.
Inherit from Created By User
The record will inherit all the groups assigned to the user who created it.
Inherit from Assigned To User
The record will inherit all the groups of the user assigned to the record.
Other groups assigned to the record will NOT be removed.
Inherit from Parent Record
E.g. If a case is created for a contact the case will inherit the groups associated with the contact.
Inbound email account
Locks down inbound email accounts in the email client to only list those that belong to the same group as the current user.
Default Groups for New Records
Set groups that should always be attached when a specific module record is created, e.g. you can set a group to be assigned to all newly created Account records.
System
System Settings


User Interface
These user interface settings apply system-wide, although some (for example Show Full Names) can be overridden by individual users in their user profile.
|
Listview items per page |
The number of records to display per page in the list view of each module. |
|
System Name |
This name will be displayed on the browser tab. |
|
Current Logo |
This shows the logo currently displayed on the login screen |
|
Select Logo |
Click Choose file select logo file. Images can be .png or .jpg format. |
|
Lead Conversion Options |
|
|
Enable inline editing |
Enables records to be edited from list or detail view by double clicking on the item to be edited. |
|
Show Full Names |
Displays full names for users, rather than usernames in Assigned To fields. |
Configure AJAX User Interface
Click the Configure Ajax User Interface link to display the configuration options.

Drag and drop modules between the columns to enable/disable AJAX.

Proxy Settings
Select the Use Proxy server? checkbox to configure proxy server address and authentication settings.
Google Authentication
This is where you upload the JSON credential file for Google Calendar Sync.
See the Google Credentials and Syncing Section.
Advanced Settings
|
Developer Mode |
Turns off caching so that code changes to files will be seen immediately. See the Developer Guide for more information. |
|
vCal Updates Time Period |
Set the number of months in advance to show free/busy information for invitees when scheduling calls and meetings. |
Logger Settings
Specify log filename, extension and size as well as the log level here. See the chapter on logging for more information.
Click the View Log link to view the log file.
Import Wizard

The Import Wizard is also available from the sidebar of all import-enabled KiyoCRM modules. Select the module to import data into and click Next to launch the wizard.
Locale
Set system-wide settings for locale here, including date and time formats, system currency and export settings. Currencies can be added to KiyoCRM via the Currencies panel.

Note that date and time settings can be overridden by the user in their user profile
Upgrade Wizard
The Upgrade Wizard provides a quick and simple way to upgrade your KiyoCRM application. Download the required upgrade package and check your system compatibility before running the wizard.
See Using the Upgrade Wizard for full instructions on upgrading.
Currencies
Use this section to add a currency to KiyoCRM. The default currency can be set in the Locale section.
Entering the ISO 4217 code for the currency will autofill the Currency Name and Currency Symbol fields.
You must also specify a currency conversion rate before saving the new currency settings.

Backups
The KiyoCRM application files can be backed up using this tool. Please note that you should also perform regular backups of your database - see the vendor’s documentation for details on how to do this.
Languages
Download language packs for Store here.
Repair
Selecting Repair from the System Settings panel displays a wide range of repair options for KiyoCRM which will run automatically when the link is clicked. KiyoCRM may direct you to run particular Repair commands, for example following an upgrade using the Upgrade Wizard.
Quick Repair and Rebuild is the most often used command here and will be required after installing a new module via Module Loader for example, or to display changes to code during development when Developer Mode is not set.
When running a Quick Repair and Rebuild, be sure to scroll to the bottom of the page to view any new SQL code which may need to be executed to ensure that your database tables are correctly synced with any changes that have been made.
The following functions are available to you in the section:
- Quick Repair and Rebuild
-
Repairs and rebuilds DB, Extensions, Vardefs, KiyoCRM Dashlets etc.
- Expand Column Width
-
Expands certain char, varchar and text columns in database (MSSQL ONLY)
- Rebuild .htaccess File
-
Rebuilds .htaccess to limit access to certain files directly
- Rebuild Config File
-
Rebuilds config.php by updating version and adding defaults when not explicitly declared
- Rebuild Relationships
-
Rebuilds relationship metadata and drops the cache file
- Rebuild Schedulers
-
Rebuilds out-of-the-box Scheduler Jobs
- Rebuild KiyoCRM Dashlets
-
Rebuilds the KiyoCRM Dashlets cache file
- Rebuild Javascript Languages
-
Rebuilds javascript versions of language files
- Rebuild JS Compressed Files
-
Copies original Full JS Source files and replaces existing compressed JS files
- Rebuild JS Grouping Files
-
Re-concatenates and overwrites existing group files with latest versions of group files
- Rebuild Minified JS Files
-
Copies original Full JS Source Files and minifies them, then replaces existing compressed files
- Repair JS Files
-
Compresses Existing JS files - includes any changes made, but does not overwrite original JS Source files
- Repair Non-Lowercase Fields
-
Repair mixed-case custom table(s) and metadata file(s) to fix issues where code expects lowercase field names
- Repair Roles
-
Repairs Roles by adding all new modules that support Access Controls, and by adding any new Access Controls to existing modules
- Repair Inbound Email Accounts
-
Repairs Inbound Email accounts and encrypts account passwords
- Sync Inbound Email Accounts
-
Sync Inbound Email Accounts and Emails
- Remove XSS
-
Removes XSS Vulnerabilities from the database
- Repair Activities
-
Repairs Activities (Calls, Meetings) end dates
- Enable/Disable Seed Users
-
Quickly enable or disable seed users populated during demo installation.
- Remove missed files from upload directory
-
Please note that removal can take a lot of time
Global Search
The Global Search functionality is used to search for records using the search bar on the main navigation menu. Add or remove modules from the Global Search here.
See the User Interface guide to the global search for more information.

Diagnostic Tool
The diagnostic tool allows you to gather system configuration information which can be downloaded via a .zip file for analysis.

|
KiyoCRM config.php |
Includes a copy of the config.php file from the KiyoCRM root directory. This contains many of the system settings options such as date formats, currency information, password configuration alongside configuration details such as database settings and KiyoCRM version |
|
KiyoCRM Custom directory |
Includes a copy of the custom directory, which contains any field or layout customizations made, either through Studio or via code. |
|
phpinfo() |
Includes the output of the phpinfo() function, containing information about the php configuration on the server |
|
MySQL - Configuration Table Dumps |
Includes a folder MySQL/Table Dumps in the diagnostic zip file with an html file for each configuration table in KiyoCRM. Each file contains field definitions (field names, data types etc), indexes (name, type and fields in the index) and data from the relevant table. |
|
MySQL - All Tables Schema |
Includes the file MySQL/TableSchema/TableSchema.html with two sections for each table in KiyoCRM- field definitions (table name, data types etc) and indexes (name, type and fields in the index) |
|
MySQL - General information |
Includes a file MySQL/MySQL-General-info.html containing database information such as version number and character sets |
Select the information you require and click Execute Diagnostic.

Once complete, click the link to download the zipped diagnostic file.
Connectors
This section to be completed.
Themes
From 7.9 onwards, only the Kiyo theme is available. For earlier versions, you can set the default theme, and which other themes are available for users to select here.

From 7.10 onwards, there is a choice of theme colors for Kiyo which can be set from the User profile.
Scheduler
KiyoCRM uses a number of Scheduler jobs running at scheduled times, supporting functionality such as search indexing, workflows, email notifications, database maintenance and sending campaign emails.

Setting up the Scheduler
Scheduler jobs need to be manually enabled. This is done by running a script called cron.php every minute. This, in turn, manages all KiyoCRM jobs according to their proper schedules.
In Windows this is setup using Task Scheduler, and in Linux and iOS, it is setup in crontab. Detailed instructions for your system will be displayed during installation and can also be found on the Schedulers page, under the list of scheduled jobs.
See Scheduler Jobs in KiyoCRM in Linux - the Definitive Guide for an in-depth guide to setting up and managing scheduled jobs in Linux.
Configuring Scheduled Jobs
Click on a scheduled job to view settings

In edit mode, you can set the job status (only Active jobs will run) and configure the interval at which the job runs as well as the start time. Unchecking the 'Advanced Options' box will show a more user-friendly way to set the job interval if you are not familiar with the crontab notation. Re-checking Advanced Options will let you set the initial start time.

Activity Streams
By default, the Activity Stream dashlet displays recent updates for the Opportunities, Contacts, Leads and Cases modules.
The Activity Stream admin panel allows you to configure what is displayed on the activity feed and which features are available to users.

|
Enable MyActivity Stream Dashlet: |
Enables/disables the Activity Stream dashlet for all users |
|
Activate Feeds For: |
Select the modules to display activity for |
|
Activate User Feed: |
Allows users to enter messages in the status update field for broadcast to all users |
Please see the user interface guide for further information on how to use the Activity Stream.
Developer Tools
Studio
The Studio tools allow you to customize the information shown in the modules and how it is displayed.
See the dedicated Studio guide for more information on how to use the Studio tools.
Rename Modules
Use this panel to rename a KiyoCRM module. For example, you may wish to rename Companies as Businesses.

Click on the module you wish to rename. Enter the new singular and plural labels for the module and click SAVE.

The new module label will now appear on menus and headings throughout KiyoCRM.
Module Builder
Use the Module Builder to create custom modules in KiyoCRM. The process of creating a custom module is as follows:
-
Create a package to house the new module(s).
-
Create a module using one of the following templates that KiyoCRM provides for you:
Basic
This template provides basic fields such as ID, Date Entered, and Created By. Use this template to create a module from scratch.
Company
This template provides organization-specific fields such as Company Name, Industry, and Billing Address. Use this template to create a module that is similar to the Companies module.
File
This template provides document-specific fields such as File Name and Document Type. Use this template to create a module that is similar to the Documents module.
Issue
This template provides case and bug-specific fields such as ID, Description, and Created By. Use this template to create a module that is similar to the Cases module or Bug Tracker module.
Person
This template provides individual-specific fields such as salutation, title, name, address, and phone number. Use this template to create a module that is similar to the Contacts module or the Leads module.
Sale
This template provides opportunity-specific fields such as Lead-Source and Probability. Use this template to create a module that is similar to the Opportunities module.
Furthermore, you can configure the following options:
-
Importing: Selecting this option to allow data import into the module.
-
Navigation Tab: By default, this option is enabled to create a tab for the module on the top navigation bar.
If you want to hide modules temporarily, use <<display_modules_subpanels>> after deployment. Disable this option only for backend modules which will never be shown in the user interface.
-
-
Create new data fields. You can also rename default fields from the template.
-
Customize page layouts for List View, Edit View, Detail View, Sub-panels, Search form, and KiyoCRM Dashlets.
-
Create relationships between the new module and other modules.
-
Save the package and distribute it.
Steps 3-5 are optional and can be done in Studio after deployment.
Distribute a Package
You can choose one of the following options to distribute the package:
|
Deploy |
This option is designed to install the custom module on your local KiyoCRM instance and make it available to users in your organization. After deployment, if needed, you can make further changes to the module in Module Builder and deploy it again to update the installed module. However, note that if you change a deployed custom module in Studio and then re-deploy it from Module Builder, all changes made prior in Studio will be lost. |
|
Publish |
This option is designed for distribution to specific users or customers. The system creates a zip file, which you can save on your local machine. You can then email it to one or more individuals who can use the Module Loader to upload the zip file into their KiyoCRM instance. After the module is installed through Studio, you can add or remove fields and make other changes to a published module. |
|
Export |
This option is designed for distribution to developers. The system creates a zip file, which you can save on your local machine and share with others. Using the Module Loader, developers can install it on their KiyoCRM instance and customize it further in Module Builder if necessary. The package is visible only in Module Builder and, hence, only administrators can access it until it has been deployed. |
History Subpanel

Display Modules and Subpanels
Control which modules and subpanels are visible in KiyoCRM by dragging and dropping modules or subpanels between the Displayed and Hidden columns.
This will show or hide modules in KiyoCRM for all users. Should you wish to control access to particular modules, this can be done using Role Management. See Roles and Security Groups for more information.
|
Allow users to select modules to appear in the navigation bar |
Selecting this option allows users to customize which module tabs are visible from their User Settings. |

Module Loader
Module Loader allows you to install and manage custom modules or plugins for your KiyoCRM instance.
Custom module packages that have been created and modified in Module Builder will be displayed in Module Loader once they have been deployed.
For more information on producing packages that can be uploaded using Module Loader, see the Developer Guide

Modules and packages that are already installed are listed in the top pane. The lower panel is used to upload packages and will list any package that is uploaded but not yet installed.
Upload and Install a Package
Click Choose File and browse for the package .zip file. Click UPLOAD
Once uploaded, the package details will appear in the lower pane, including the version number, a short description and whether or not the module can be uninstalled.
UNINSTALL and DELETE PACKAGE options will appear.
Click INSTALL to install the module.

On the next screen, if there are no problems detected with the package and it is ready to install you will be asked to click COMMIT to complete the installation.
If any errors occur during installation, they will be displayed here. Otherwise, clicking the Display Log link will detail the steps taken in the installation process.

Click BACK TO MODULE LOADER to return to the Module Loader screen where the newly installed package will appear in the list of installed extensions.
Uninstall a Package
For a package to be Un installable it needs to be defined as Un installable in the package manifest file. For more information regarding the manifest file see the Developer Guide
Uninstall a package by clicking the buttons next to the package name.
As with the install procedure, you will be asked to confirm the uninstall on the next screen. If the package added any tables to your database, you will be asked to if you wish to keep these, and any data within them, for example if you are replacing an older version of a module with a new one.
Click COMMIT to uninstall the package.
If any errors occur during the uninstall they will be displayed here. Otherwise, clicking the Display Log link will detail the process.
Click BACK TO MODULE LOADER to return to the Module Loader screen where the newly installed package will appear in the list of installed extensions.
An uninstalled module will be listed in the lower panel from where it can be re-installed or deleted.

Configure Module Menu Filters
Use this section to configure the module menus on the top navigation bar.

Drag modules from the list to the required menu or delete an item by dragging it to the wastepaper bin icon. Edit the menu name by clicking the pencil icon next to the module name. Delete a menu entirely by clicking the wastepaper bin icon next to the module name.
Any changes made will not take effect until you click SAVE & DEPLOY
Dropdown Editor
The Dropdown Editor shows all the dropdown lists currently installed on the system.
Click on the dropdown name to edit it. If you are unsure which dropdown you require, it can be easier to edit via Studio where you can find the dropdown by its field name. See the Studio guide for full instructions on adding or editing a dropdown list.

Search
1. Elasticsearch
This enhancement is only available in KiyoCRM from version 7.11 onwards.
Table of Contents
1.1 Introduction
This enhancement is only available in KiyoCRM from version 7.11 onwards.
Elasticsearch is an indexing engine that is built specifically to have almost real-time search results, optimized for searching text strings. It is built in Java and runs as a separate server/process.
Elasticsearch can be integrated with KiyoCRM to widely improve search quality and time. To achieve this, search-enabled modules are indexed on the Elasticsearch server. When a search query is received by KiyoCRM it is redirected to the Elasticsearch server, which will perform an optimized search and return the results back to the CRM.
KiyoCRM 7.11 requires Elasticsearch 5.6. KiyoCRM 7.12 requires Elasticsearch 7.
Synchronization between the database and the Elasticsearch index happens in three main ways:
- Logic Hooks
-
Every time a record is updated it gets re-indexed automatically.
- Scheduled task
-
A scheduler job will run periodically to make sure that the database and the index are synchronized.
- Manual indexing
-
A full or partial index can be requested by an administrator via the admin panel or from a Robo task.
1.2 Set up Elasticsearch
This enhancement is only available in KiyoCRM from version 7.11 onwards.
KiyoCRM 7.11 requires Elasticsearch 5.6. KiyoCRM 7.12 requires Elasticsearch 7.
Elasticsearch requires Java 8 to run, supporting only Oracle Java and OpenJDK.
The quickest ways of having an Elasticsearch server up and running is by either using the official Docker image, or the .deb package for Debian-based systems (like Ubuntu).
In this guide we will assume that you are attempting to install Elasticsearch on an Ubuntu machine. Refer to the official documentation to know how to install Elasticsearch in different ways.
This guide will teach you how to have a development server up and running with very little configuration, either by installing via Docker or .deb package. Please keep in mind this guide is not suitable for setting up a production Elasticsearch server.
Install via Docker (recommended)
Be sure that the current user belongs to the docker group or you’ll receive permission issues.
Download image:
docker pull docker.elastic.co/elasticsearch/elasticsearch:5.6.10Start with docker run
Start Elasticsearch. This is ideal for a test/development server.
docker run -p 9200:9200 -p 9300:9300 \
-e "discovery.type=single-node" -e "xpack.security.enabled=false" \
docker.elastic.co/elasticsearch/elasticsearch:5.6.10
Start with docker-compose
Create a new docker-compose.yml file or add the elasticsearch configuration your pre-existing docker-compose.
version: '3'
services:
    elasticsearch:
        image: docker.elastic.co/elasticsearch/elasticsearch:5.6.10
        container_name: elasticsearch
        restart: unless-stopped
        ports:
            - 9200:9200
            - 9300:9300
        environment:
            - discovery.type=single-node
            - xpack.security.enabled=false
            - "ES_JAVA_OPTS=-Xms512m -Xmx512m"
And start with:
docker-compose upInstall via .deb (not recommended)
Download and install the public signing key:
wget -qO - https://artifacts.elastic.co/GPG-KEY-elasticsearch | sudo apt-key add -You may need to install the apt-transport-https package on Debian before proceeding:
sudo apt-get install apt-transport-httpsSave the repository definition to /etc/apt/sources.list.d/elastic-5.x.list:
echo "deb https://artifacts.elastic.co/packages/5.x/apt stable main" | sudo tee -a /etc/apt/sources.list.d/elastic-5.x.listUpdate the repository and install OpenJDK 11 and Elasticsearch:
sudo apt-get update && sudo apt-get install openjdk-11-jre elasticsearchYou might need to tweak the OpenJDK version to match the one available for your distribution.
Start Elasticsearch with:
sudo systemctl start elasticsearch.serviceor on older Ubuntus:
/etc/init.d/elasticsearch startTest Installation
Check if the server is running with:
curl -X GET "localhost:9200/"And you should receive something like this:
{
  "name" : "B5VzMdk",
  "cluster_name" : "elasticsearch",
  "cluster_uuid" : "KGoWI84GQ8SZipmDaeA7pA",
  "version" : {
    "number" : "5.6.10",
    "build_hash" : "b727a60",
    "build_date" : "2018-06-06T15:48:34.860Z",
    "build_snapshot" : false,
    "lucene_version" : "6.6.1"
  },
  "tagline" : "You Know, for Search"
}
Note that the current setup does not provide authentication. Remember to secure your Elasticsearch server before going to production, or your data will be vulnerable!
1.3 Set up Elasticsearch integration
This enhancement is only available in KiyoCRM from version 7.11 onwards.
Configure the Elasticsearch connection
Go to the admin panel, scroll down to the Search settings, and open the Elasticsearch setting page. Enable Elasticsearch from the checkbox and fill the host, user and password fields. Simply leave user and password blank if you have anonymous access enabled.
If you are running both KiyoCRM and Elasticsearch via Docker, the hostname must be the name of the Elasticsearch container.

You can use Test connection to see if the current configuration is working.
Once you are satisfied with your settings hit Save.
Initial indexing
After having saved, perform a full indexing by opening the Elastisearch setting page again and now pressing Schedule full indexing. This task starts running within a minute, provided that the crontab has been configured correctly.
Switch the search engine to Elasticsearch
Now go to the Search Settings and set Elasticsearch Engine as the search engine. You can customize the modules that are used for indexing in the modules section.

Setup the scheduled task
The Elasticsearch data is updated each time a record is created, changed, deleted and imported. Nevertheless, a scheduled task keeps the elastic data in sync with the KiyoCRM database.
Go to the admin panel, open Scheduler. Check if a Task with a name like "Perform Elasticsearch index" already exists.
If no such task exists, then on the side panel click "Create Scheduler".
-
In the Jobs dropdown, select "Elasticsearch indexer"
-
At Job Name, enter a self-chosen title, for example "Perform Elasticsearch index"
-
At Interval you specify the frequency at which the job should run. A frequency of about once a day should be sufficient. To have the task run at 4 o’clock at night, click "Advanced Options" and enter 0 at min and 4 at hrs., leave date, mo., day as they are.
-
hit Save.
As AOD Lucene Indexing will no longer be used, edit the following entries in the Scheduler list, set status to "inactive", hit Save:
-
Perform Lucene Index
-
Optimize AOD Index
Make sure that you have correctly configured the crontab configuration, as described at the bottom of the Schedulers page.
1.4 Search Syntax
This enhancement is only available in KiyoCRM from version 7.11 onwards.
KiyoCRM Elasticsearch engine makes use of Elasticsearch’s Query String DSL. This allows very advanced search query to be performed.
For a complete understanding check the official documentation. A quick overview will be provided here.
Examples
Search for all the records having both 'John' and 'Doe' in any field:
John AND DoeSearch for all the records having the first name 'John' (note that this won’t include 'Johnny'):
name.first:JohnSearch for all the records having with the name starting with 'John':
named:John*Search for all the Accounts having 'corp' in their name:
named:corp AND _type:AccountsJoining
By default, keywords are joined by OR clauses, meaning that searching for John Doe will be the same as searching for John OR Doe. Of course, results containing both 'John' and 'Doe' will appear on top.
Boosting
Names are boosted, meaning that if one of the keywords matches in the name the record will very likely appear on top.
Wildcards
By default the entire keywords must match. Thus, searching with 'John' won’t match someone named 'Johnathan'. To do that you need to use a wildcard character. Can be use interchangeably to replace zero or more characters. ? can be used to replace exactly one character.
Search for both 'John' and 'Johnathan':
named:john*Search for all the surnames starting with either 'Mc' or 'Mac':
name.last:(Mc* OR Mac*)Wildcards can be used at the beginning of the keyword too, but it will make the search slightly slower.
Search for all the records having the last name ending with 'Connor':
name.last:*connorSearching by modules
You can restrict search to one or more module by using the _type keyword and the module name.
Search for all the Users:
_type:UsersFuzzy search
Using the ~ will make a keyword fuzzy, meaning that it will make a proximity search, finding all matches that have one different character (distance). The distance can be customized by adding a number after the tilde,
Search for 'Mackenzie', 'McKenzie', 'Makenzie', etc.
MacKenzie~3Metadata
Each records have the following meta fields that can be searched:
-
meta.created.date
-
meta.created.user_id
-
meta.created.user_name
-
meta.modified.date
-
meta.modified.user_id
-
meta.modified.user_name
-
meta.assigned.user_id
-
meta.assigned.user_name
Search all the records created by 'John Doe':
meta.created.user_name:(John Doe)Search all the records modified on the first of August.
meta.modified.date:"2018-08-01"1.5 Command Line Tools
This enhancement is only available in KiyoCRM from version 7.11 onwards.
KiyoCRM’s Elasticsearch integration ships with two useful command-line tools powered by Robo.
These two commands allow to perform indexing and searches from the command-line, making debug and integration with external tools easier.
These commands require a working connection to the database, if you are running KiyoCRM behind Docker or a VM, please execute them from a shell on the same host as the KiyoCRM web server.
elastic:index
The elastic:index command allows to run an indexing from the command-line and see the step-by-step logs. Both partial and full indexing are supported.
Usage
elastic:index [<differential> = 1]Examples
Running a full indexing:
vendor/bin/robo elastic:index 0Running a partial indexing:
vendor/bin/robo elastic:index 1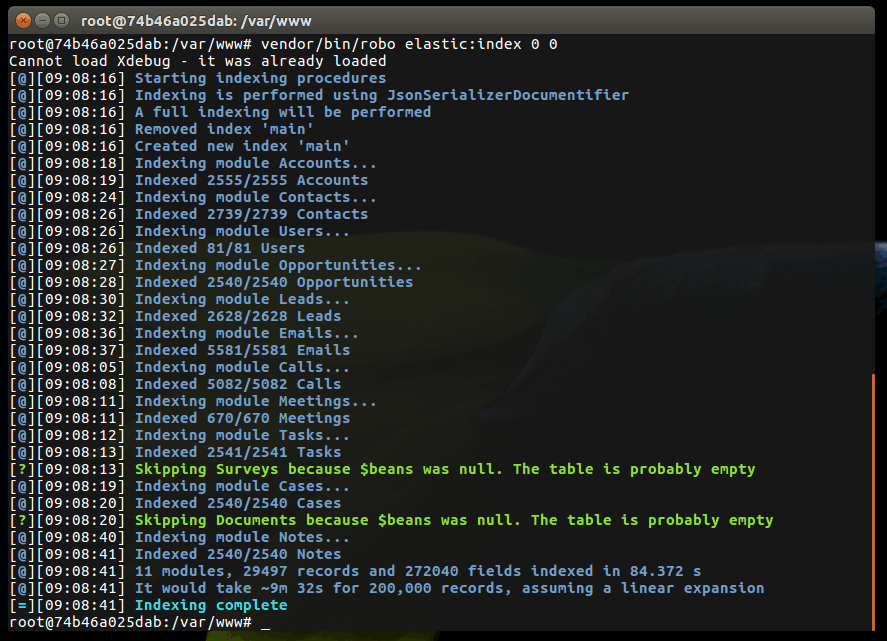
elastic:search
The elastic:search command allows you to perform the same kind of queries you would do from the search bar directly from the CLI. It also allows to return a JSON with additional data about the record.
Usage
elastic:search <query> [<size> = 20] [<showJson> = false]You can use the full query syntax for query argument.
The size option specifies the number of results.
When the showJson option is enabled, a JSON will be returned for each result
Examples
Search for everything using the keyword 'Rohan':
vendor/bin/robo elastic:search "rohan"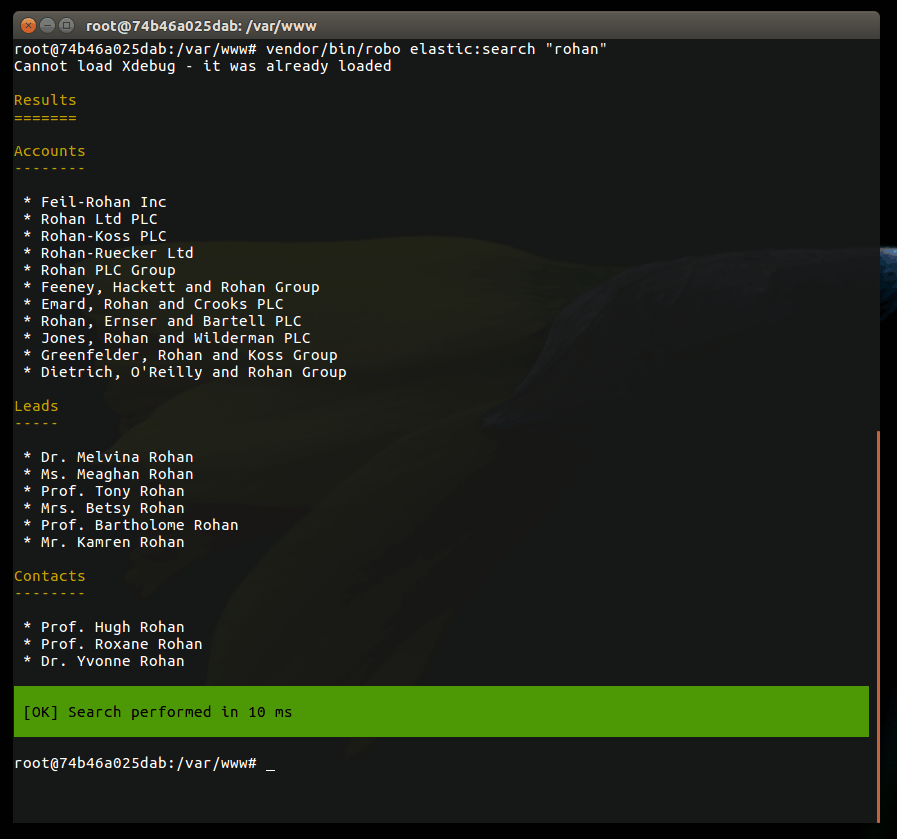
Search for the first account named 'Maxwell' and show a JSON:
vendor/bin/robo elastic:search "_type:Accounts AND named:Maxwell" 1 true
1.6 Troubleshooting
This enhancement is only available in KiyoCRM from version 7.11 onwards.
In order to make the troubleshooting process easier for the Elasticsearch extension, a separate file is used to offer very verbose and dedicated logging: search_index.log. This is mostly because the indexing procedures are run in the background, where they are hard to debug. Logging calls get redirected to the standard logging, filtered with the configured logging level.
In addition to checking the logs, you could try running the search or the indexing from the command-line using the command line tools. Given the verbosity of the console output, this should surely help to narrow down the issue.
Finally, enabling developer mode in the admin settings, will provide a clear exception page if the error happens at some point during the search process.
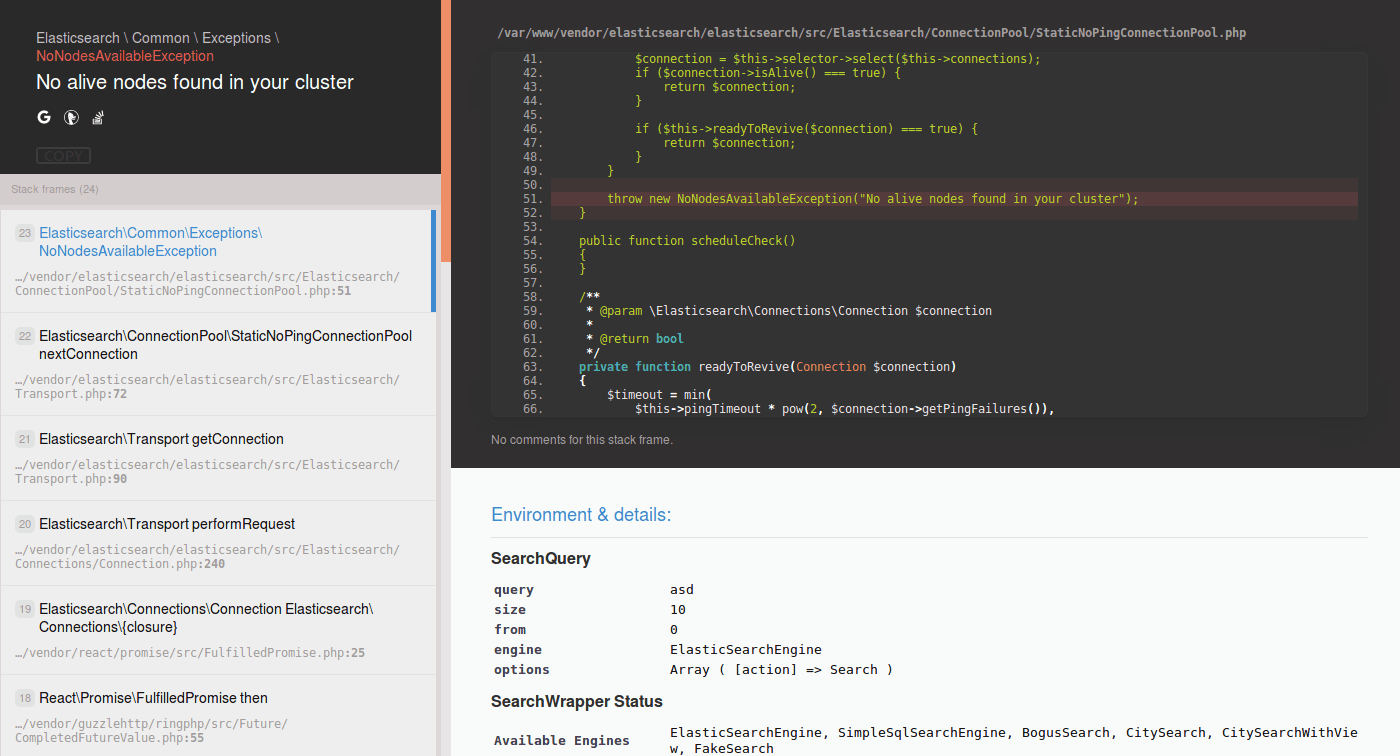
Studio
Introduction
The Studio tools allow you to customize the information shown in the modules and how it is displayed.
To access Studio, log in as an Administrator user. In the top-right corner of the screen you find a menu with a profile figure icon. Click this icon, then select "Admin". Scroll down the page and click "Studio".
When Studio is opened, it will display a list of all the modules which can be customised. Click to select the required module.

For each module, there are several components which can be edited.

Labels: View/edit field labels and the module name
Fields: View/edit field properties and add new fields
Relationships: View/edit/add relationships between modules
Layouts: Customise the edit/detail/list and filter views
Subpanels: Set which columns are displayed on module subpanels
Labels
Selecting the Labels component lists all the field labels for the module. Edits to labels will be reflected on the module layouts.
Click and type to make the required changes to the labels and then click SAVE & DEPLOY.
A confirmation message will appear once the changes have been saved. You should now be able to see the changes to the labels when you navigate to the module.

Clicking CHANGE MODULE NAME will allow you to change the label for the module itself. See the Rename Modules section of the Developer Tools documentation for more details.
Fields
Selecting the Fields component displays all the available fields for the module, with their display label and data type.

Adding A Field
You can add a custom field to the selected module by clicking ADD FIELD.

Enter the details for the new field. Depending on the data type selected for the field, some or all of the following properties can be set for the field:
|
Data Type: |
The type you select determines what kind of characters can be entered for the field. For example, only numbers that are integers may be entered into fields that are of the Integer data type. |
|
Field Name: |
The field name must be alphanumeric and must not contain any spaces. Underscores are valid. |
|
Display Label |
The label which will be displayed alongside the field in the views. |
|
System Label: |
This label is used to refer to the field in the code. |
|
Help Text: |
Optional explanatory text to display temporarily when the user hovers over the field. |
|
Comment Text: |
This is only visible in Studio and Module Builder, as a description for administrator use. |
|
Default Value: |
The field will have the value set here unless the user enters a new value. |
|
Max Size: |
The maximum number of characters that can be entered into the field. |
|
Mass Update: |
Enable to mass Update feature for this field. |
|
Required Field: |
Whether or not a value must be entered for the field before a record containing the field can be saved. |
|
Audit: |
If this is selected, changes made to the field value can be tracked from the record’s Change Log. |
|
Inline Edit: |
Whether or not the field can be edited inline, when this option is enabled in the System Settings. |
|
Importable: |
Select an option to allow, disallow or require the field to be imported when using the Import Wizard. |
|
DuplicateMerge: |
Select an option to enable or disable the Merge Duplicates and Find Duplicates features. |
Field Types
Studio comes out-of-the-box with many different types of fields which can be created in KiyoCRM.
The following data types are available when creating fields in Studio:
|
Data Types |
Description |
|
Address |
Creates fields for street, city, postal code, state, and country. |
|
Checkbox |
Creates a checkbox for data fields with a Yes/No action |
|
Currency |
Creates a field to enter a currency value. The system automatically creates a dropdown of the currency type if the field does not already exist in that module |
|
Date |
Creates a field to enter a date. Includes a button for a calendar popup |
|
DateTime |
Creates a field to enter the date and time. Includes a Calendar icon button to choose a date via the popup calendar, as well as a dropdown list to select the time |
|
Decimal |
Creates a field to hold a number rounded to a specified decimal precision. KiyoCRM stores the exact representation of the number in the database (e.g. For a precision of 2: 2.539 is stored as 2.60) |
|
DropDown |
Creates a field where you can associate a dropdown list of values |
|
DynamicDropdown |
Creates a dropdown list from which you can relate a single record from a variety of modules. |
|
Flex Relate |
To specify a one-to-many relationship with another module but allows linking to several kinds of modules. For example, Notes use a Flex Relate so they can be related to Companies, Contacts, Leads, etc. Only one Flex Relate-type field is allowed per module, which explains why you can’t add another field of this kind to the Companies, Calls, Meetings, Notes, and Tasks modules. |
|
Float |
Creates a field to hold a number rounded to a specified decimal precision. KiyoCRM stores the value differently based on the database platform KiyoCRM is running on |
|
HTML |
Creates static HTML-formatted text to display in record views |
|
IFrame |
Creates a field to store a URL to display in an iFrame in record views. This URL can also be generated dynamically from data in other fields. |
|
Image |
Creates an image field to upload an image to display on a record |
|
Integer |
Creates a field to specify positive or negative numbers with no decimal places |
|
Multiselect |
Creates a dropdown list of values where multiple values can be selected at once |
|
Phone |
Creates a field to enter a phone number |
|
Radio |
Creates a radio button for a user to select one value from a dropdown list |
|
Relate |
Creates a field to associate a record with another module’s record as a one-way relationship. You can add multiple Relate fields to a module. |
|
TextArea |
Creates an open text area field for multiple lines of text |
|
URL |
Creates a field to store a URL and display as a clickable link. This URL can also be generated dynamically from data in other fields. |
|
Text Field |
Creates a field for a single line of text |
Adding A Dropdown Field
When adding a field of type Dropdown, you need to additionally specify the dropdown list. This contains the list items which will be displayed for the dropdown.

You can select an existing dropdown list if appropriate or click ADD to create a new one.

For each item to include in the list, enter:
|
Item Name |
Used to refer to the dropdown item in the code, this must be alphanumeric, begin with a letter and contain no spaces. |
|
Display Name |
The text shown to the user. This may contain spaces and special characters |
Click ADD to add each new entry.
To add a blank item, click ADD without entering any values for the Item Name and the Display Label. It is not possible to add a blank name, but with a non-blank label.
The list can be optionally sorted alphabetically by the Display Label by clicking the appropriate SORT button. If you want to set a default item, this is not the place to configure that; instead, look for a "default value" option in the settings for the field that will be using this dropdown.
Click SAVE to save the new dropdown list and return to the field properties.
The dropdown list items you have created will now be visible. If desired, you can select a default value for the dropdown.

Editing A Field
Click on a field to view the field’s properties. These can be edited in the same way as detailed above for adding a new field.
Deleting A Field
Only fields that have been created in Studio can be deleted via Studio. Core fields cannot be deleted.
Select the field you wish to delete and click DELETE A warning message will appear asking you to confirm the deletion as both the field and any data related to the custom field will be deleted from the database and the field will no longer appear on any module views.

Relationships
A relationship represents a two-way link between two modules. Selecting the Relationships component displays all the relationships between the currently selected module and other deployed modules.

Click on a relationship to view the relationship properties.
Click ADD RELATIONSHIP to add a new relationship for the selected module.

The Primary Module will be set to the currently selected module.
Specify the relationship type:
One to One
With a One-to-One relationship, each record in the primary module may only have one related record in the related module, and vice versa. This type of relationship will add a relate field to both modules' records.
One to Many
With a One-To-Many relationship, records in the primary module may be related to one or more records in the related module, but each related module record is only related to one primary module record. This will add a relate field to the related module’s records, but the primary module will display a subpanel where more than one related module records can be added.
Many to Many
With a Many-To-Many relationship, records in the primary module can be related to one or more records in the related module, and vice versa. Each module’s records will contain a subpanel for the related records.
Select the Related Module from the dropdown list.
Where there are subpanels, subpanel views for the module(s) can be selected.
Click SAVE AND DEPLOY to save the relationship.
Layouts
Layouts can be edited in Studio to customize the module views shown to users.
Edit View
Edit view is displayed when editing a record or creating a new one.

The current layout is displayed in the main panel on the right-hand side. Unused fields are shown in the list on the left hand side.
Select Sync to Detail View if you wish any changes made to fields or field placement to be automatically applied to the corresponding Detail View. Note that layout changes cannot be made to the Detail View when this option is set.
Adding Fields
Fields can be added to the view either as a new row in an existing panel (section), or by adding a new panel.
Click and drag the New Row or New Panel element to the desired location in the layout on the right-hand side.

If you have added a new panel, this can be renamed by clicking the pencil icon. This will open the edit view for the panel label. Edit the label and click SAVE to return to the layout.

A new row will automatically be created with two columns.
Drag and drop the required fields to the new row. Clicking the + button will span the field across both columns.
Click SAVE AND DEPLOY to save the layout changes. These should now be visible when you navigate to the Edit view for the module.
Deleting Fields
Delete fields, row or panels from the layout by dragging them to the Delete area on the left-hand side.
Click SAVE AND DEPLOY to save the layout changes.
Detail View
Detail View is a read-only view, shown when a record is opened.
The Detail View layout can be edited in exactly the same way as for the Edit View. Note that if you have Sync to Detail View selected on the Edit View, you will not be able to make changes to the Detail View.
List View
The List View is shown when a module is opened and lists all the records in the module.
Customise which fields are shown in the list view, and the order in which they are displayed here.
|
Default |
Fields in this column will be shown by default in the list view. Re-order by dragging and dropping the field names. |
|
Available |
Fields in this column are available for users to add to the list view using the Column Chooser button on the list view. |
|
Hidden |
These fields are hidden from users and cannot be added to the view. |
Drag and drop the module fields between the columns to customize the list view.
Subpanels
Use this section to customize which fields are shown on a particular subpanel.
Select the subpanel. Fields shown in the Default column will be shown on the subpanel. Drag and drop the required fields between the two columns.
Click SAVE & DEPLOY

Export Customizations
You can export module customizations that you have made in Studio, and upload these into another KiyoCRM instance via Module Loader

Enter a name for the package, and optional author and description details.
Select the module(s) that contain the customisations you wish to export. Only modules containing customisations will appear for you to select.
Click EXPORT. This will create and download a .zip file containing the module customizations. Use Module Loader to upload and install the customizations on another KiyoCRM instance.
Google Maps
This section allows you to configure the settings for integrating KiyoCRM with Google Maps.
Google Map Setup
Before you start working with maps, you must obtain an API key and save it in the system. To do this, in the Administration panel in the subsection Google services → Setting up Google maps click on the Get API key link, follow the requested steps to get the key and save it in the map configuration settings.
The description of the main settings of the maps is presented in detail in the system interface, therefore, these parameters will not be described here.

A detailed description of the Google Maps API is available at Google Maps.
Geocoding addresses
When this section is selected, the automatic assignment of geographical coordinates to the system addresses immediately begins.
If you only need to view the results of geocoding performed earlier, use the module Geocoding results.
Depending on the size of the database and the speed of data processing, the process can take a long time. At the end of geocoding, the results will be shown, for example:

If Google doesn’t use a Premium account, then Google Maps imposes a limit on determining the number of coordinates equal to 2500 requests per day for one ip-address - detailed information can be found at Google Maps Geocoding API Usage Limits. To avoid repeated queries, all geocoding results are cached in the system, as described in the section below.
To perform automatic geocoding of system addresses, it is recommended to configure the appropriate task for CRON by adding the URL ./index.php?module=jjwg_Maps&entryPoint=jjwg_Maps&cron=1 to the task of the scheduler and perform it at an appropriate time.

For more information about setting up a job, see the Scheduler.
If it is necessary to geocode addresses with third-party utilities, you can export addresses from the corresponding modules. At the end of geocoding, import the updated addresses through the module Address cache.
If you need to clear the cache of individual modules, use the Reset link in the right part of the table. If you need to clear the entire cache, use the appropriate link at the bottom of the page.
Geocoding results
This option displays previous results of the option Geocoding addresses.
Geocoding Testing
The module is designed to quickly obtain the geographical coordinates of the entered address.
Address Cache
The module is intended for viewing, changing and importing data into the cache of geocoded addresses.
SSO
Azure SAML Single Sign On
The following documentation is for KiyoCRM Version 7.x; to see documentation on the same topic for Version 8+
Azure SAML Single Sign On
KiyoCRM can utilize a third-party identity provider such as Microsoft Azure Active Directory and the SAML protocol to achieve single sign-on authentication. You can then use Azure AD to control who has access to KiyoCRM and enable automatic sign in.
Considerations
-
We recommend using the latest release of KiyoCRM 7.x to benefit from the latest improvements and fixes.
-
The user must exist in both Azure AD and KiyoCRM for login to be successful.
-
The usernames in KiyoCRM 7.x must match the email address in Azure. If you have used abbreviated or shortened usernames these should be changed to email addresses in advance.
1. Setup APP in Azure
The first step is to create a new Enterprise Application in Azure. This app defines how Azure, as the Identify provider (IdP) will interact with your KiyoCRM instance. Doing so will also provide you with the required values and certificate to configure KiyoCRM. SAML apps in Azure are unique to each instance, as the CRM URL is verified as part of the sign in process. If SAML is needed for multiple staging, test or production environments a new app will be needed for each.
1.1. Create the new application
Login to Microsoft Azure and navigate to 'Azure Active Directory' section using the icon on the home page
From the left-hand Menu select 'Enterprise applications'
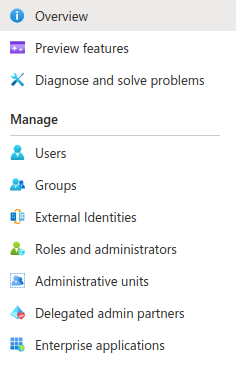
From the top menu, select 'New Application'

From the top menu, select 'Create your own application'
A new side window will open; you can use this to create your application.
-
Enter a descriptive name such as KiyoCRM SAML Authentication'
-
Choose 'Integrate any other application you don’t find in the gallery (non-gallery)'
-
Click Create and you will be taken to the 'Application Overview' after a short delay

1.2. Configure the new application
From the left-hand Menu select 'Single sign-on' from the Manage category
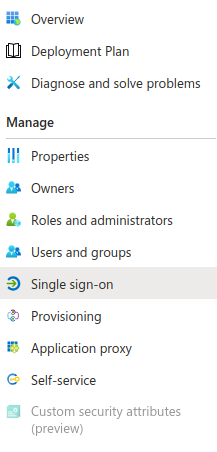
Select SAML from the available options

Click on the pen icon to Edit the Basic SAML Configuration
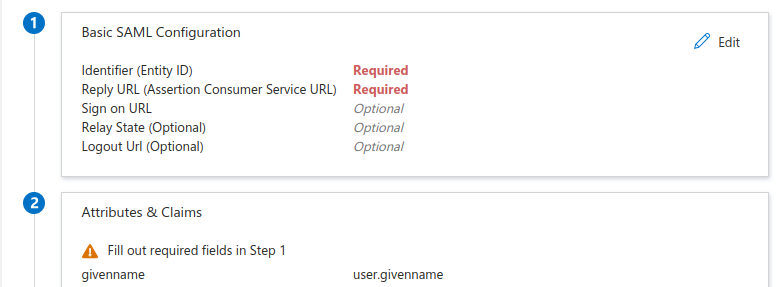
KiyoCRM uses the same value for Entity ID, ACS URL and Sign On URL.
The value should be your KiyoCRM URL in the following format:
{CRM URL}/index.php?action=Login&module=Users
For example: https://kiyocrmdemo.com/index.php?action=Login&module=Users
-
In the Identifier (Entity ID) section, enter your KiyoCRM URL as prepared in the previous step
-
In the Reply URL (Assertion Consumer Service URL) section, enter your KiyoCRM URL as prepared in the previous step
-
In the Sign on URL (Optional) section, enter your KiyoCRM URL as prepared in the previous step
-
Verify that the same URL is present in all three of these fields, then click Save
1.3. Store the required settings for later use
Scroll down to the SAML Certificates section and download the Certificate (Base64) and store it for later
Scroll further down and store the Login URL and Logout URL and again, store these for later.
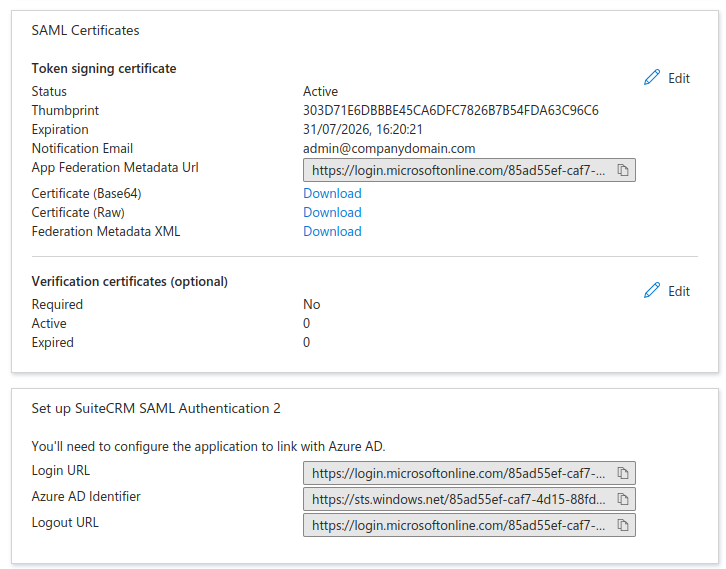
2. Add users to APP in Azure
Before your users can login to KiyoCRM using SSO with Azure, they must be added to the newly created application. Users can be added individually or in groups, depending upon how your Azure Active Directory is configured. Only users which have been added to the KiyoCRM SAML Authentication' Application will be able to login.
From within your newly created Enterprise Application:
-
From the left-hand menu, select 'Users and Groups'
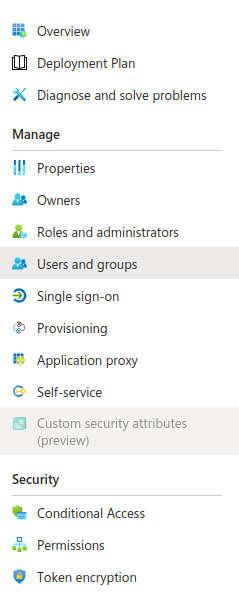
-
From the top menu, select 'add user/group'
You can now assign either users or groups to your KiyoCRM SAML Authentication' Application.
3. Setup SAML in KiyoCRM
Before you can finish setting up your users in KiyoCRM you must first enable SAML. Once this step is complete your users will no longer be able to login in the normal way and SSO must be used.
3.1. Enable SAML
Sign in to KiyoCRM as an administrator
Go to Admin → Password Management
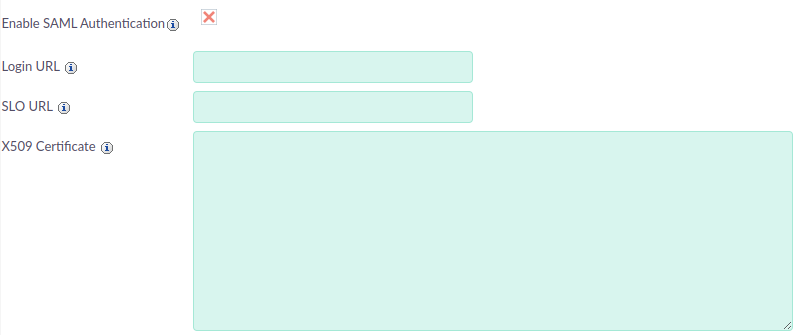
Select Enable SAML Authentication
In the SAML Authentication section, add the following information
-
Login URL: Paste the value of the Login URL retrieved from Azure
-
SLO URL: Paste the value of the Logout URL retrieved from Azure
-
X.509 Certificate: Paste the contents of the Base64 Certificate retrieved from Azure
Save your changes
3.2. Enable SAML for your users
Once KiyoCRM has been configured to use SAML, you can configure your individual users to use SAML to login. You must complete this step for each user who will login using SSO.
-
Create or edit an existing CRM User, setting their username to match the email address in Azure.
-
Enable SAML Login for that user, by navigating to the Advanced tab, and checking the SAML2Authenticate
-
You may wish to setup and assign any Roles, Security Groups required for the user at this stage before they first login
Sales Module Settings
AOS Settings
The Advanced Open Sales suite of modules allow you to manage the post-Opportunity Sales processes such as Quoting, Invoicing and recurring Contracting.

You can customize the following settings within the AOS Settings:
-
Renewal Reminder Period This defines how many days before the Contract End Date that a reminder call should be created.
-
Initial Invoice Number Allows users to set the initial invoice number. For example 20001.
-
Initial Quote Number Allows users to set the initial quote number. For example 456.
-
Enable Line Items Groups If selected then users will be able to bundle line items into groups. If this is not selected then you will not be able to use the AOS Group functionality.
The Enable Line Item Groups setting should be selected before using AOS. It is difficult to migrate from/to groups once Quotes/Invoices have been created.
-
Add Tax to Line Total If this is selected then the Tax will be added into the Line Total on Line Items. If this is not the selected the Line Total will not include Tax.
Once configured, click Save to apply your AOS Settings.
AOD Settings
Enable or disable KiyoCRM's full text global search here.
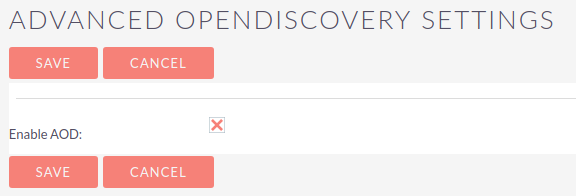
The full text global search is powered by Zend Lucene search framework. The search works very similar to the standard global search but provides the enhanced functionality of searching text in documents and other files, compared to the record-level search provided by the standard global search.
AOP Settings
Here you can enable or disable the Advanced Open Portal functionality, configure the Joomla URL, set the case distribution method, the 'from' name and email address and configure the email templates.


Business Hours
Specify business working hours here.
These settings will determine when workflows set to run 'Only In The Scheduler' will run and will be used when "Consider Working days" is set on Project records.

Google Credentials and Syncing
This enhancement is in Beta please help by providing us your feedback! It is only available in KiyoCRM versions 7.11 and newer.
Overview
KiyoCRM has the ability to synchronize a user’s meetings with their Google Calendar. This is a bidirectional sync, and changes on either end of the synchronization cause updates on the other.
There is no middle man in this process. Your data does not pass through any 3rd parties. It’s just your KiyoCRM instance, and Google’s servers.
Requirements
Valid API Credentials
In order to synchronize a user’s KiyoCRM meetings with their Google Calendar, the system must have valid credentials saved.
These credentials are created on the Google Developer’s Console, downloaded as a JSON file, and imported into KiyoCRM. There are instructions on how to do this further down this page.
Internet Access from the KiyoCRM Server
The KiyoCRM server must also have access to the internet. However, the KiyoCRM server does not need to be publicly accessible. The user must be able to reach both Google and KiyoCRM at the same time to authorize calendar access. Once that is done, the synchronization process runs on a schedule without any user interaction. The user does not need to be logged in to KiyoCRM for the synchronization to function.
At Least One Google Account
You’ll need a Google Account to create the API credentials, and an account to synchronize with. They can be the same account if you only have one user. The API credentials only need to be generated once, from a single account. These credentials can be used to synchronize all the users once they authorize access to their account. These accounts can be generic @gmail.com accounts, or any level of GSuite accounts (Basic/Business/Enterprise).
Generating & Installing Google Credentials
Generating Credentials
Make sure you’re logged into a Google account before proceeding.
Go to Google Developers Console
|
Click on the drop-down at the top of the screen. |
|
|
Click on the 'New Project' Button. |
|
|
Give the project a descriptive name, like 'SuiteCRM Google Sync', and click 'Create'. |
|
|
At the top of the page, click on the 'Select a project' dropdown… |
|
|
…then click on the project you just created. |
|
|
You’ll now see the project in the dropdown, and a notice that no API’s are enabled. Click on the ‘Library’ link in the notice. |
|
|
In the search window, type in “Calendar”, then click on the ‘Google Calendar API’ result. |
|
|
Click the ‘Enable’ button. |
|
|
Now that we’ve enabled the API, we create the credentials. Click the ‘Create credentials’ button. |
|
|
Set the options in section 1 like this. Click on ‘What credentials do I need?’ to continue. |
|
|
For Section 2, give it a descriptive name. Leave ‘JavaScript origins’ blank. Note that this does not need to be a public URL. It only needs to be accessible to the user who is enabling the calendar sync. It is strongly recommend having an https enabled site for production on a publicly accessible site. |
|
|
Again, create a descriptive name. There are more options under ‘More customization options’, but they are unnecessary for this to function. Then click ‘Continue’. |
|
|
Click on the ‘Download’ button. Save the .json file. We use this later in SuiteCRM. Click ‘Done’ when finished. This is all we need for all our users to be able to sync their calendars. |
|
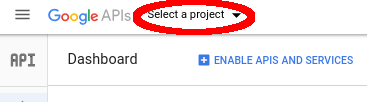
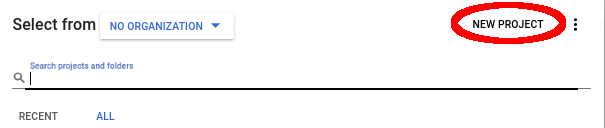



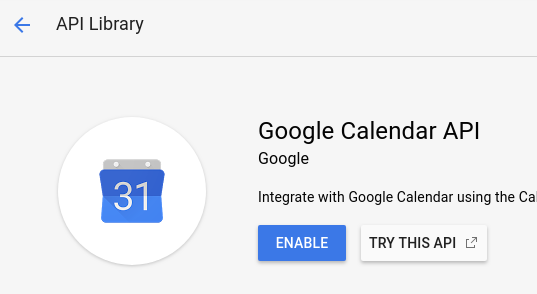

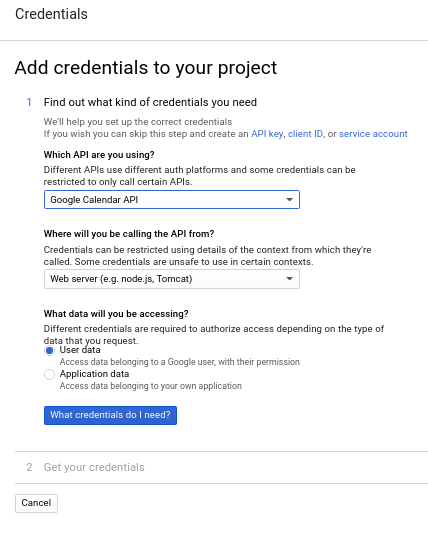
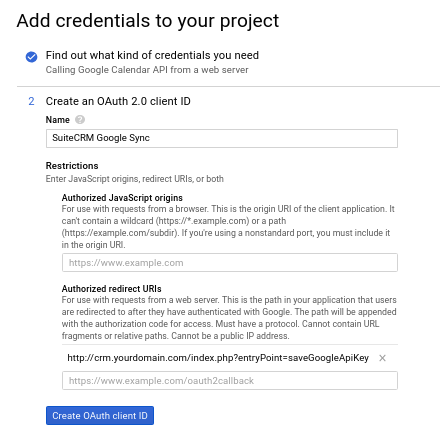
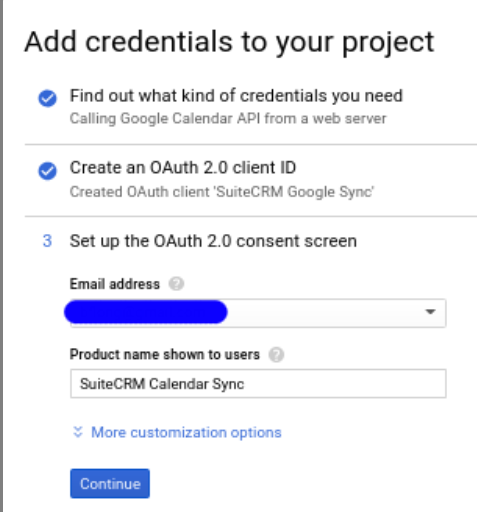
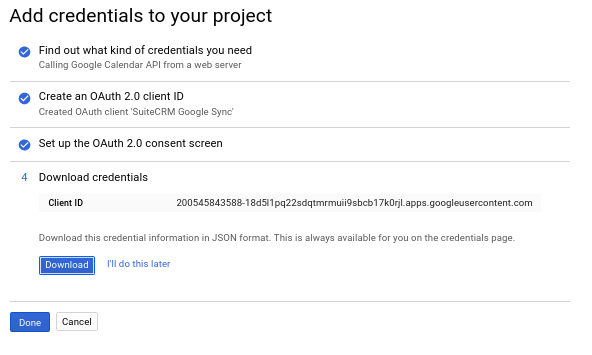
Installing Credentials
Log into SuiteCRM as the administrative user.
Go to ‘Administration’.
Then scroll down to the 'Google Suite' section.
Click on the 'Google Calendar Settings' item.
|
Note how it says 'Unconfigured'. This means there is no JSON file currently installed. |
|
|
This will return you to the 'Administration' menu. Go back into 'Google Calendar Settings'. |
|


If you ever need to install new credentials, simply upload them. They will overwrite the old ones.
Authorizing Calendar Access
This needs to be performed by the User to enable syncing with their Google Calendar
|
Click on your name dropdown in the upper right of the KiyoCRM site, then on ‘Profile’. |
|
|
Go to the ‘Advanced’ tab. |
|
|
You should see the ‘Google Account Synchronization’ Subheading at the bottom. If it’s not shown, then the KiyoCRM server doesn’t have Google Credentials installed. |
|
|
If you are logged into multiple Google accounts, you’ll be asked which Google account you want to sync with. Otherwise, you’ll be taken directly to this dialog: |
|
|
Once you click on ‘Allow’, you’ll be taken back to the user profile page. Click on the ‘Advanced’ tab again, and you should see: |
|


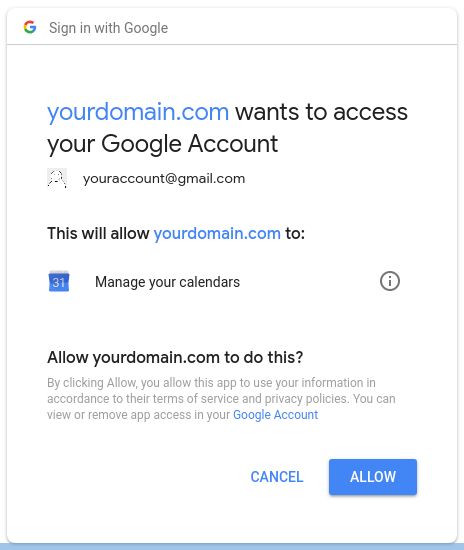

Check the ‘Enable Calendar Sync’ checkbox, and then click the ‘Save’ button.
That’s it! By default, the sync happens every quarter hour. That can be changed by the Administrator in the Scheduler configuration.
Known Issues
If the value of "google_calendar_sync_name" is changed then this will cause ALL Meetings to re-sync. This is due to the fact that if the value changes, then Google detects all current meetings as new, unique Calendar items.
The best way to avoid this from happening is to not edit/change the "google_calendar_sync_name" that is located in your config.php file.
Disabling Google Calendar Sync
If you want to disable the Google Calendar sync completely or re-add its token from scratch, perform these actions:
|
Disable the ‘Google Sync Calendars’ task(s) from Admin/Scheduler. |
|
|
Delete the Google Cloud token line in |
|


In order to reset Google authorization, user can reset their personal settings. It might be excessive if the token is already deleted from the admin config and the scheduler task is not active.